Manage a Portal
Portal Admins or Platform Owner(s)/Staff can manage the portal.
Managing/Updating Portal
Steps for updating/managing a Portal
-
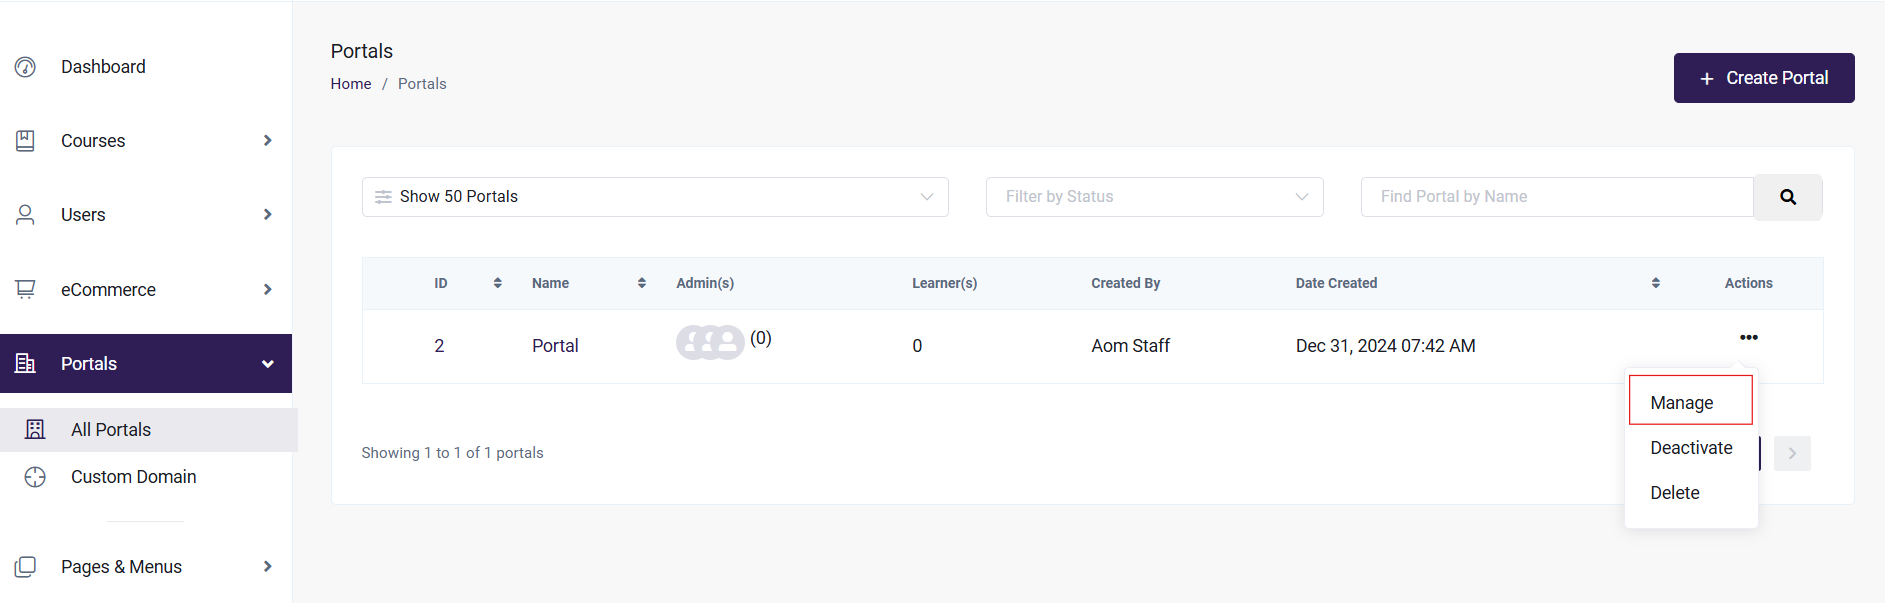
In the Dashboard go to Portals ->All Portals.
-
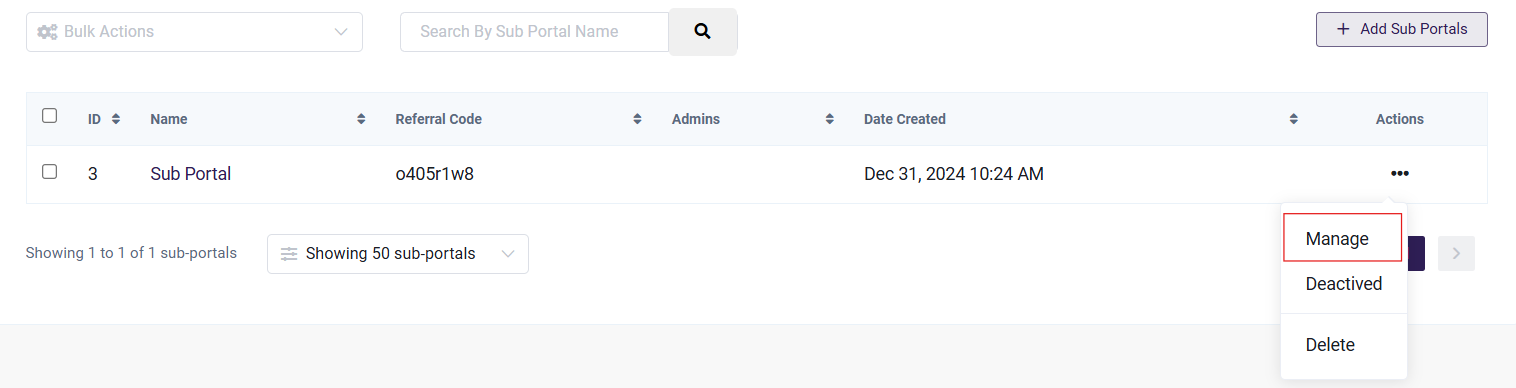
Find the Portal that want to manage, and click on (...) in the Actions Column.
-
Click on Manage
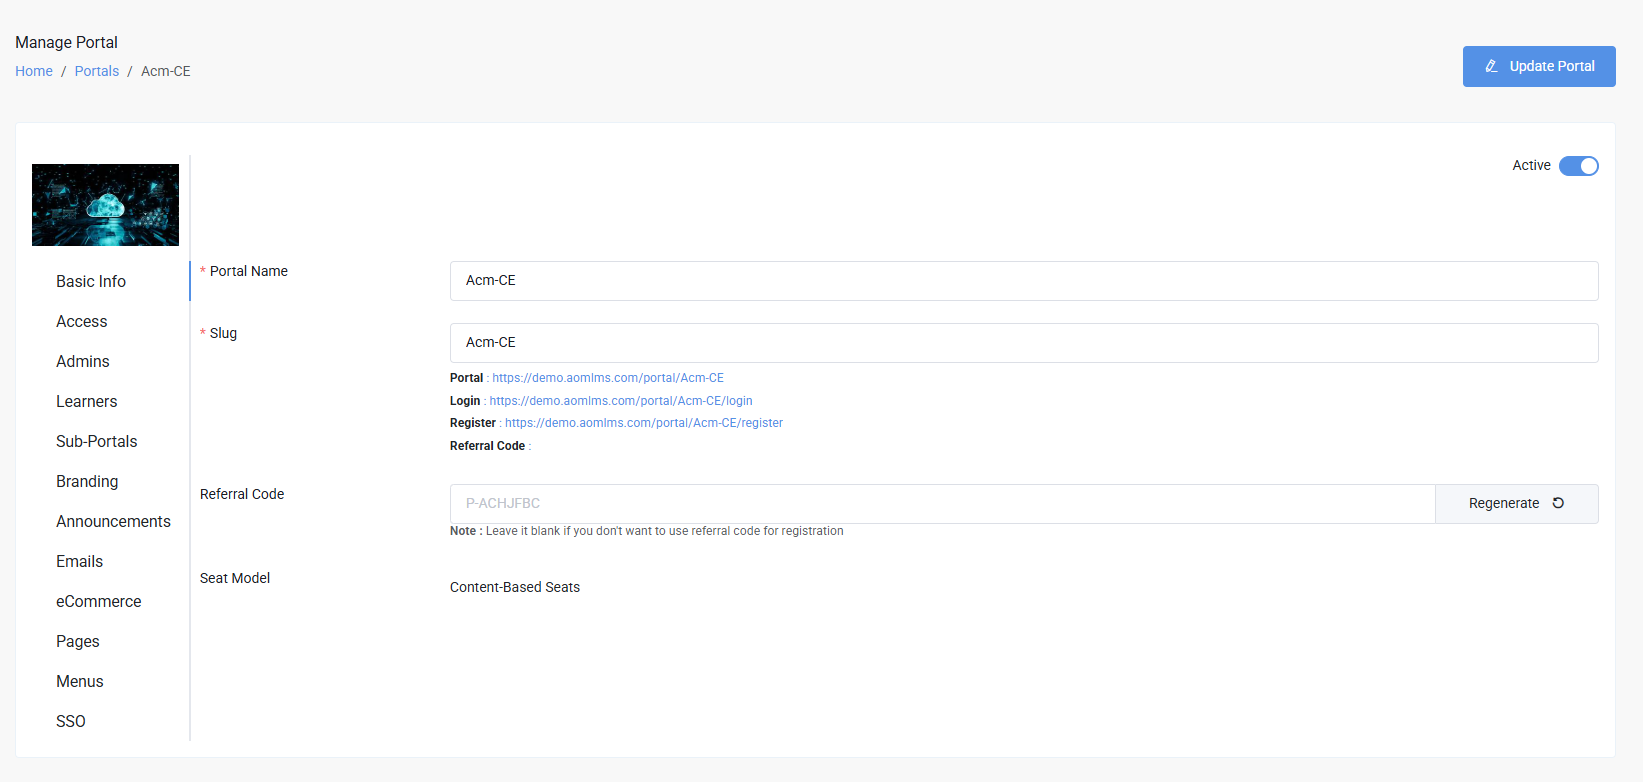
Basic Info
- Here you can edit the Portal Name, Referral Code, and Slug. In the Seat Model, the portal's seat model will be displayed, but it cannot be edited.
- All the portal-specific links can be copied by clicking on them.
Access
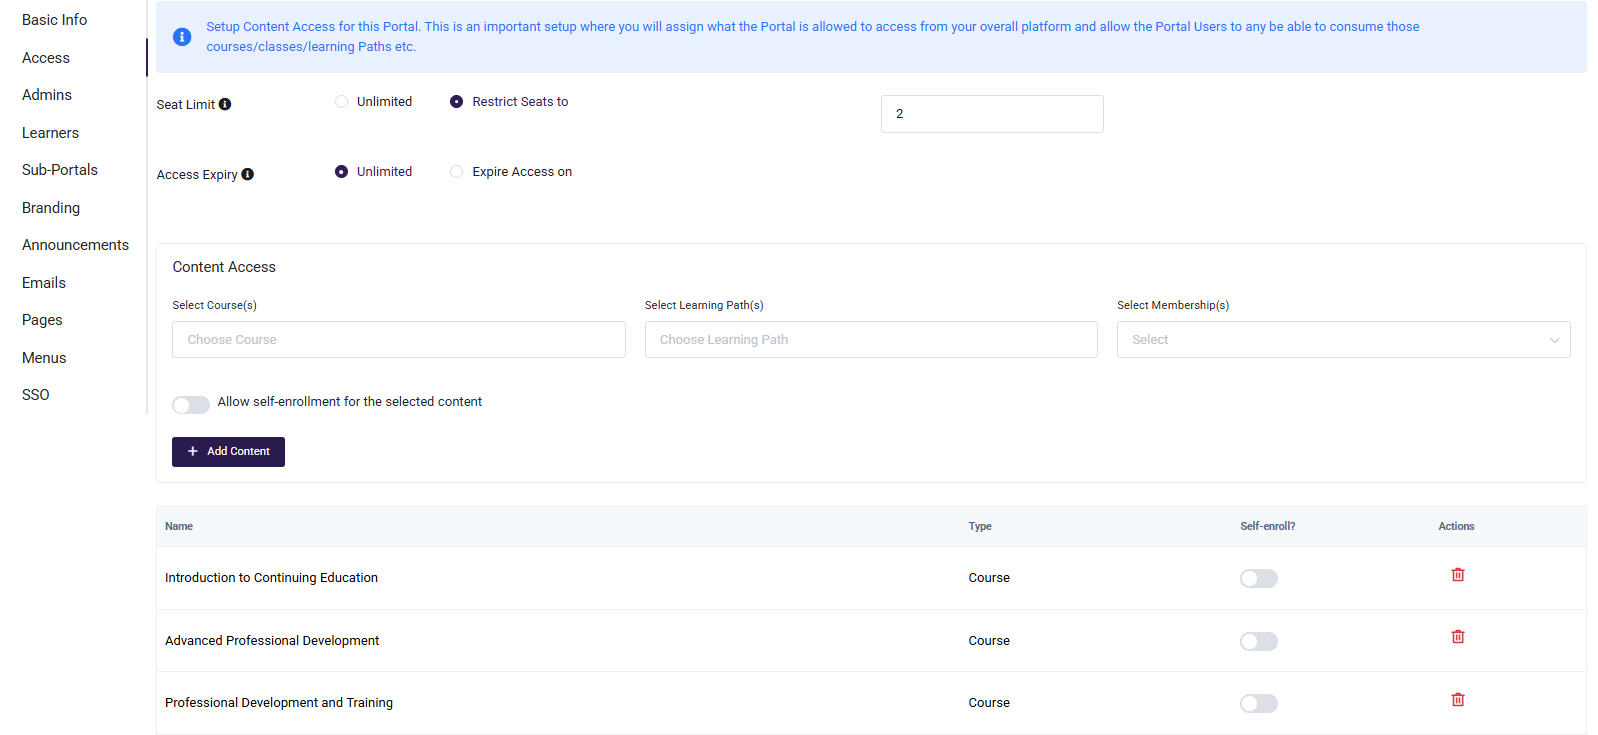
Access tab content will be different according to the selected portal's seat model.
Portal-Based Seats :
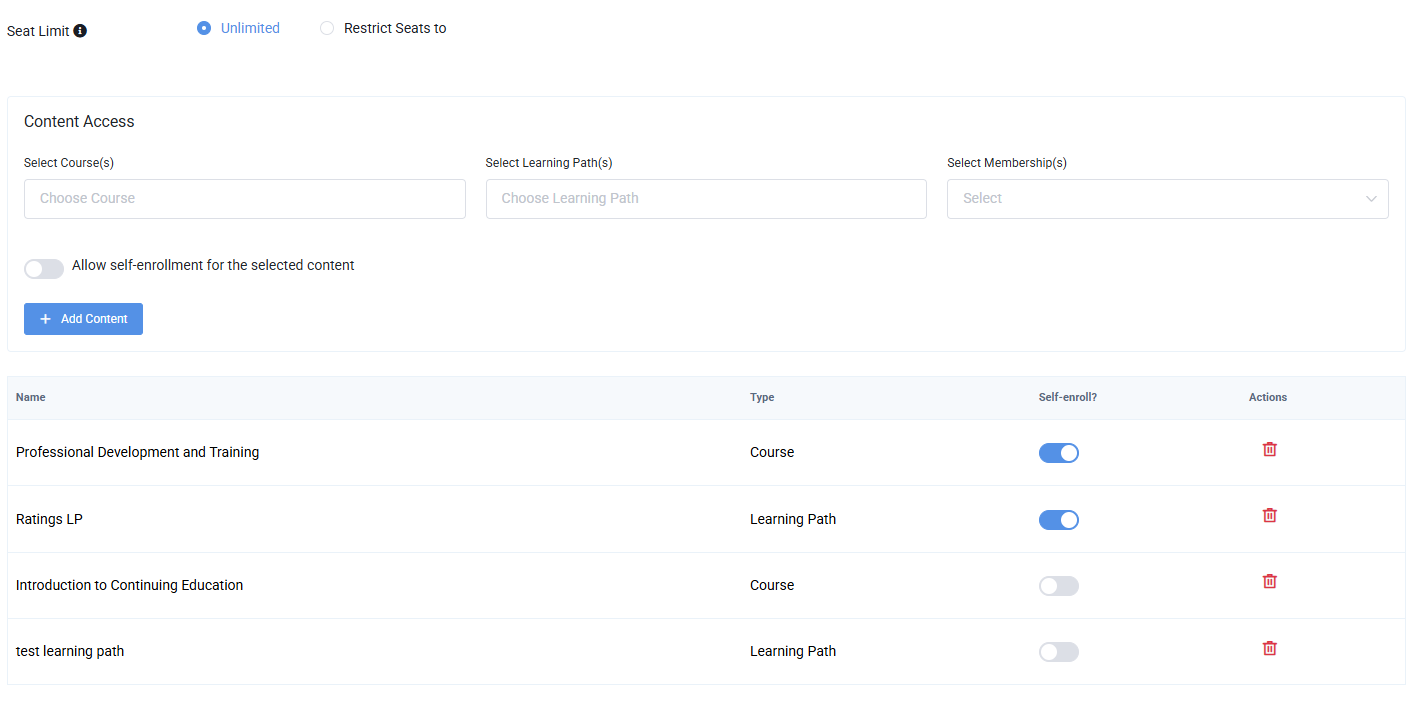
- Seat Limit: This key allows to set whether seats are restricted with a limit or can be allocated to unlimited users in the Portal. Leave it blank for unlimited access. Seat count includes the total of unique Learners.
- Access Expiry: This setting allows to determine whether the Portal will expire on a certain date or remain open-ended. On selecting 'Unlimited' the Portal will be always available. If select 'Expire Access on' , will have to set an expiry date for the Portal. Portal Admins and Learners will lose access to the Portal once the expiry date is reached. Along with the expiry date will have to provide an Expiry Message which will be displayed when a user tries to access the Portal.
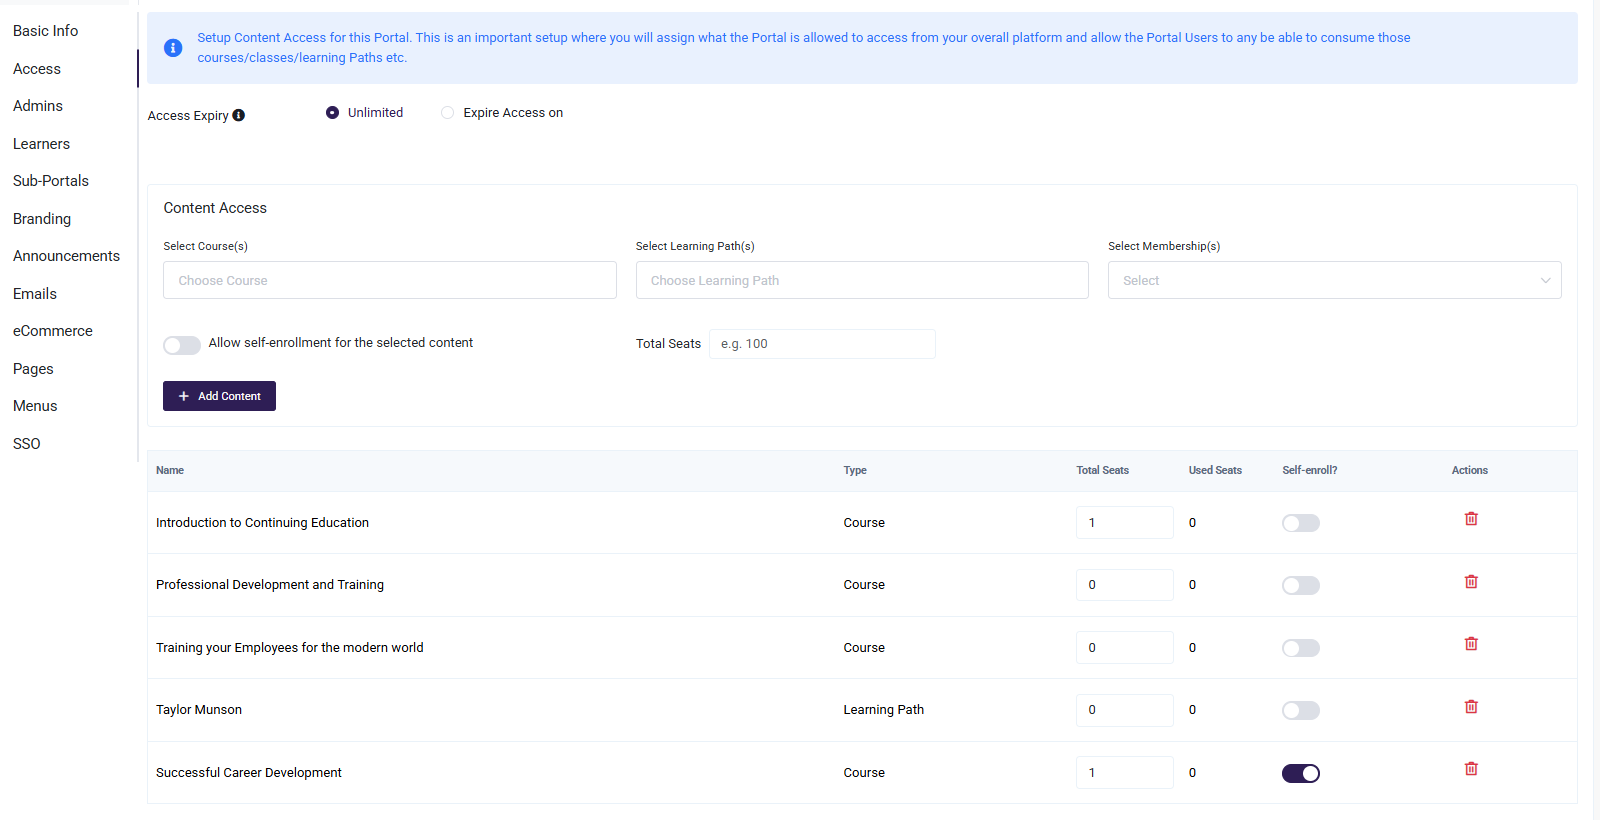
- Content Access : Here courses, Learning Paths, or Memberships can be selected. When the toggle “Allow self-enrollment for the selected content” is enabled, learners gain access to materials such as Courses and Learning Paths independently through self-enrollment. When the toggle is disabled, access to these materials remains restricted and can only be granted by an administrator.
Content-Based Seats:
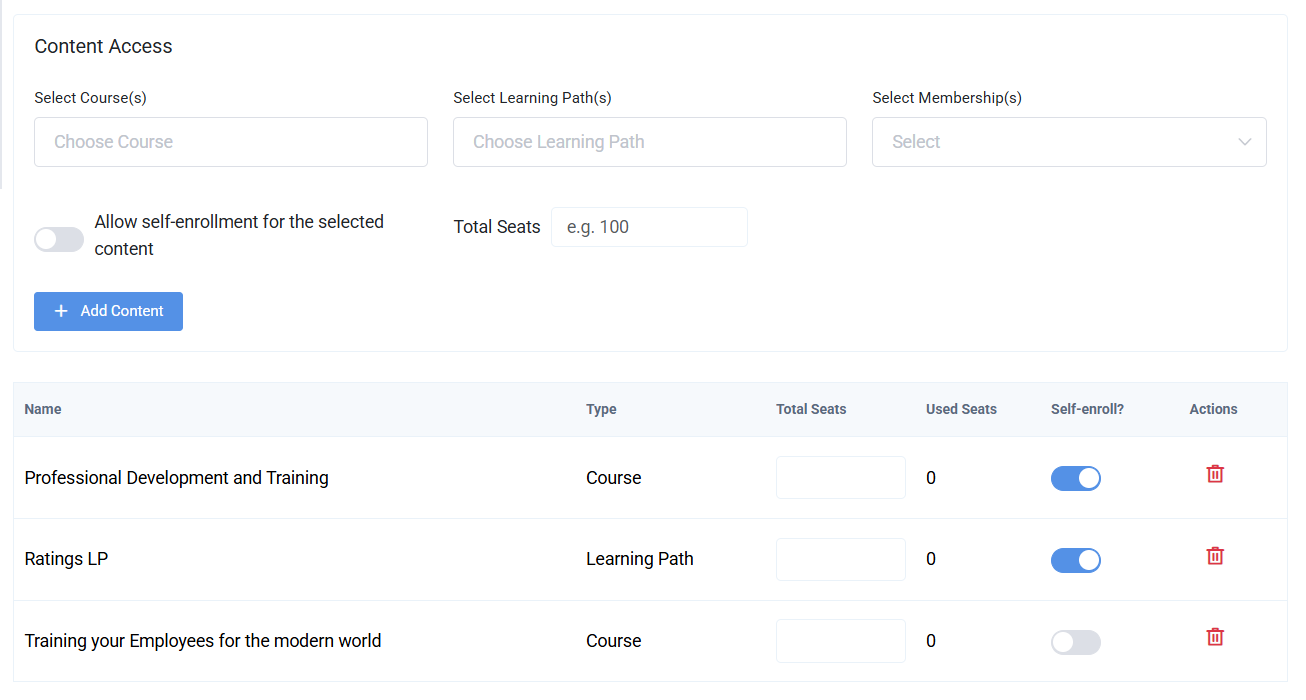
- Allow self-enrollment for the selected content : If enable learner can access to materials such as Courses and Learning Paths, can be made available for self-enrollment, allowing learners to access them independently.
- Total Seats : The total number of seats can be allocated to the selected content while adding them. Additionally, once the content is added, seats can be manually assigned to individual content items from the content list.
Admins
The admins screen allows to view/add/remove/update admins for the given Portal. Guide on adding portal admins.
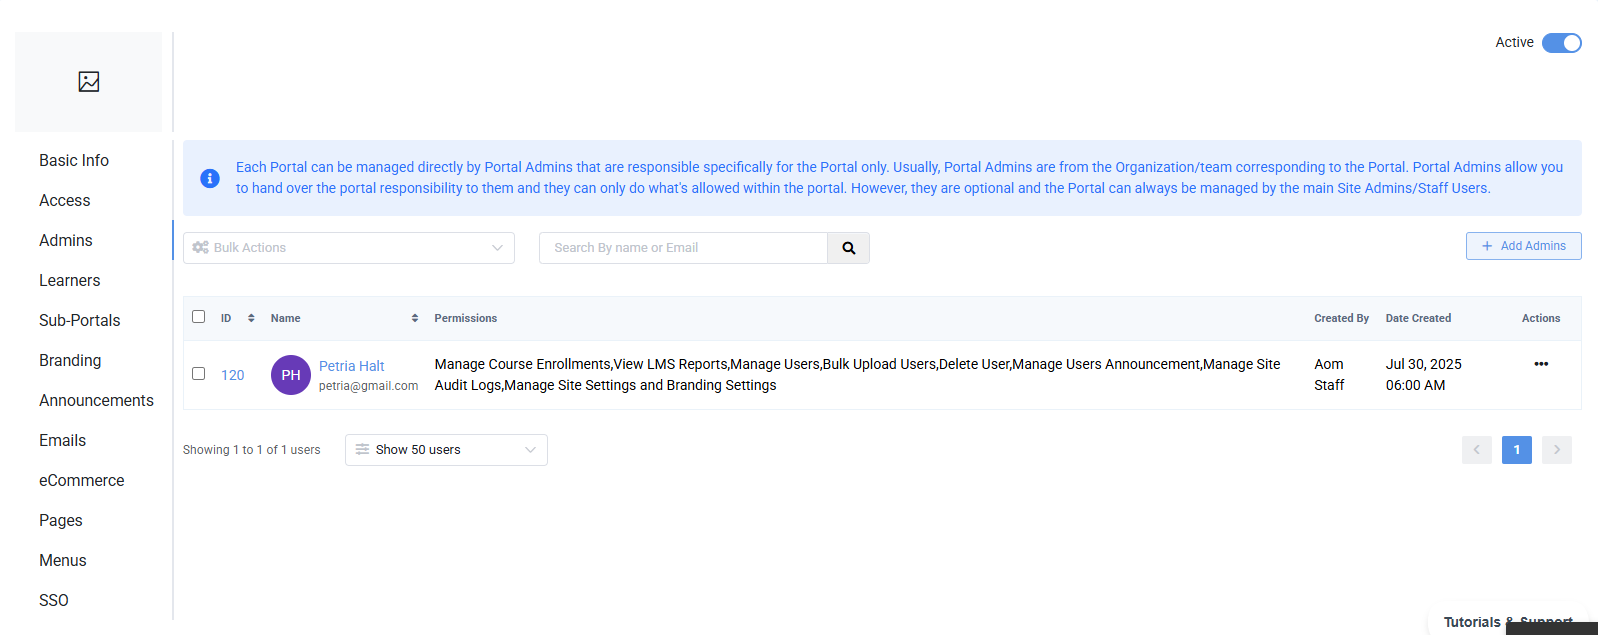
-
Click on 'Add Admins'
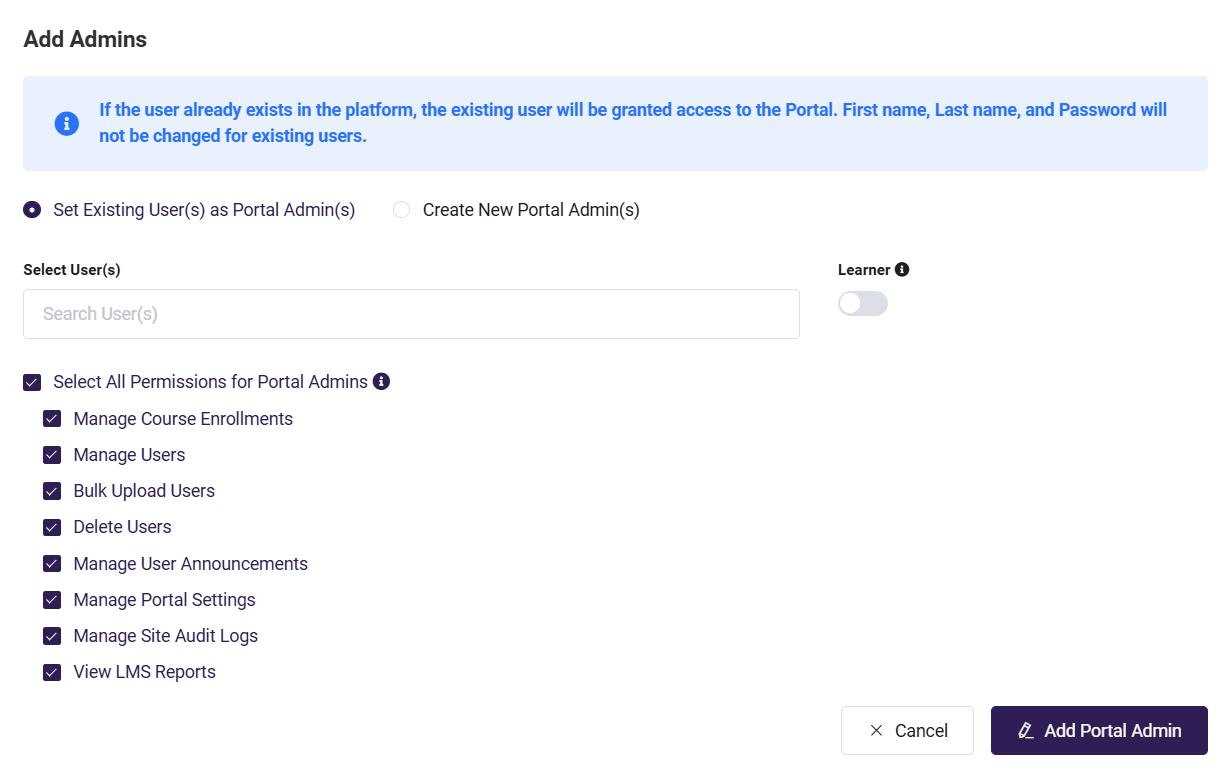
1. Set Existing User(s) as Portal Admin(s): This option allows to designate an existing user as a Portal Admin. If the user is already registered on the platform, any input for first name, last name, and password will be ignored. The user will be added as an admin to the Portal while keeping their existing information intact.
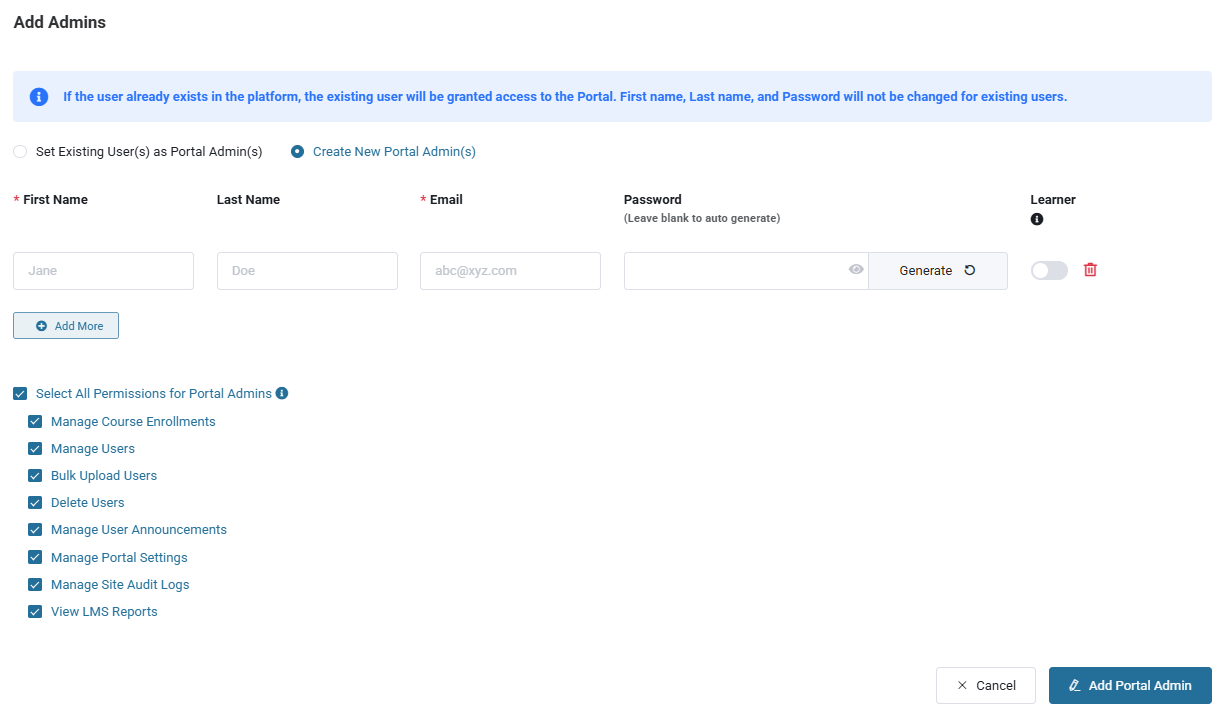
2. Create New Portal Admin(s): This option allows to add new users as Portal Admins. The first name, last name, email, and optionally a password must be provided. If no password is specified, a default process will apply.
- First Name : First name of the user who needs to be added as Admin.
- Last Name : Last name of the user who needs to be added as Admin.
- Email : Email ID of the user who needs to be added as Admin.
- Password : Leave blank as it will get auto generated or add the desired password. Also here have option to generate password.
- Learner? : By toggling this option, Portal Admins will also be allowed to enroll as learners in the portal to take courses, which will utilize a seat count if set.
- Click 'Add More' to add admins. A Portal can accommodate multiple administrators.
To configure all permissions for the Portal Admins, click on 'Select All Permissions for Portal Admins' . To allow only certain permissions to the Portal Admins, have to select the permissions according to the preference.
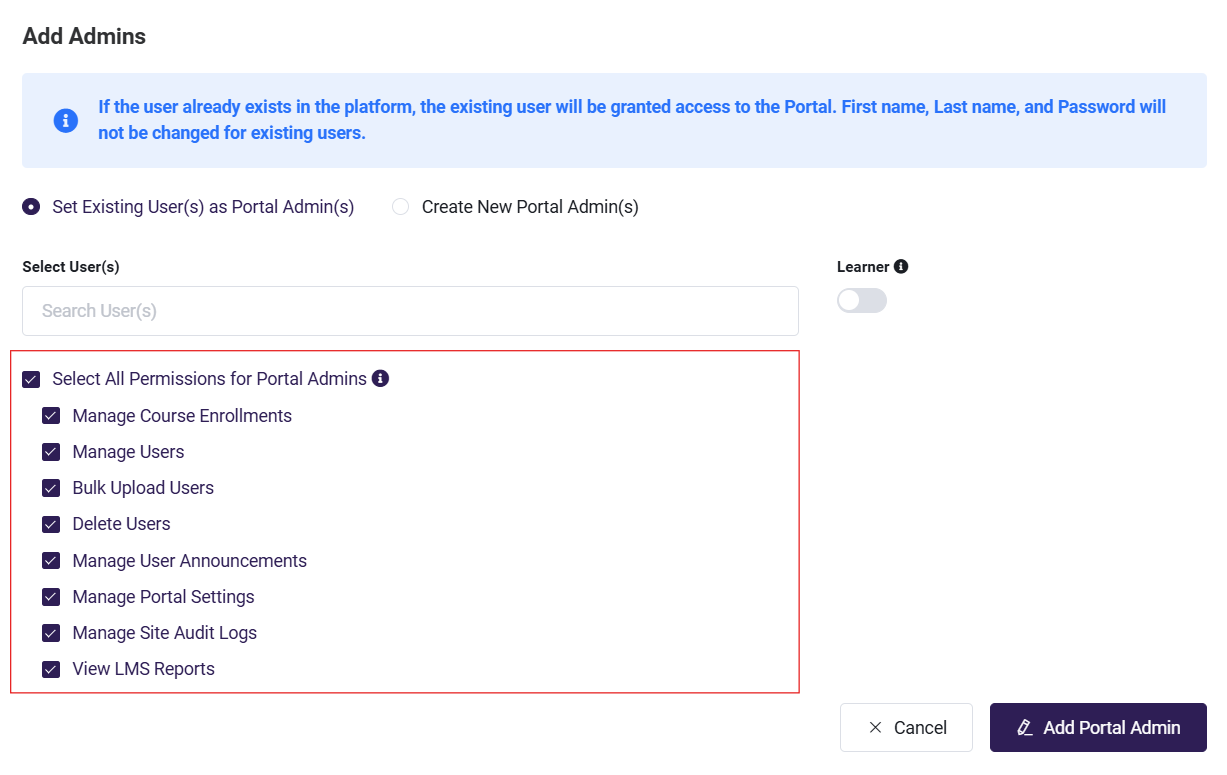
If need to configure different permissions for each admin, you can edit permissions for each admin individually afterwards using the actions menu.
-
Click on Add Portal Admin.
-
Lastly, the following bulk actions are available: Reactivate / Suspend / Remove.
- Suspend: Locks the Portal admin(s) out of the Portal.
- Reactivate: Cancels the lock, allowing the Portal admin(s) to access the Portal.
- Remove: Removes the Portal admin(s) from the Portal.

In Content-Based Seat portal : All portal admins are automatically assigned the learner role, and the 'Add to Learner' option will not be visible for them. A content seat will only be consumed when a learner is enrolled into the content.
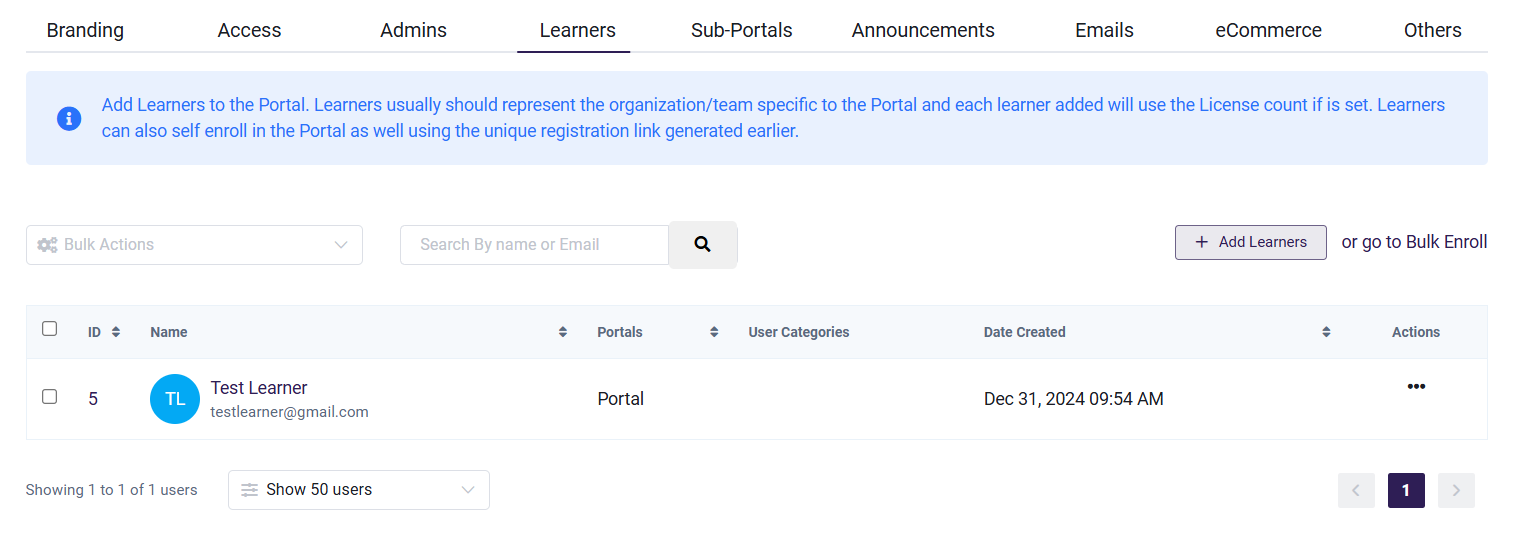
Learners
To create/manage/view learners for a Portal. Guide on adding a Learner.
-
Click on Add Learners.
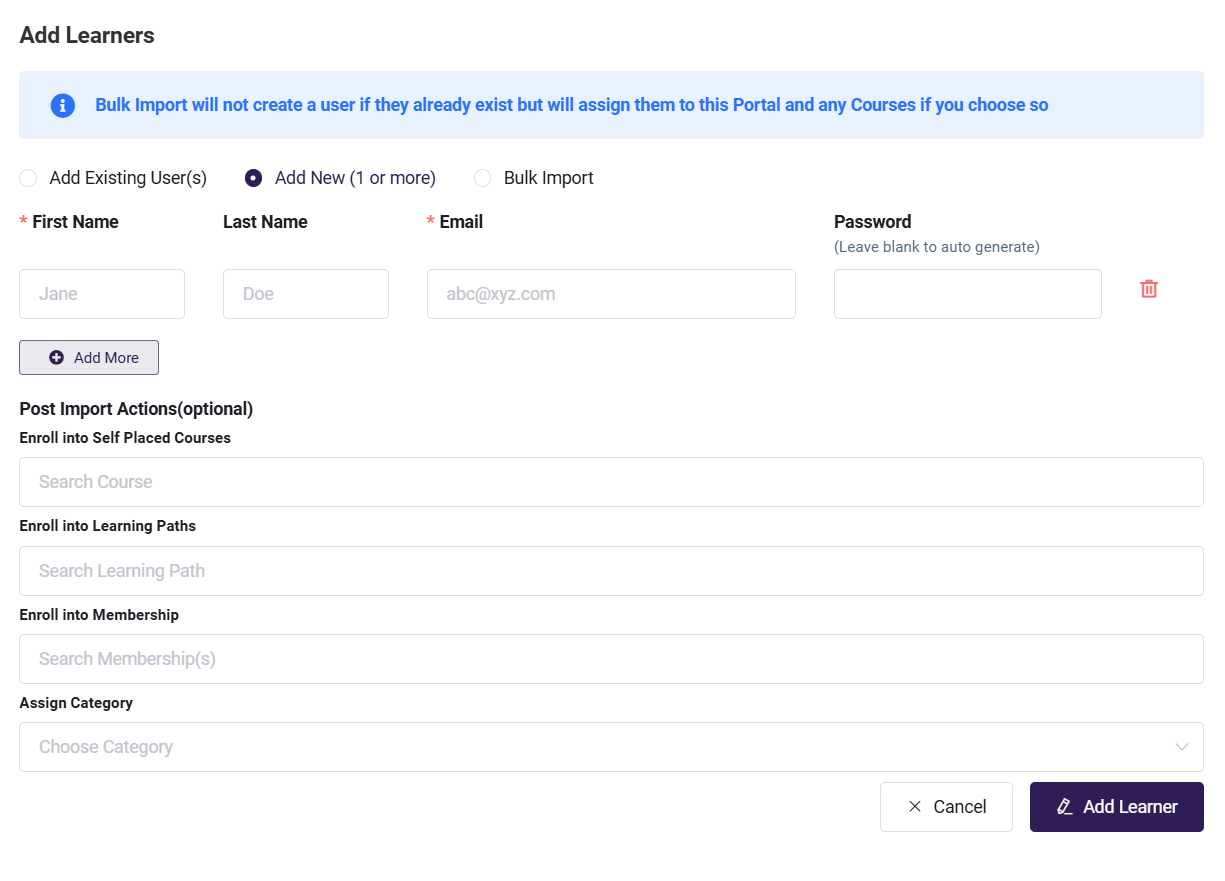
1. Add Existing User(s)
Assign existing users to the Portal. If a user with the same email address is already registered, any input for first name, last name, and password will be ignored. Instead, the user will be added as a learner to the Portal while keeping their existing information intact.

-
Add New (1 or more)
Add new users individually by providing their first name, last name, email, and optionally a password. Leave the password field blank to let the system auto-generate it. Also can click the 'Add More' button to add multiple learners at once.
-
Bulk Import
Bulk import learners using a spreadsheet.
- Click on 'Bulk Import' under the Learner(s) tab.
- Download the 'Sample Bulk Upload File' to reuse.
- Fill in all required details in the downloaded Excel sheet.
- Upload the file by dragging it into the upload area or selecting it from computer.
- For a portal-based seat model, the bulk upload should throw an error if an attempt is made to add more learners than seats available

Sub Portals
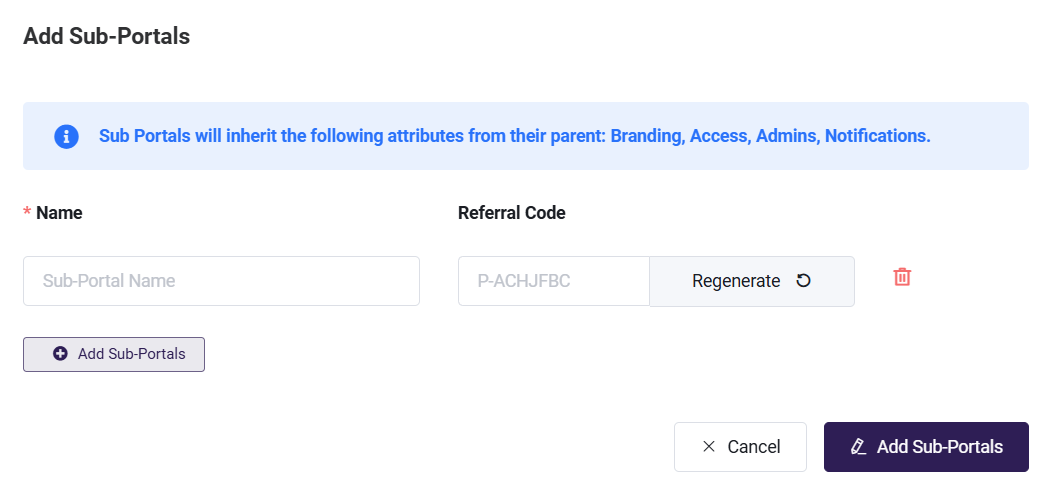
Sub-Portals can be created only after a Portal is Created. Sub-Portals will inherit the attributes from its parent Portal by default: Branding, Access, Admins, and Email.
- Click on 'Add Sub Portals'
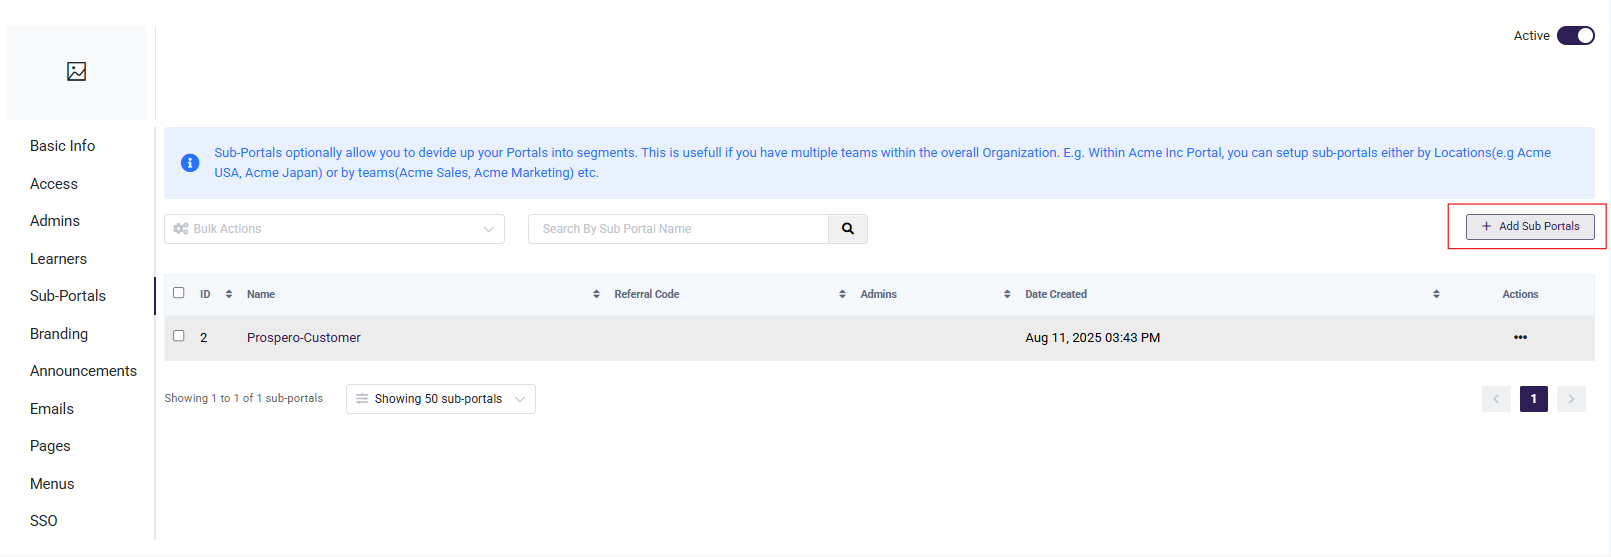
- Name: Add the Sub Portal Name.
- Referral Code: The referral code generates a unique registration link for learners from the customer organization to self-enroll. If a referral code is added, it becomes mandatory for users during registration. If the referral code is left blank, it will not be visible or required when users register.
- Click on Add Sub-Portals.
After adding Sub Portal, click on Manage if any changes are to be made in Access/Admin/Email.
If portal is Portal-Based Seat :
- Restrict No of Seats: If Portal has a seat limit, then Sub Portal also must have a seat limit.
If portal is Content-Based Seat :
- Total Seat : Total Seats allocated per content item. Needs to give the total seat for that content
- Used Seat : No of seat used by the learner will show here.
Branding
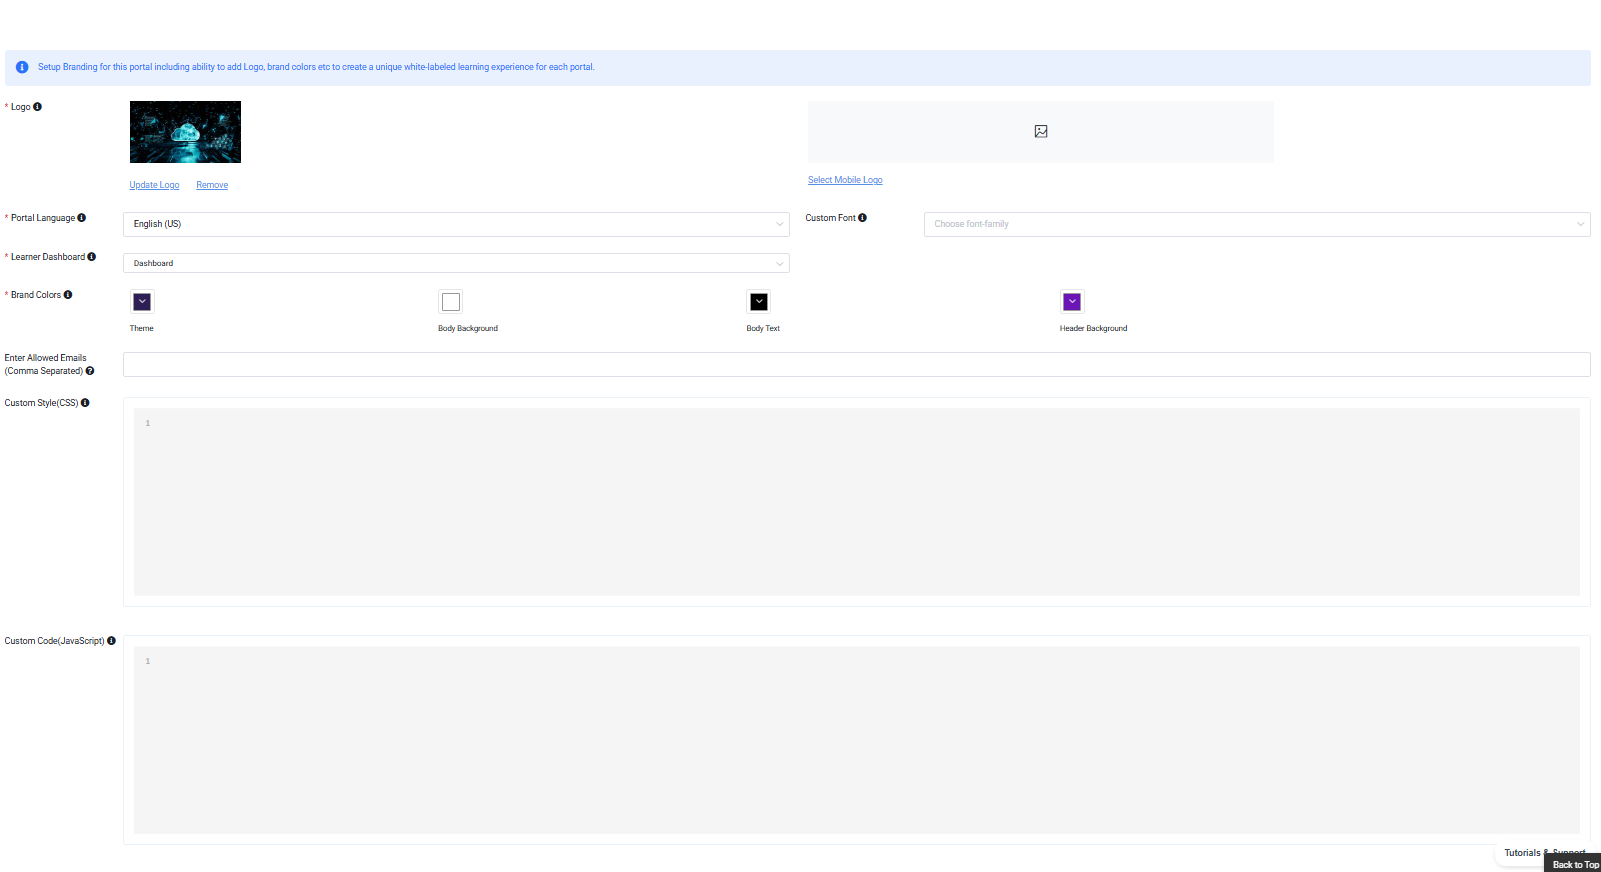
A Portal Admin and Admin of the platform can setup the Branding for this Portal. Logo, brand colors, and other styling can be customized to create a unique white-labeled learning experience for each Portal.
-
Logo: The logo is displayed to Portal users and included in related Portal emails. Upload a mobile-optimized logo specifically designed for smaller devices to ensure a consistent and responsive user experience.
-
Portal Language: Set the default language for the Portal.
-
Custom Font: Set the custom font for the Portal.
-
Learner Dashboard: Set the default dashboard page that learners will see after logging in. Choose from options like Portal Courses, Portal Learning Paths, Portal Announcements, or Portal Membership to customize their experience and ensure they see the most relevant information first.
-
Brand Colors: Customize Portal color theme by setting Theme, Body Background, Body text. Header Background
-
Enter Allowed Emails (Comma Separated): Specify the email addresses or domains that are permitted for registration. Separate multiple email addresses with commas. Use an asterisk (*) as a wildcard to match parts of an email address. For example:
*@gmail.comallows all email addresses ending with@gmail.com.john.doe@example.comallows only the specific emailjohn.doe@example.com.
-
Custom Style (CSS): To add custom styling using CSS to further change look and feel of the Portal.
-
Custom Code (JavaScript): The feature is typically for adding 3rd party code like Google analytics etc.,
Click here to learn more on how to add branding and logo in a Portal.
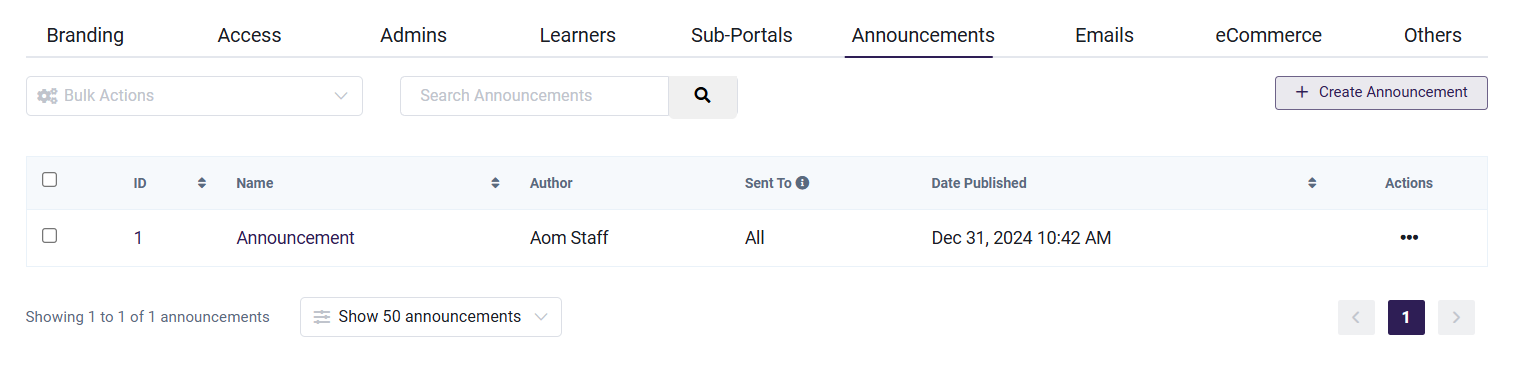
Announcements
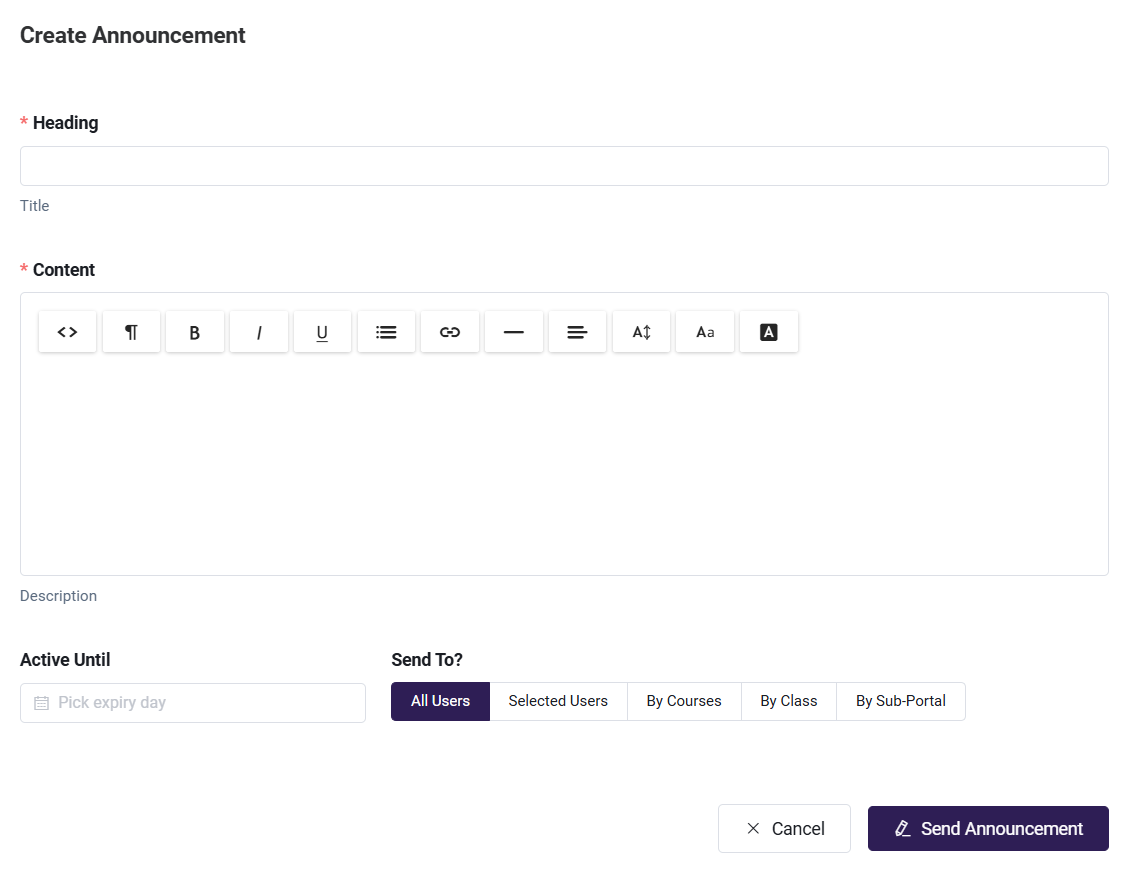
This section is to create Announcements and send them to Portals or Sub Portals users. To create an announcement fill in the following:
- Heading: Subject Of Announcement
- Content: Content of Announcement
- Active Until Set Expiry of Announcement.
- Send To?: Select the target audience from here.
- Then, Click on Send Announcement.
Emails
All LMS-related emails can be configured at a Portal level. By default, Portals will inherit their parent configurations; Portals will inherit platform settings and Sub-Portals will inherit Portal settings. Under email have General. Accounts, LMS, Gamification, and Others menu to make changes accordingly
If no changes are made to the email templates, then they will follow the platform's standard email templates & settings.
General
General settings are to customize the look and feel of all emails sent through the platform.
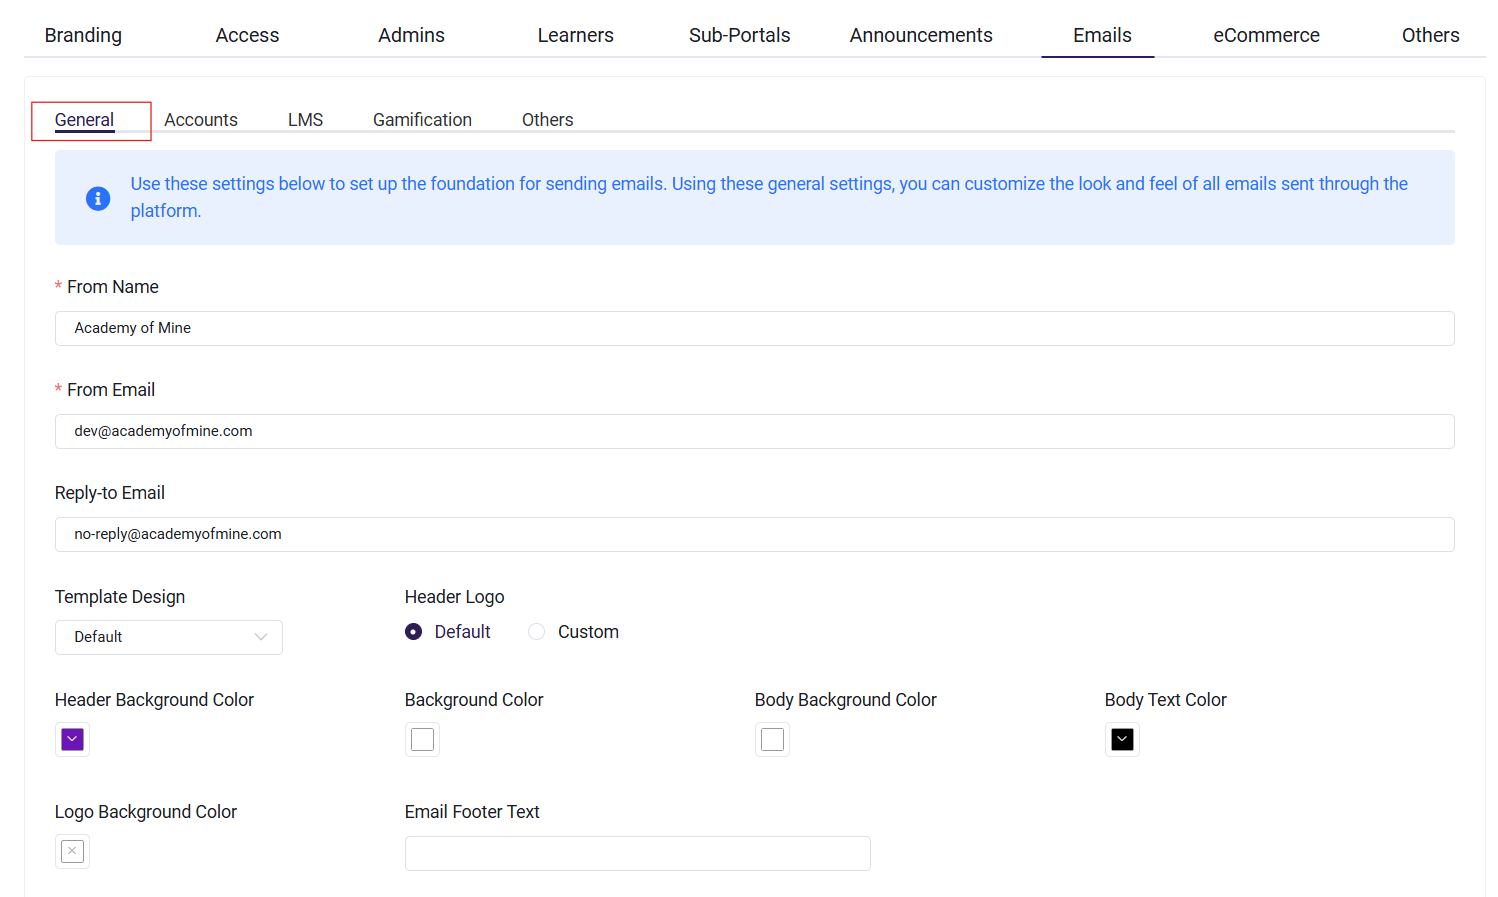
- From Name
- From Email
- Reply-to Email
- Template Design
- Header Logo
- Header Background Color
- Background Color
- Body Background Color
- Body Text Color
- Logo Background Color
- Email Footer Text
Guide on configuring automated email settings.
Accounts
A New Account email is sent to the user after an account is created for or by the user and generally should contain information such as Site URL, Username, and Password.
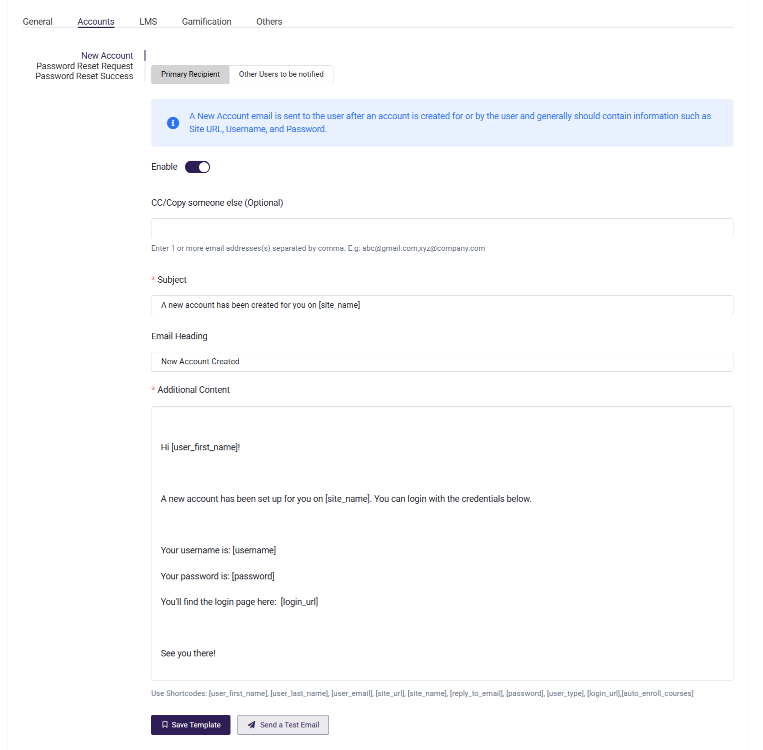
- Click on Enable to enable Primary Recipient and fill in email details for Course Enrollment.
- CC/copy someone else (optional).
- Subject of the email.
- Email Heading: a heading within the email prior to the content.
- Additional Content: body of the email.
- Save Template to save email template changes.
- Send a Test Email to test the email.
- Click on Enable to enable Other Users to be notified.
- Fill in all details like Recipient ID. Subject, Email heading, and Additional Content as required and update the template.
- Follow above steps for the Password Reset Request and Password Reset Success email templates too.
LMS
Email setting to notify learners when they are Enrolled/Course completion/Quiz submission/enrollment etc., of a course.**
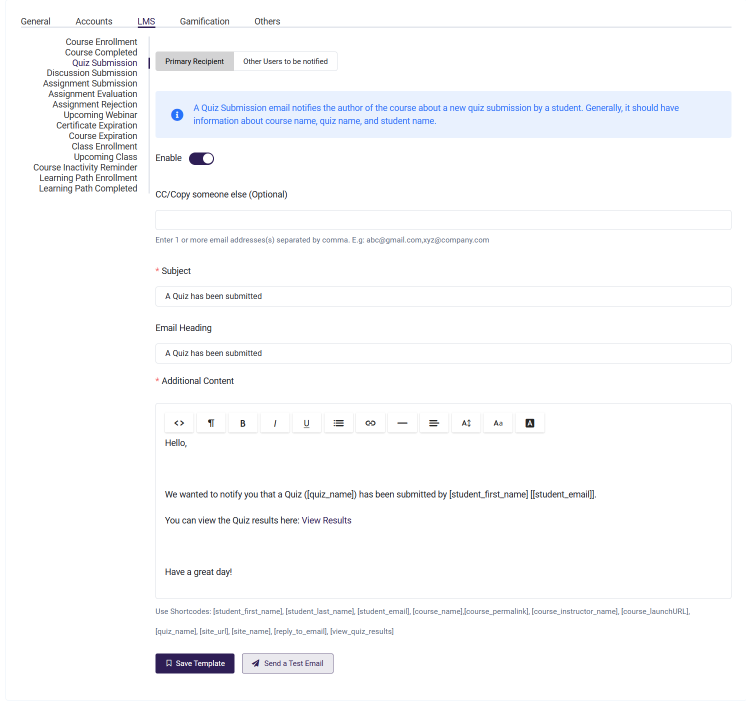
Here we have 15 activities for which emails can be configured. Activities like Course Enrollment, Course Completed, Quiz Submission, Discussion Submission, Assignment Submission, Assignment Evaluation, Assignment Rejection, Upcoming Webinar, Certificate Expiration, Course Expiration, Class Enrollment, Upcoming Class, Course Inactivity Reminder, Learning Path Enrollment, Learning Path Completed
- Click on Enable to enable Primary Recipient and fill in email details for Course Enrollment.
- CC/copy someone else (optional).
- Subject of the email.
- Email Heading: a heading within the email prior to the content.
- Additional Content: body of the email.
- Save Template to save email template changes.
- Send a Test Email to test the email.
- Click on Enable to enable Other Users to be notified.
- Fill in all details like Recipient ID. Subject, Email heading, and Additional Content as required and update the template.
- Follow above steps for updating the other email templates too.
Gamification
Email notifications can be set for users when they get a New badge, Leaderboard Promotion/Demotion tier in the platform.
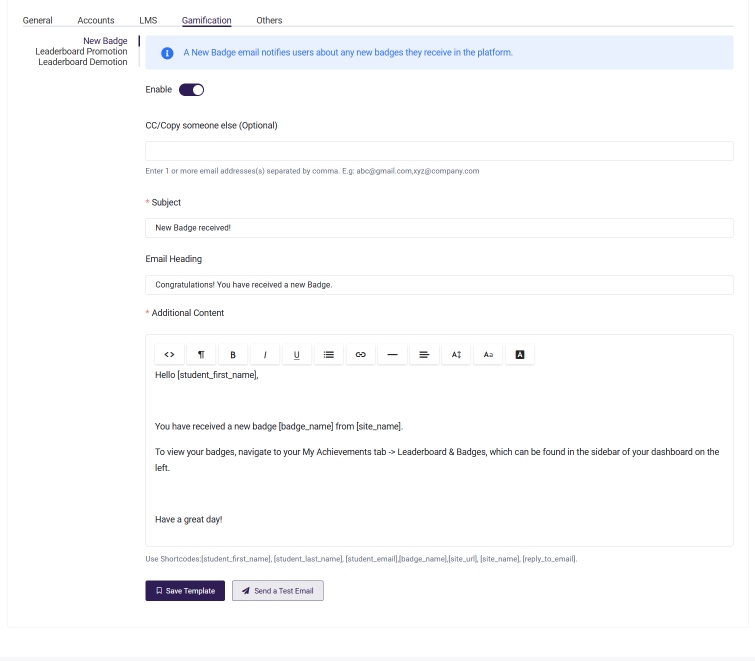
- Click on Enable to enable Primary Recipient and fill in email details for Course Enrollment.
- CC/copy someone else (optional).
- Subject of the email.
- Email Heading: a heading within the email prior to the content.
- Additional Content: body of the email.
- Save Template to save email template changes.
- Send a Test Email to test the email.
- Click on Enable to enable Other Users to be notified.
- Fill in all details like Recipient ID. Subject, Email heading, and Additional Content as required and update the template.
- Follow above steps for updating the other email templates too.
Others
Email notifications for Announcements can be set here.
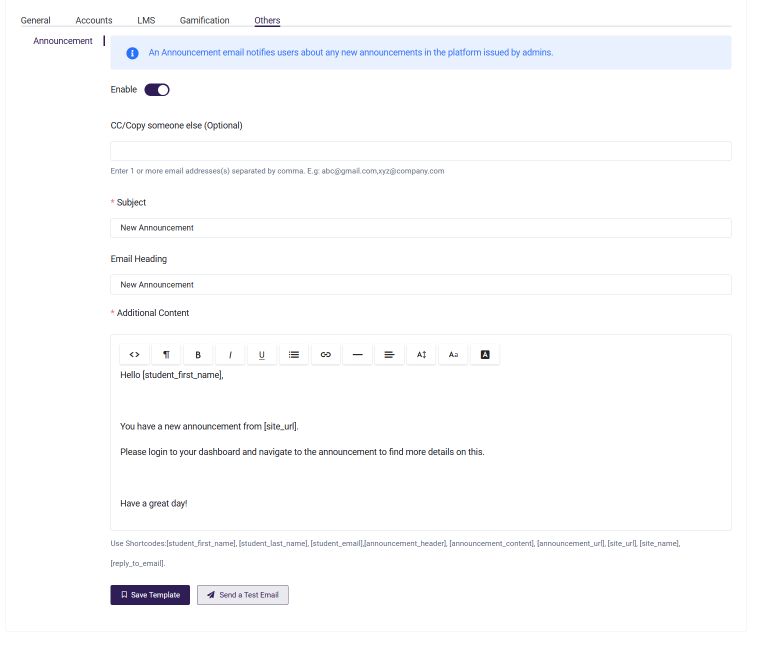
- Click on Enable to enable Primary Recipient and fill in email details for Course Enrollment.
- CC/copy someone else (optional).
- Subject of the email.
- Email Heading: a heading within the email prior to the content.
- Additional Content: body of the email.
- Save Template to save email template changes.
- Send a Test Email to test the email.
- Fill in all details like Recipient ID. Subject, Email heading, and Additional Content as required and update the template.
eCommerce
In the case of Portal-Based Seats Portal, the eCommerce tab in the Manage Portal interface will not be visible. For Content-Based Seats, the eCommerce tab will be available. Additionally, for specific content, admins can purchase seats. Any additional purchases for the same content will be added to the existing seat count
The eCommerce section has details of any products purchased.
- Orders: Order details of the particular Portal will be listed.
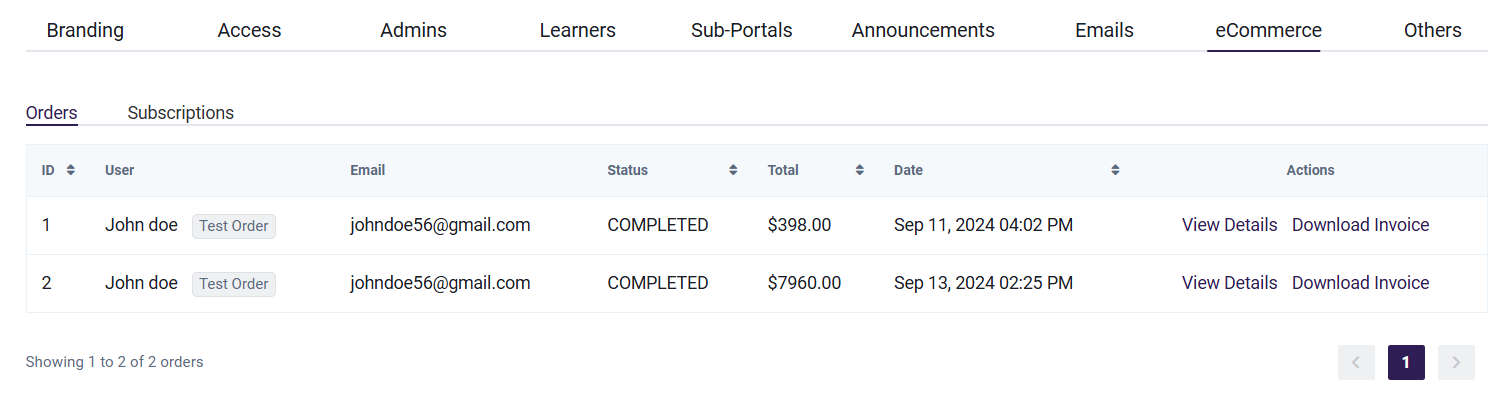
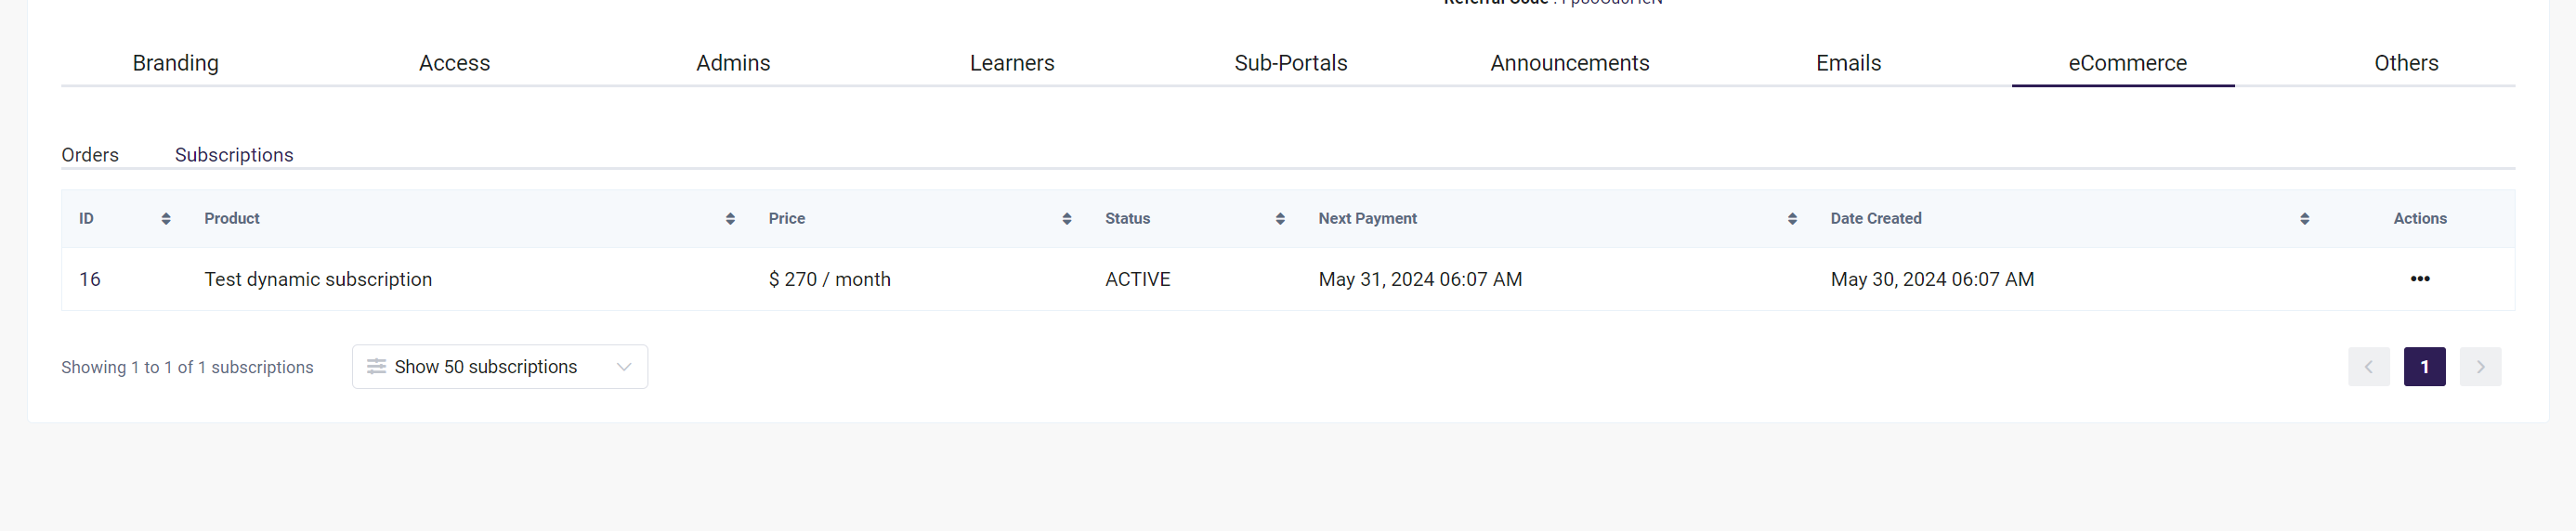
- Subscriptions: If the purchased Product is of type 'Subscription', then the details of it will be listed.
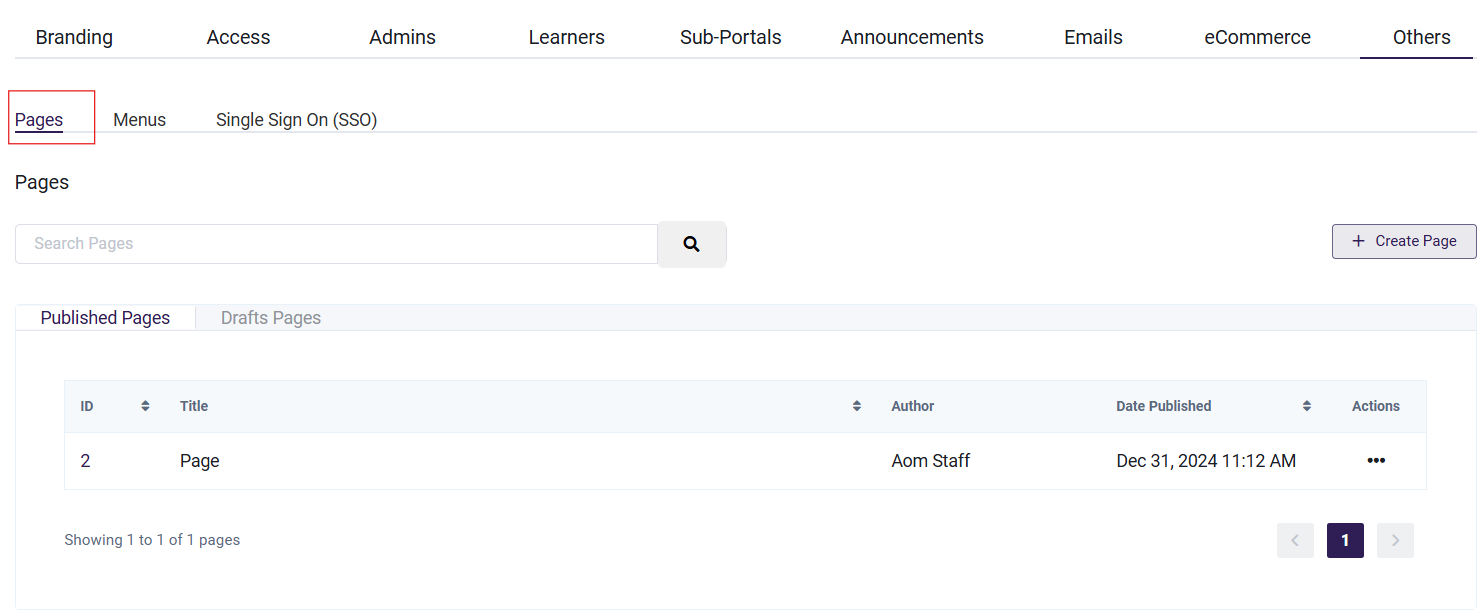
Pages
Create pages that are specific to the particular Portal. To know more on how to use the Page Builder you can click here.
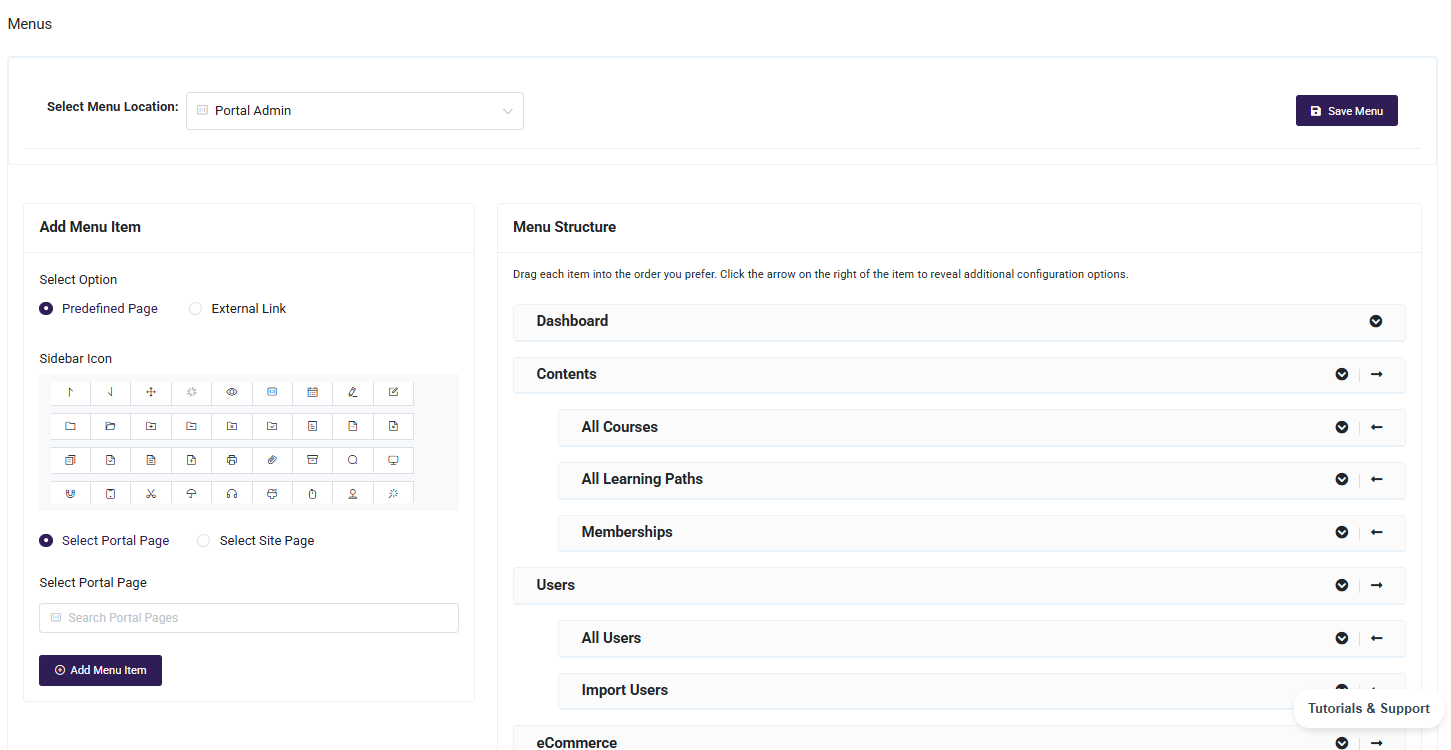
Menus
Menus allow to customize the sidebar for Portal Admin or Portal Learner.
Two menu item types here to choose from:
Predefined – Allows to link to an existing page within the system.
- Select Site Page: Displays all global pages available across the platform.
- Select Portal Page: Displays only the pages created within the current portal.
External Link – Allows to manually enter a URL that will redirect users to an external website or resource when they click the menu item.
After selecting a page and clicking Add Menu Item, the chosen page will be added to the menu structure on the right side.
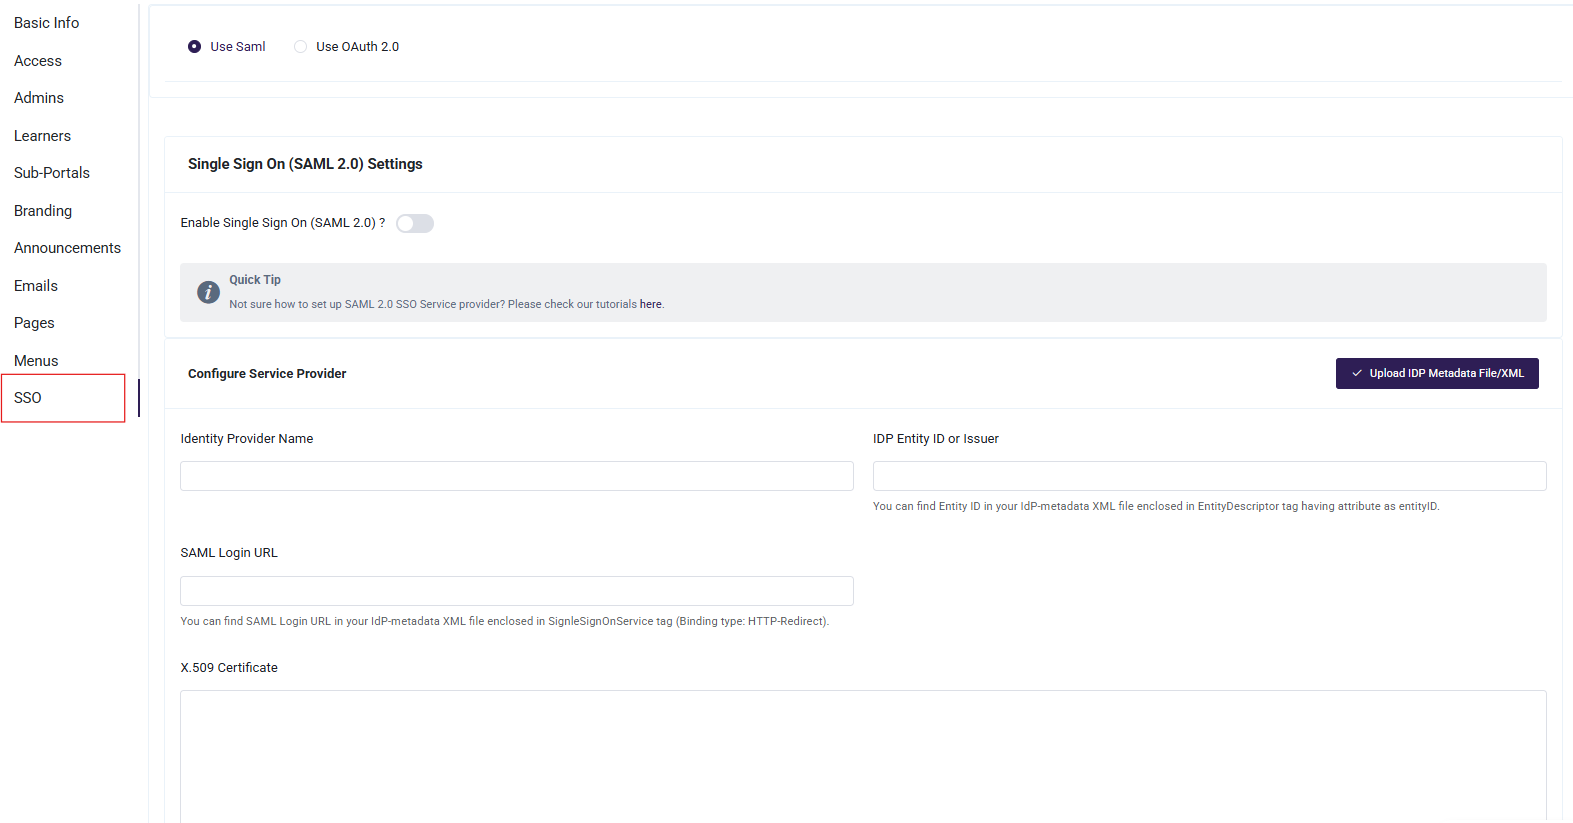
Single Sign On (SSO)
Simplify user access with Single Sign-On (SSO) authentication options. Choose between SAML 2.0 or OAuth 2.0 to integrate secure and seamless login methods.
Guides on setting up SSO: