Configuring AOM as an LTI Tool on Canvas LMS
If you'd like to offer your course content to external users on Canvas LMS, you'll need to connect the two platforms using the LTI Advantage (LTI 1.3) standard. In order to connect, an admin will need to set up the connection on the Canvas LMS side.
Integrating with Canvas LMS
Please note, only Canvas Admins have the appropriate permissions to create/edit developer keys, which are a requirement to connect via LTI.
AOM initial steps
- In your AOM platform, go to your Integrations page, find the Publish as LTI Tool integration, and click on Manage.
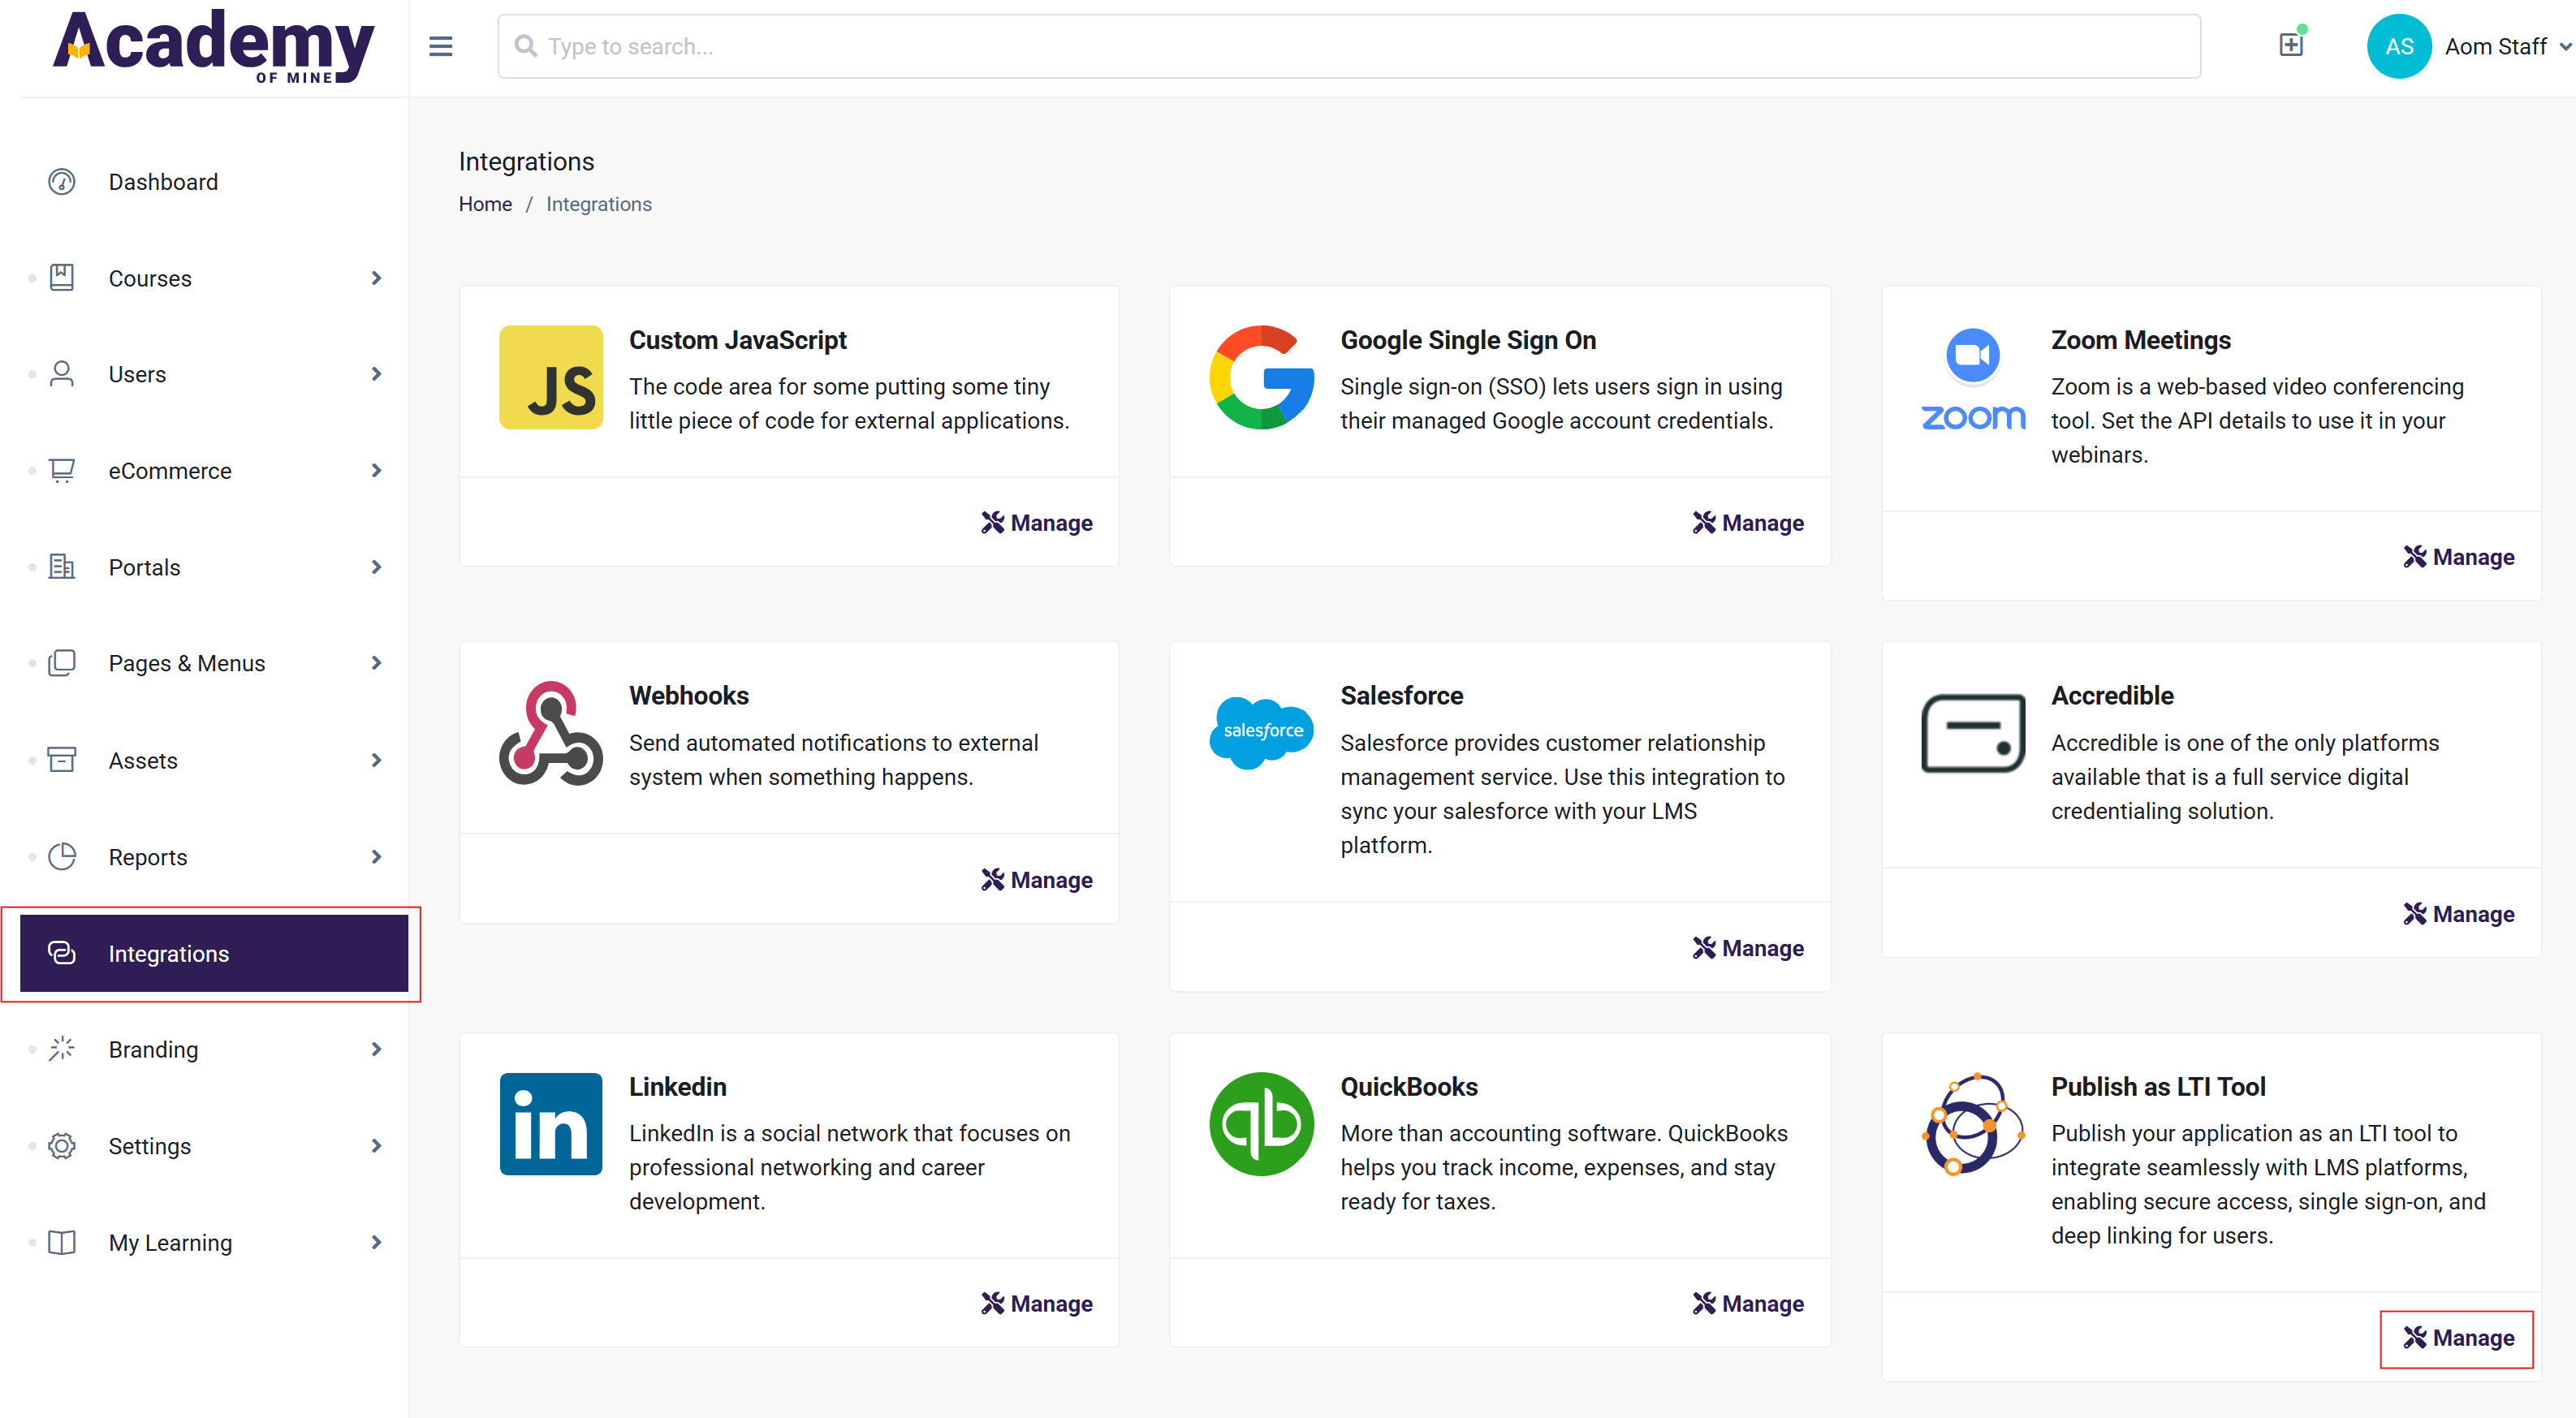
- Ensure that the Enable LTI Tool toggle is enabled, and then click on Register Platform.

- On the Register Platform page, you will find a LTI Tool Information section at the top, which provides the information you will need to provide to the Canvas LMS admin. Each piece of information can be copied easily by just clicking on it.

- Once you've noted down the information, add a Platform Name, and click on Add Platform to register the platform. We'll come back to this page once the external Canvas LMS admin has added the tool on their end.
The Platform Name can be anything that helps you recognize this LTI connection. It does not need to match anything on the external LMS platform.
Canvas LMS steps
-
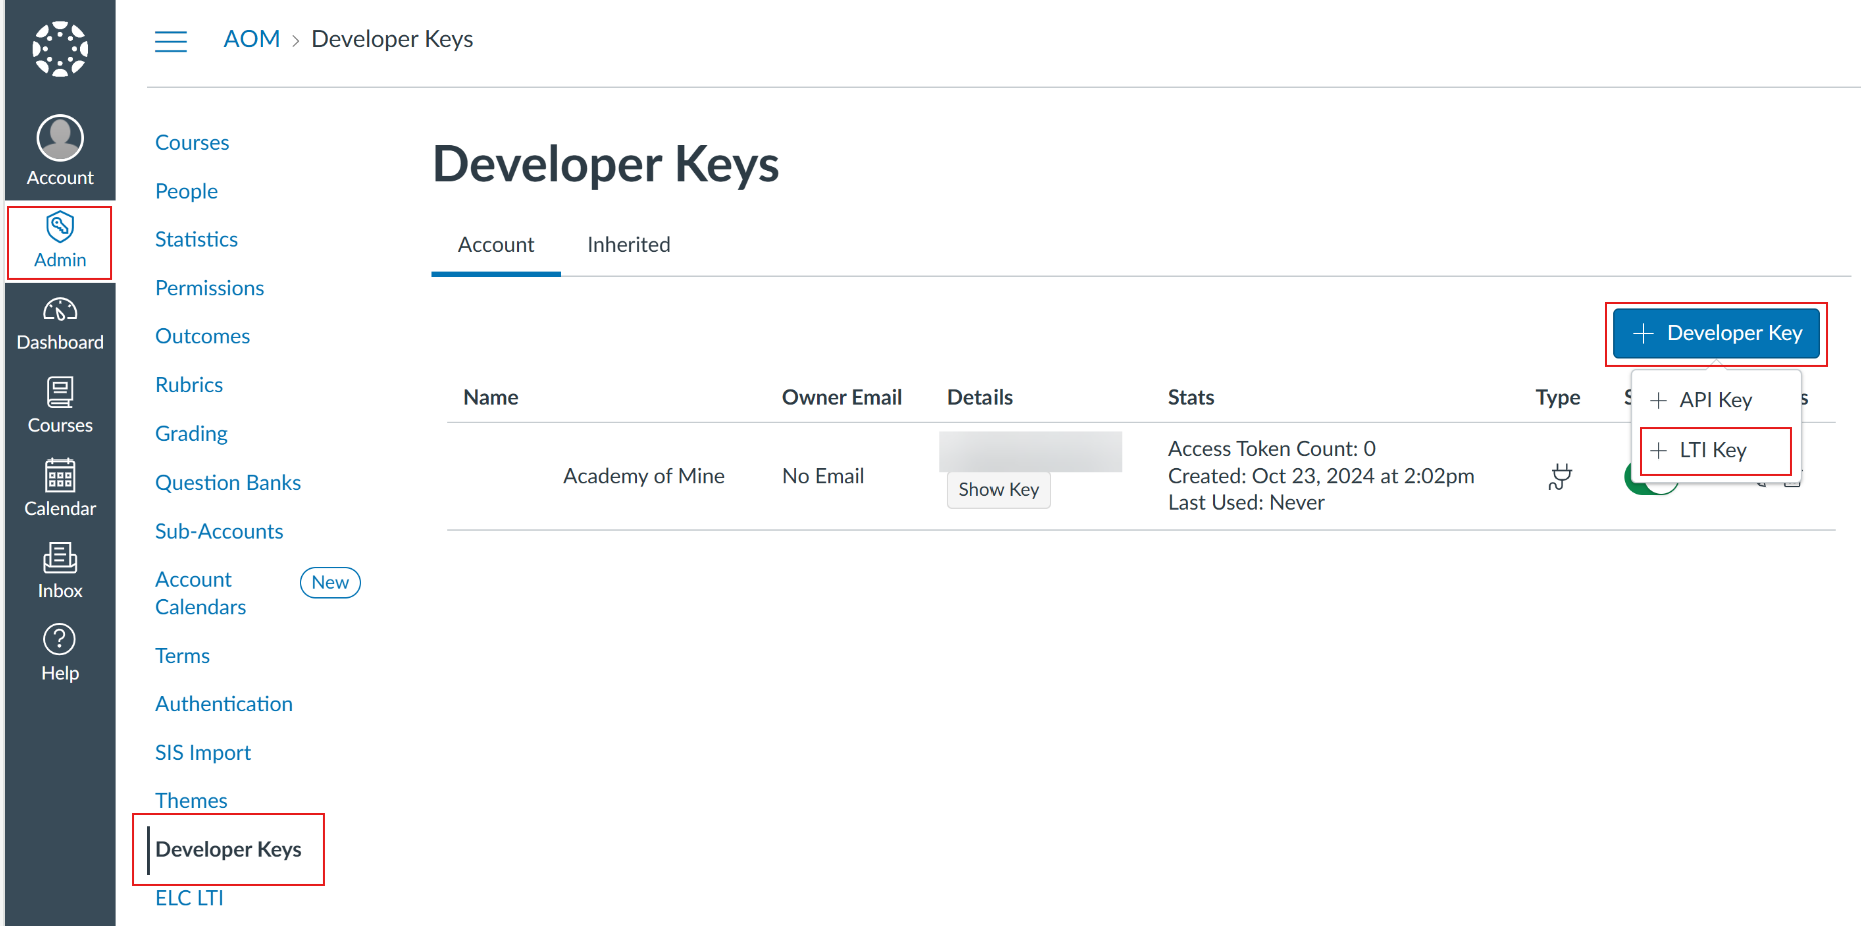
Open the Canvas LMS instance, and log in with your admin credentials.
-
Go to Admin>[Account name]>Developer Keys.
-
Click on Developer Key and then LTI Key.
- This should open up the Key Settings. Make sure the Method is set to Manual Entry, and then fill this page in as follows:
| Field | Value |
|---|---|
| Redirect URIs | All of the Launch URI(s) |
| Target Link URI | Launch URI(s): the first URL that ends in /launch |
| JWK Method | Public JWK |
| Public JWK | Tool Public JWK |
| OpenID Connect Initiation Url | OIDC Auth endpoint |

-
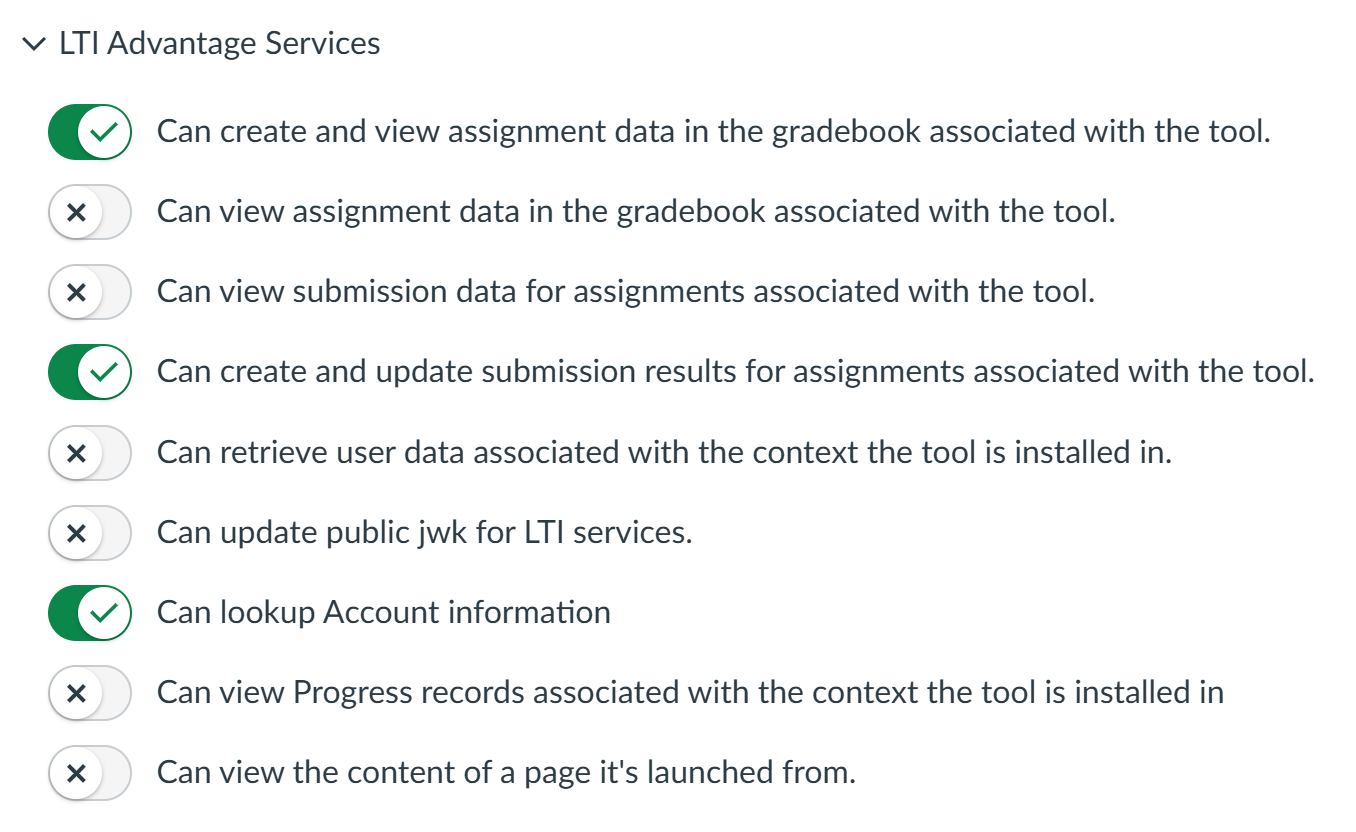
In LTI Advantage Services, enable:
-
Can create and view assignment data in the gradebook associated with the tool.
-
Can create and update submission results for assignments associated with the tool.
-
Can lookup Account information
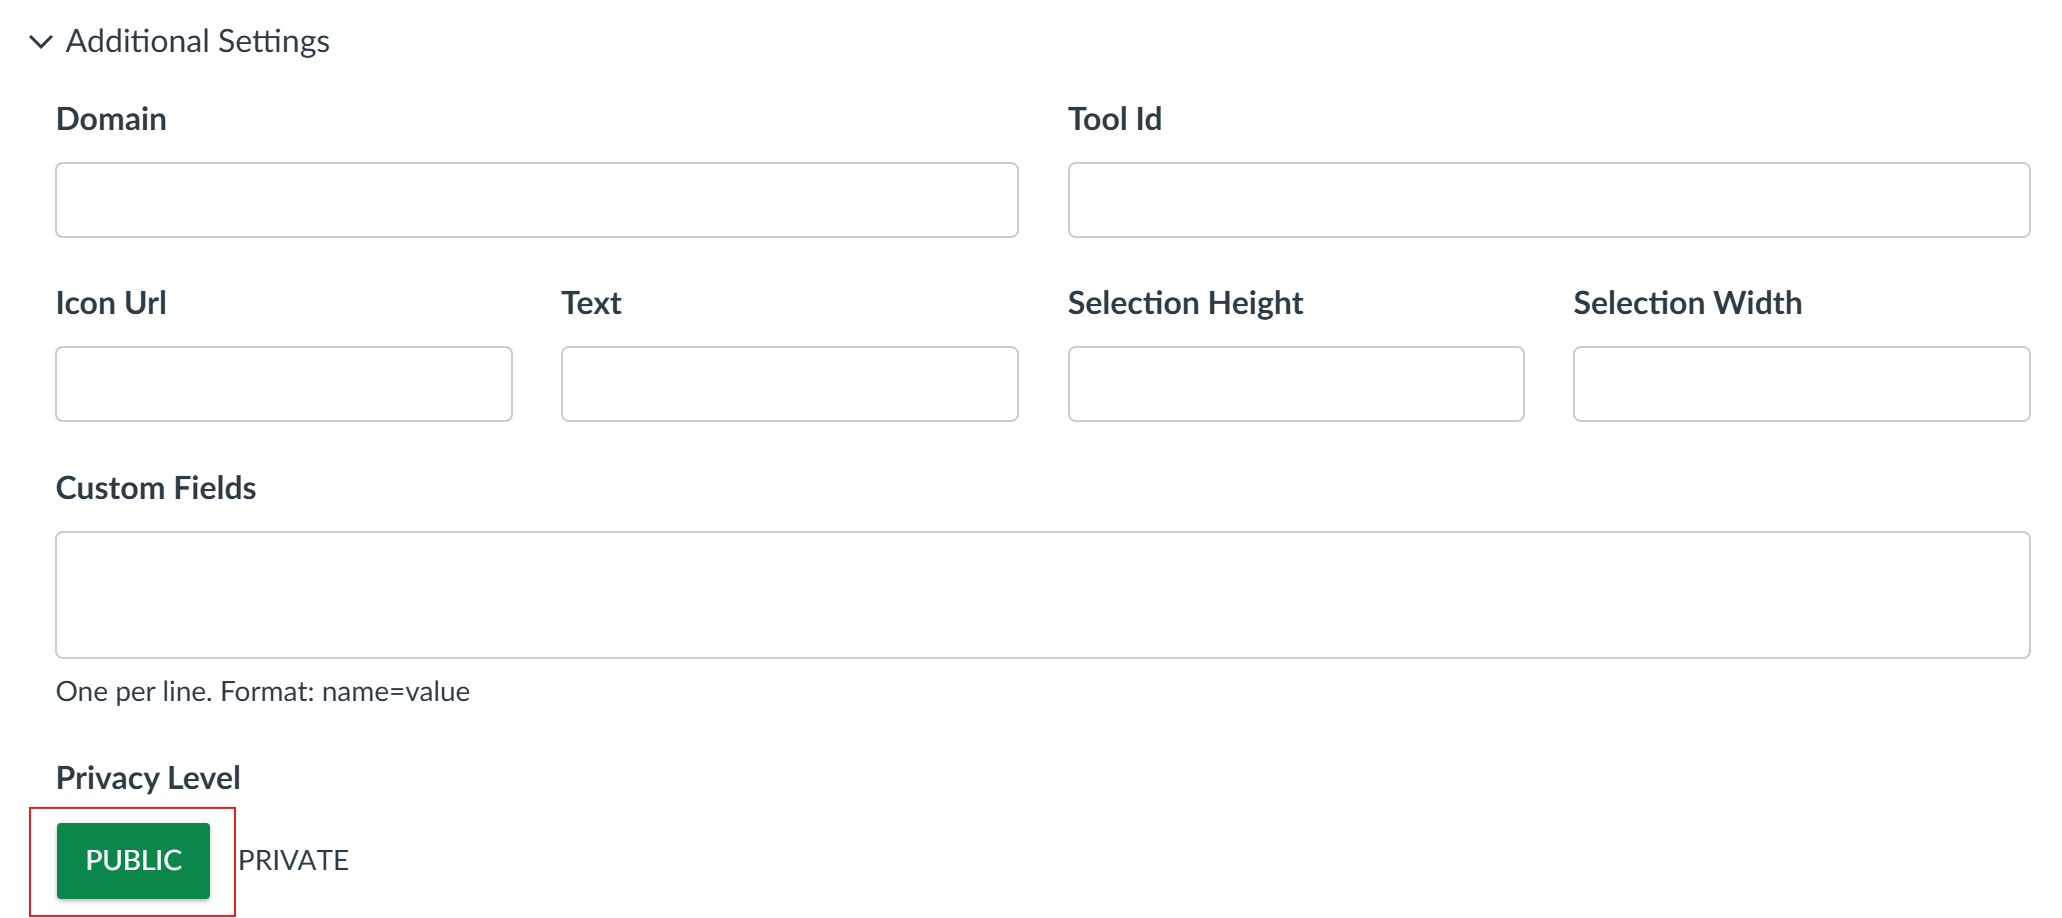
- In Additional Settings, update the Privacy Level to Public. This is because the user's email is required to connect to the AOM platform correctly.
-
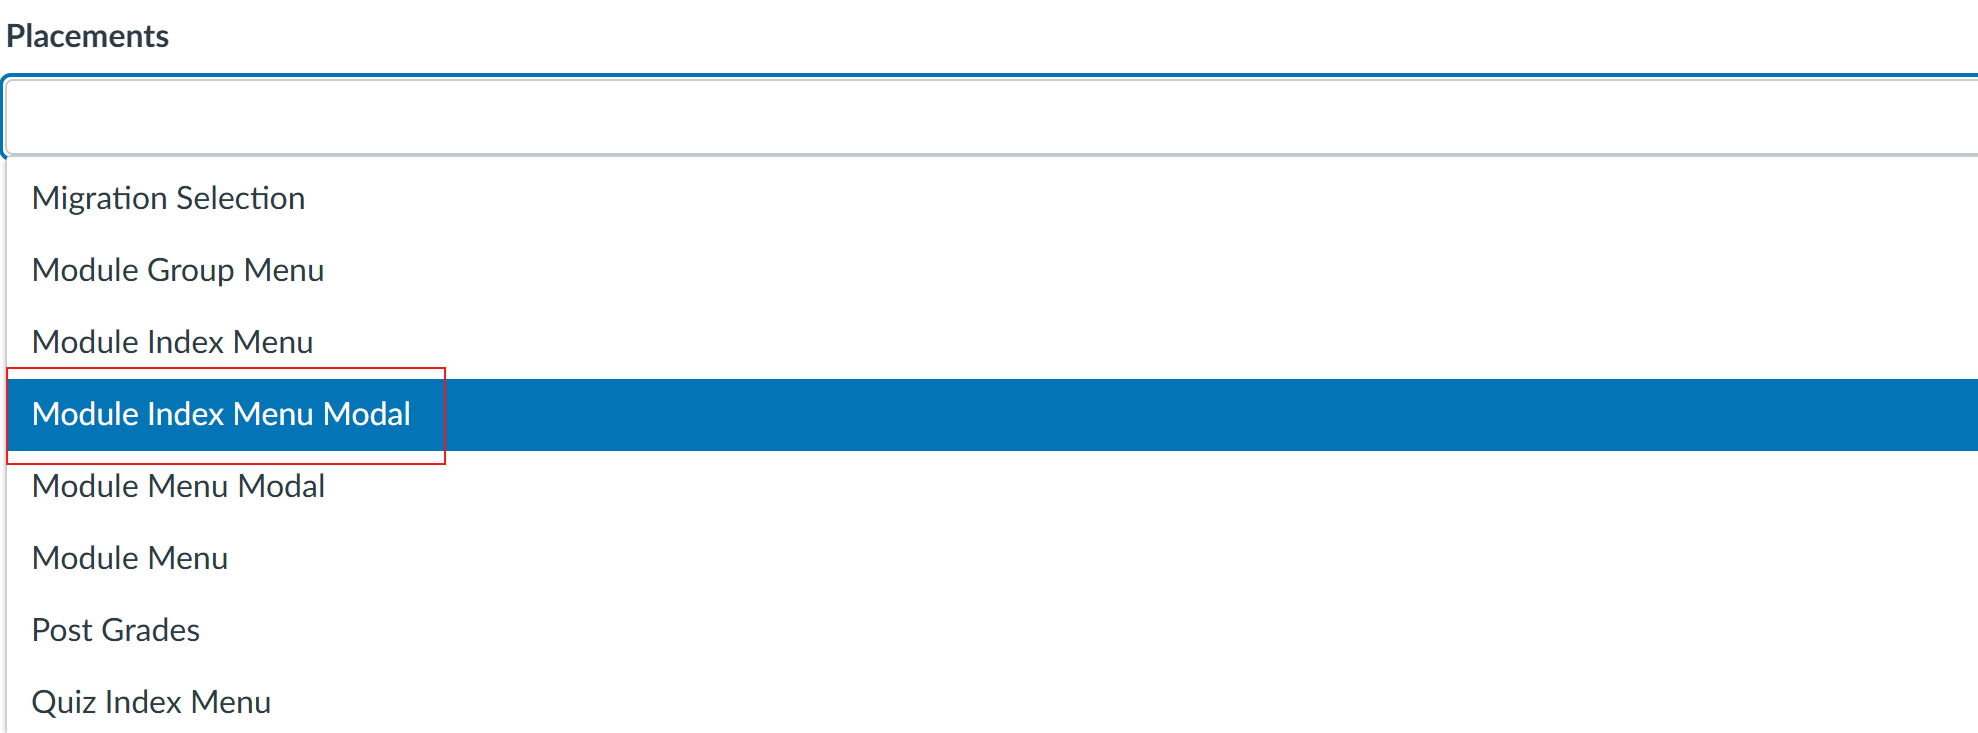
For Placements, add:
-
Module Index Menu Modal
-
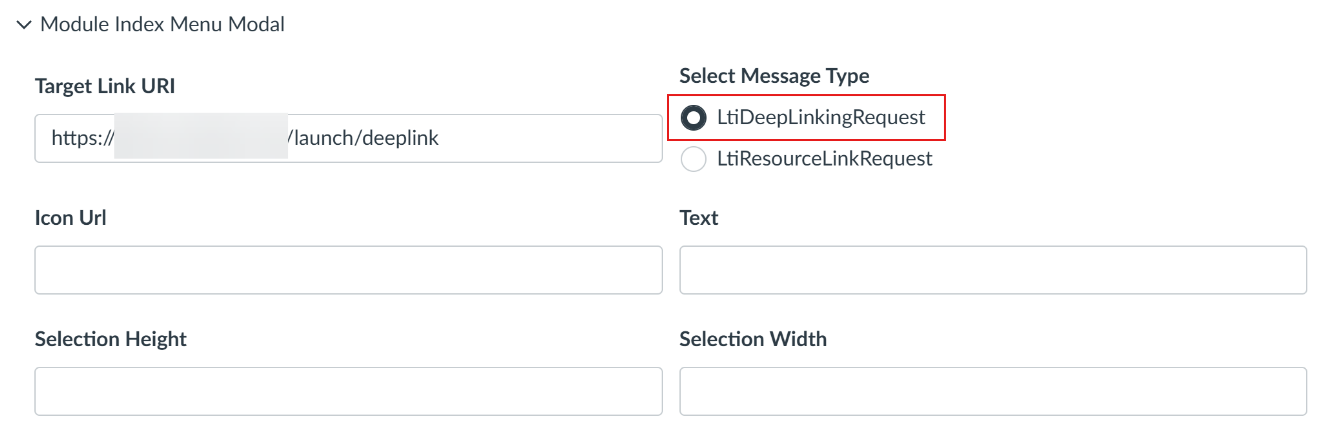
An additional Module Index Menu Modal option should appear. Update as follows:
-
Select Message Type: LtiDeepLinkingRequest
-
Target Link URI: [Content-selection URL] (provided by the LTI tool)
-
Click Save. This should take you back to the Developer Keys page.
-
Ensure that the State is toggled to ON.
-
In the Details column, note down the ID that is shown above the Show Key button. This is the Client ID that the LTI Tool will need.

-
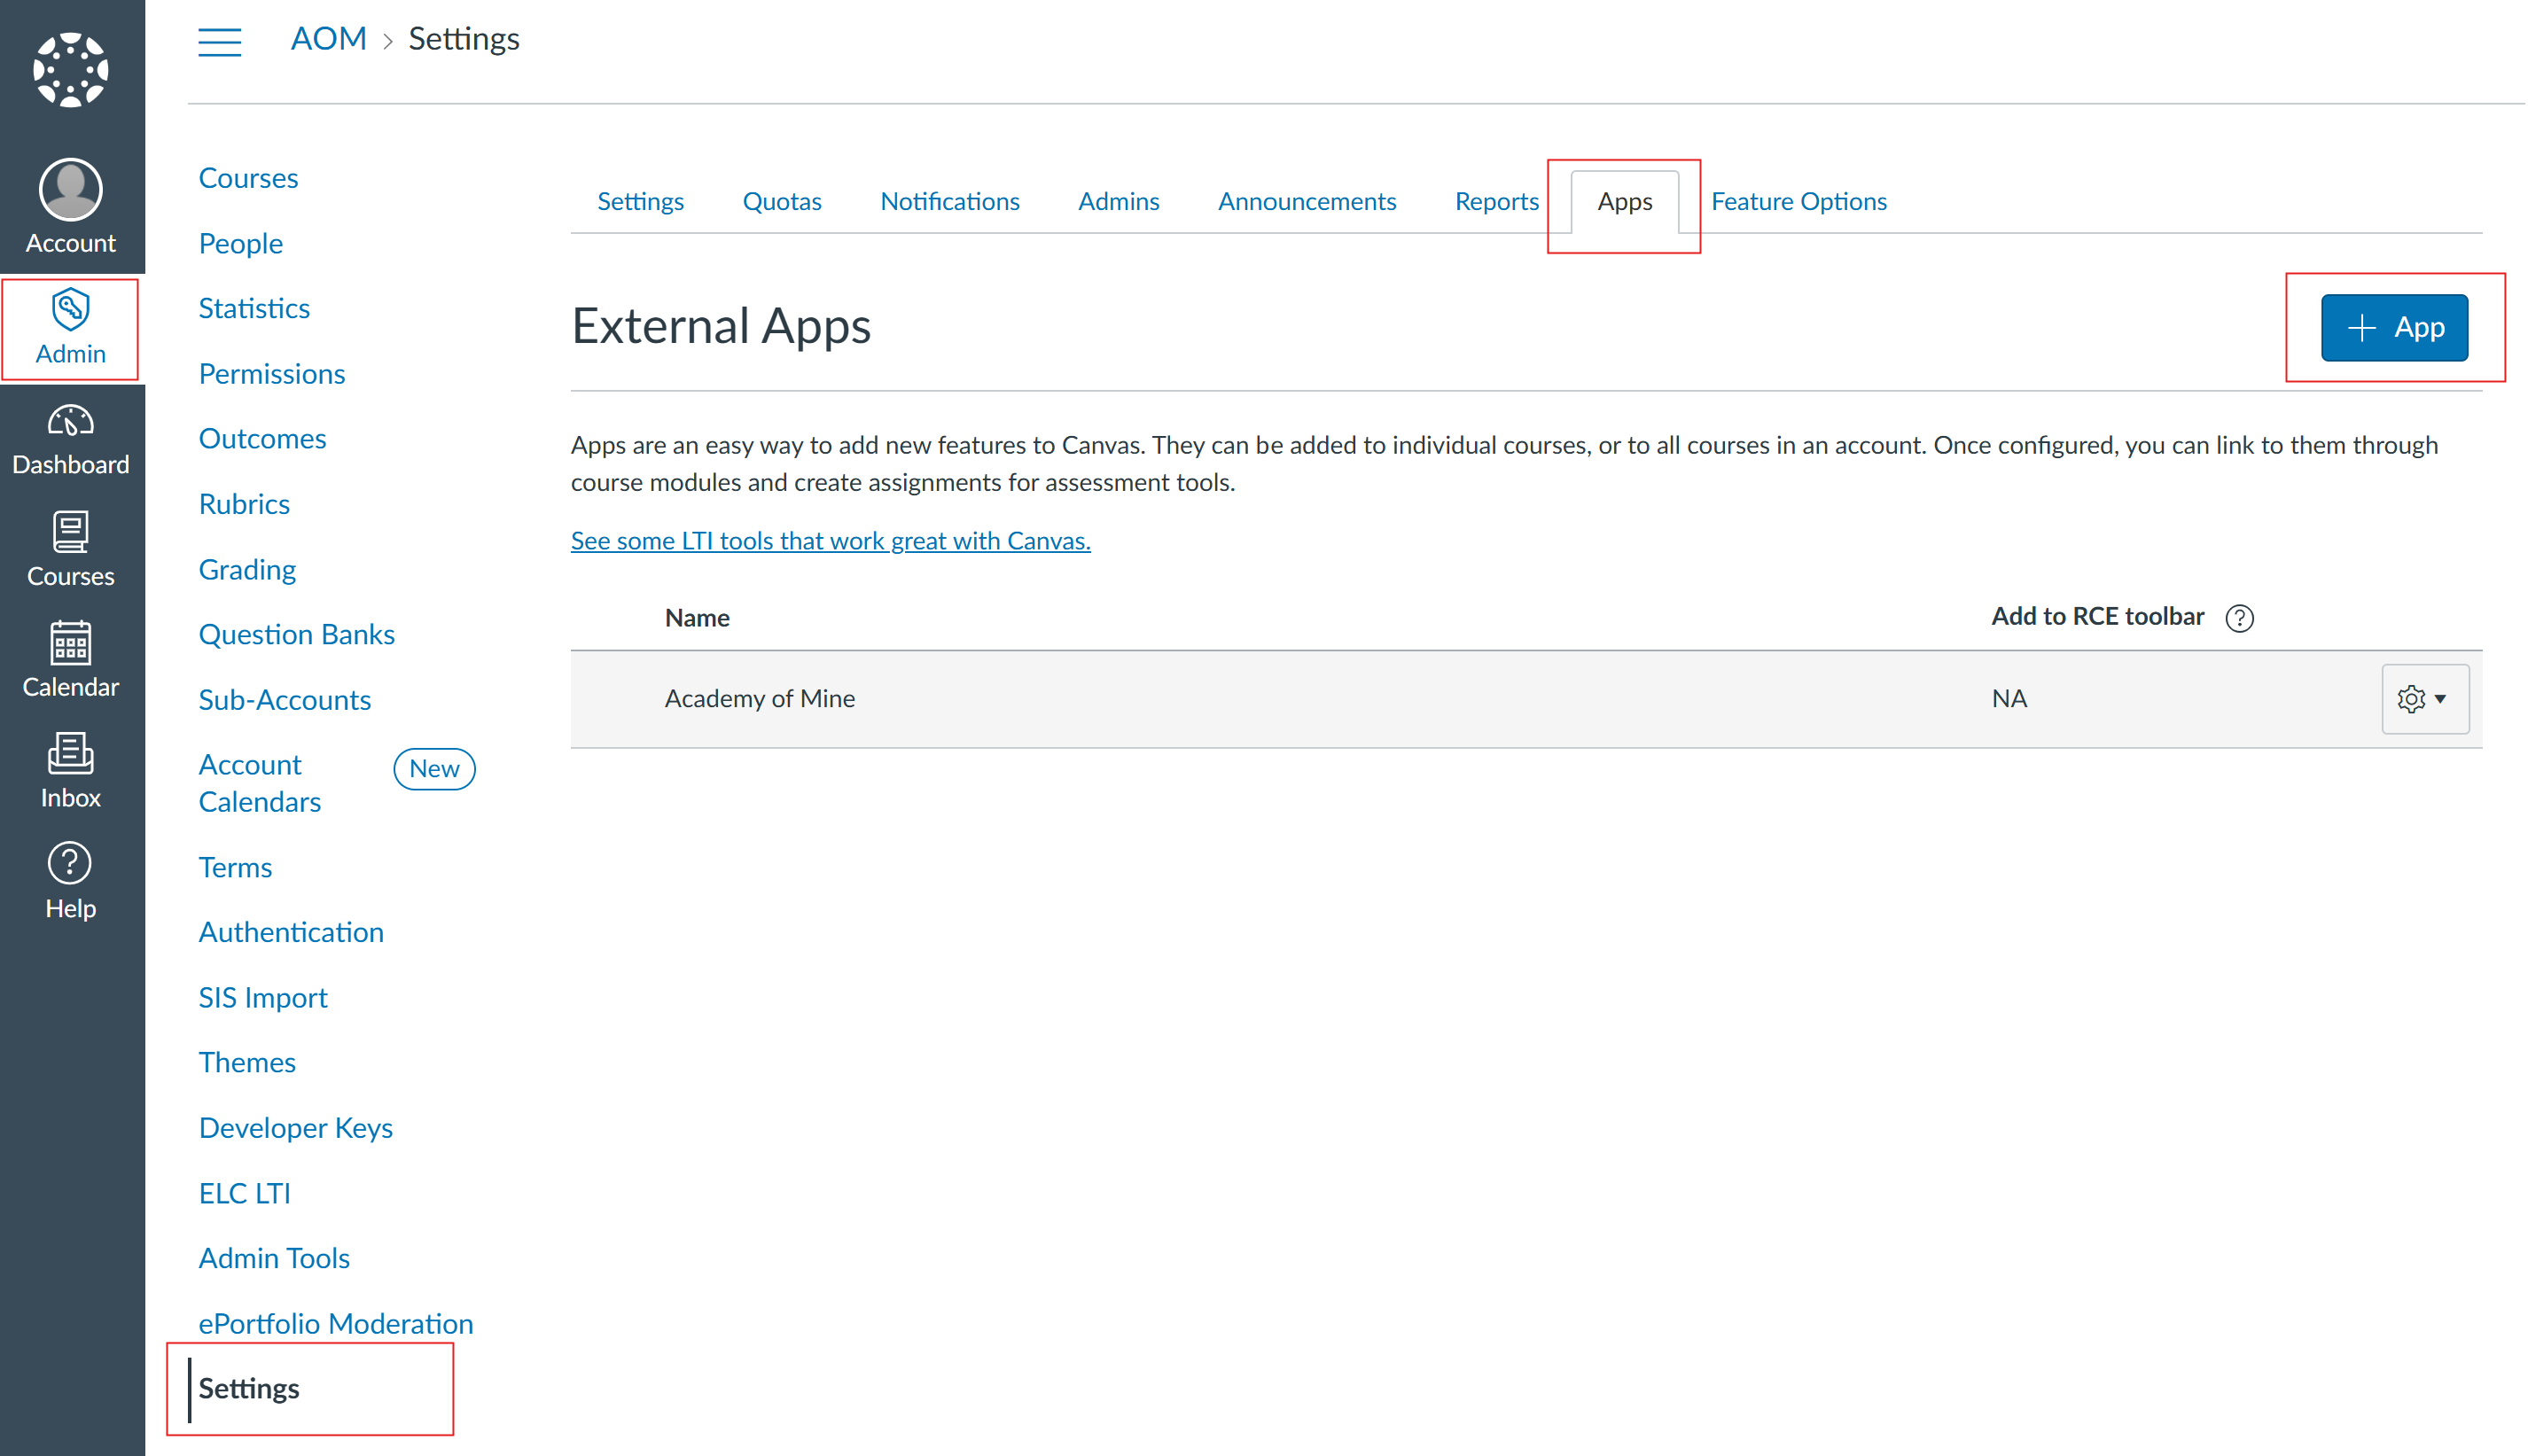
In Canvas LMS, it is possible to make an LTI Tool available at different levels. This can always be achieved by accessing the Settings at the given level. For example, if the LTI Tool should be available to a specific account, you would access the account via Admin>[Account name], and then click on Settings.
-
In Settings, click on the Apps tab. Then click on App to open the Add App modal.
-
Change the Configuration Type to By Client ID, and then enter the Client ID you noted down previously, and click Submit.
-
If the developer key was setup correctly, you should see a prompt with the Tool name, and asking if you wish to install it. Click Install.

- Once installed, you should be redirected back to the Apps tab, and the external app should be visible in the list. Click on the cog menu on the right, and click on Deployment ID.

-
Note down the Deployment ID that is shown.
-
Share the Client ID and Deployment ID with the LTI Tool admin, so that they can complete the LTI Tool connection setup.
AOM final steps
- Once you have received the Client ID and Deployment ID from the Canvas LMS admin, you will have all the necessary information to complete the platform registration. Add the information as follows:
| Field | Value |
|---|---|
| Issuer/Platform ID | https://canvas.instructure.com |
| Client ID | As provided by Canvas LMS admin. |
| Public Keyset / JWKS URL | https://sso.canvaslms.com/api/lti/security/jwks |
| OIDC Login endpoint/ Auth endpoint | https://sso.canvaslms.com/api/lti/authorize_redirect |
| Access token URL | https://sso.canvaslms.com/login/oauth2/token |
| Deployment ID | As provided by Canvas LMS admin. |
-
For configuring the remaining settings of the LTI Tool, consult our LTI 1.3 guide.
-
Once finished, click on Update Platform.
-
The external platform has now been successfully connected, and users on the external platform will be able to add & launch the content that you configured.
Please note that if the Canvas LMS is self-hosted, then all the above URLs (except the Issuer/Platform ID) will need to be updated with the domain of the self-hosted instance (i.e., sso.canvaslms.com needs to be updated).
Adding External Content on Canvas LMS (Deeplinking Flow)
For admins/instructors that are creating courses in Canvas LMS.
- In Courses, choose the course where you wish to add the external content.
- Next, click on the Modules sub-menu.
- Click on the 3-dot kebab menu, next to the Module button, and then select the LTI Tool app.

- This will launch the external content selector. You will see a list of courses that have been enabled, and can choose to select entire courses, are only some modules. Once you have selected your modules, click on the Submit Selected Content button.

- You should now have a new module in your course, that is linked to the external content you selected.
Launching External Content
When learners launch the content, they will be presented with a launch course screen first.

Once they launch the course, they will see the external modules that were selected.
