Platform General Settings
The General Settings page is where you can customize the basic settings of your platform, such as the date/time format, the site's language, and whether you'd like your site to be private or public. The sections within General Settings are Site General Settings, Site Page Identifications, Privacy Policy & Terms of Conditions, Cookie Settings, and Google reCAPTCHA settings. Let's dive into which settings are available.
General Settings
To make changes to General Settings, follow these steps:
- From the Admin Dashboard, choose Settings, then General Settings.
- Make the necessary changes and click Save Settings when you're done.
Read on for more information about what each General Settings section includes. For a video walkthrough, check out this video:
Site General Settings
The Site General Settings options will be seen platform-wide by all users. Selecting language, date, and time settings will set the default for all users on your platform.

Here are the available settings:
- Site Title: The Site Title will appear across multiple areas of your platform, including orders and invoices, and in all automated emails.
- Site Language: The Site Language will set the language that will display throughout your platform.
- Date Format: The Date Format selects the format that will be visible internally and to learners throughout the platform.
- Administrator Email: The Administrator Email will primarily be used as a recipient for messages sent by users via the contact form page. To adjust email addresses used for automated platform email, please review our guide called Automated Email Settings.
- Time Zone: The time zone will display across your platform and will affect the timestamp for multiple functions in your platform, including learner progress, learner activity, certificate issue date, orders, and reports.
- Time Format: You can choose between a 12-hour format or a 24-hour format to display for all timestamps throughout the platform.
- Enter Emails/Domains to be blocked from registering into LMS: You can add email addresses or domains that will be blocked from registering on the platform.
- Private Site: Enabling the Private Site option restricts access to all site pages, making them inaccessible to the public. Both the home page and Course Catalog will require a login to view, though login access can be optional for private sites. This feature is ideal for clients who intend to use their courses exclusively within a company or for platforms with front-end content they prefer to keep hidden from unprivileged visitors.
Site Page Identifications
Site Page Identifications allow you to designate the pages created on the Site Pages page as your site's Home, Cart, Checkout, Thank You, Learner Dashboard, and Product Catalog pages.

These designations are also displayed on the Site Pages page. For more information on creating and editing Site Pages, please review our guide called Introduction to Site Pages.
Sample pages have been created for you and you are welcome to use them. You are also free to edit those pages or create new ones. As long as each designated page contains the correct snippet block, they will function correctly. Here are the options available to customize:
- Home Page: The home page is what will be displayed when someone first visits your site. The home page is the most customizable page of your site, and does not require any special snippets. For more information on a custom domain name change, please contact Support.
- Cart Page: The Cart Page is where users will review the Products they selected from the Course Catalog. They can review their order total and apply a coupon to their order if one is available. They can then proceed to the checkout page. The Cart page is required to use the Shopping Cart Block snippet. For more information on the cart page, please review our guide: Navigating the Checkout Process.
- Checkout Page: The Checkout Page is where a user will enter their payment information and finalize their order. The billing address added here will be saved in the user's profile and a payment will be made via a third-party payment gateway. The Cart page is required to use the Checkout Block snippet. For more information on the checkout page, please review our guide: Navigating the Checkout Process.
- Thank You Page: The Thank You Page is where users are directed after successfully completing their purchase. This page serves as a confirmation page displaying the order summary, payment details, and any relevant next steps or messages. The Thank You page provides users assurance that their transaction was successful.
- Learner Dashboard: Just like Admins, learners also have their own dashboard on our platform. This dashboard serves as a central hub where learners can launch courses, download certificates, manage purchase orders, and more. Admins can select any of the pages created on the platform to serve as the Learner Dashboard.
- Product Catalog Page: Your Course Catalog displays a full listing of your Courses that are publicly available for people to browse and purchase. The Product Catalog page is required to use the Product Listing Block snippet. For more information on the Course Catalog, please review our guide: Building a Course Catalog.
Privacy and Terms & Conditions
Privacy Policy and Terms & Conditions will only be shown during registration if a relevant page has been assigned within the General Settings. If no page is assigned to the Terms & Conditions, a user can register without needing to accept the Terms & Conditions.

The Privacy Policy and Terms & Conditions will be displayed on the specific page you select within your platform. In the General Settings section, you have the option to assign the site pages for these policies, ensuring they are easily accessible to users on the front end of your site. When users navigate to the designated page, they can view the full details of the Privacy Policy and Terms & Conditions by clicking on the respective links. Additionally, this section allows you to modify and update the text for both policies to align with your platform's requirements and compliance standards.
Cookie Settings
Cookies play a vital role in enhancing browsing experiences on websites. They store information about user interactions, allowing websites to deliver personalized content and simplify navigation. By analyzing cookie data, websites can improve functionality, boost performance, and customize content to align with user preferences, creating a more seamless and engaging online experience.
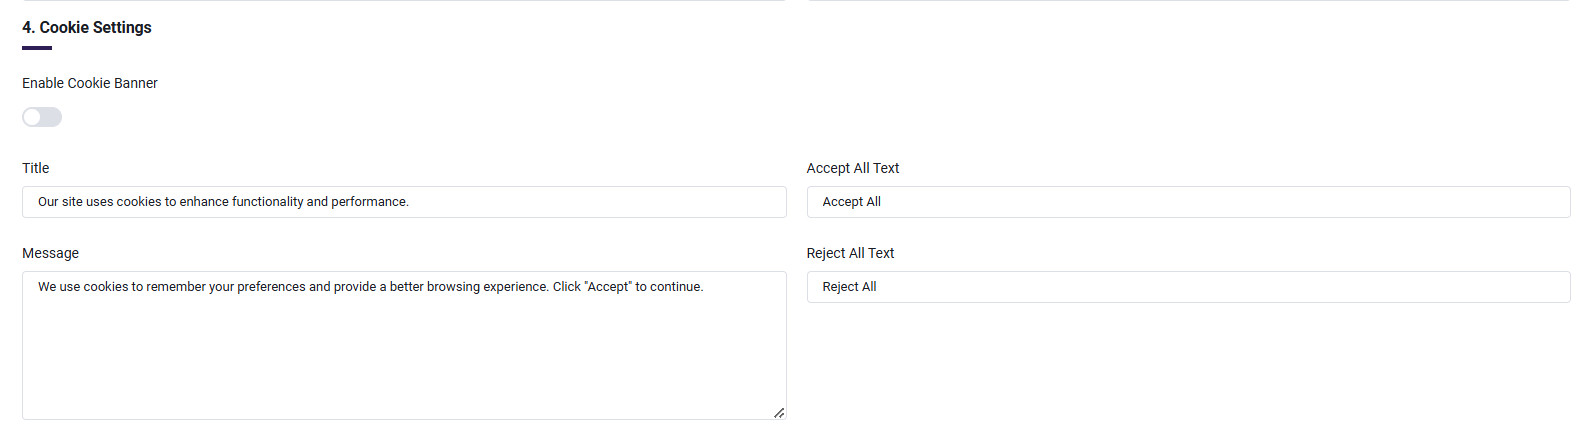
Once the "Enable Cookie Banner" setting is enabled, the cookie banner will display on the marketing pages.
- Enable Cookie Banner: Toggle to enable or disable the cookie banner on the website. Default: Disabled (by default cookie banner will not be visible on marketing pages).
- Title: The title displayed on the cookie banner.
- Accept All Text: The text displayed on the button that allows users to accept all cookies. Default: "Accept All".
- Reject All Text: The text displayed on the button that allows users to reject all cookies. Default: "Reject All".
- Message: The informational message displayed to users on the cookie banner.
-
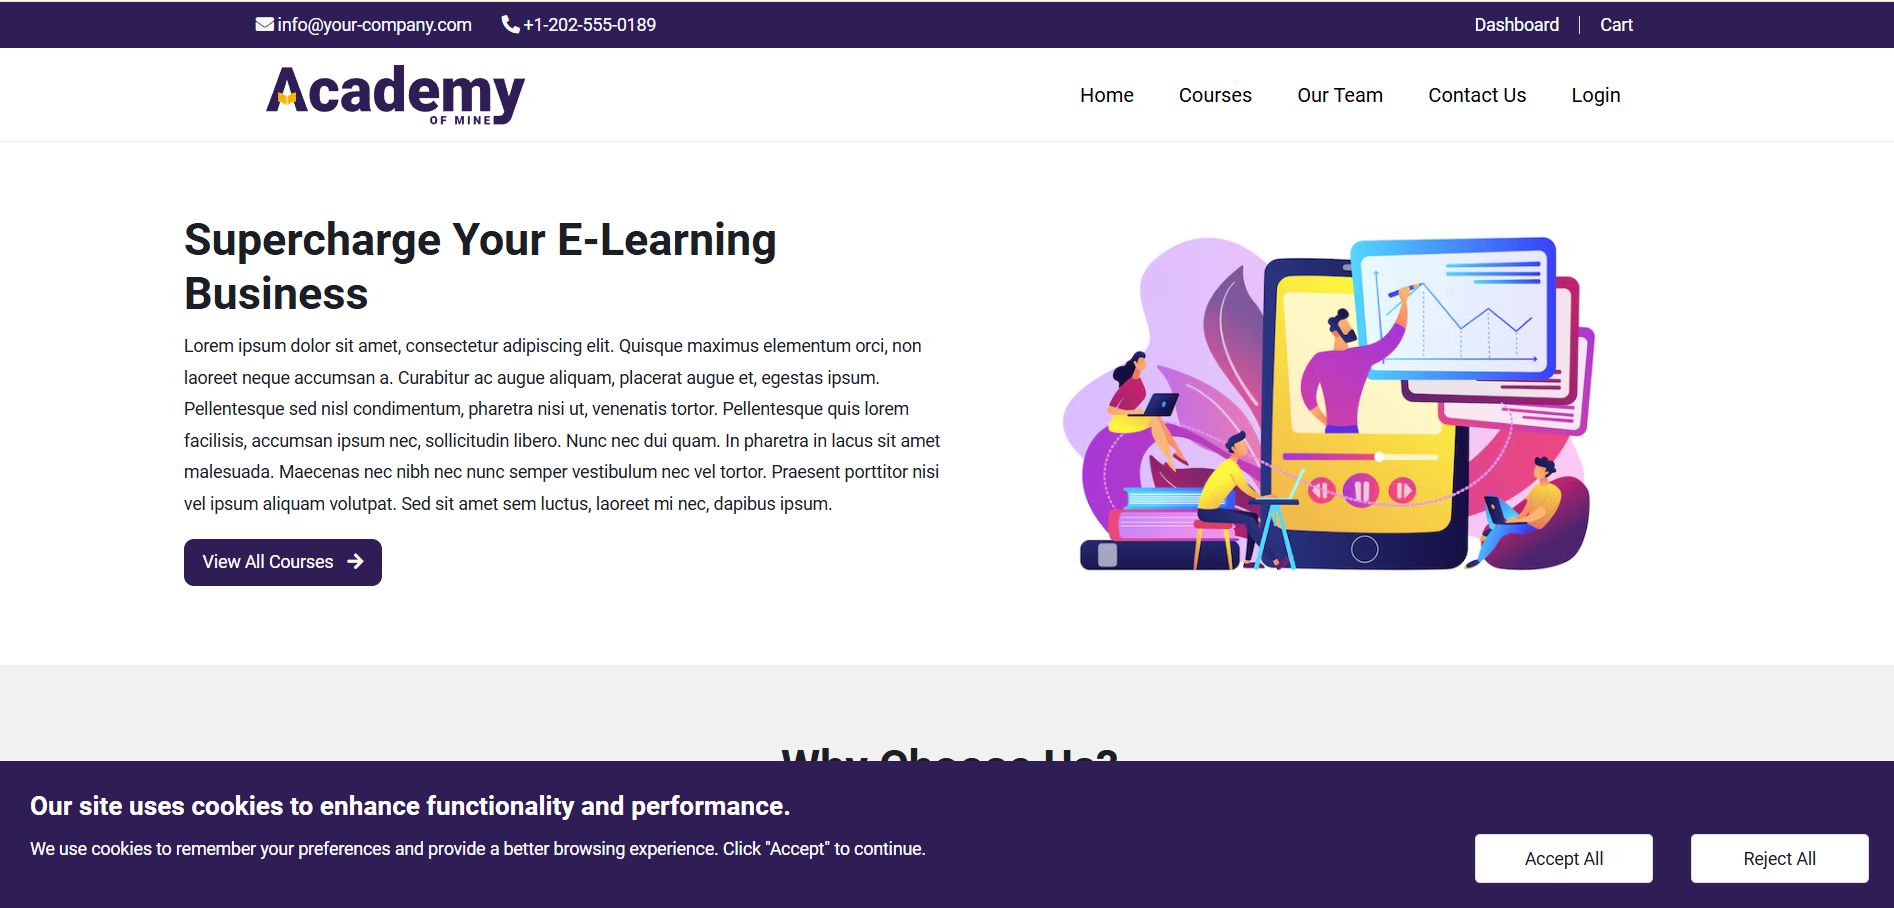
Cookie Banner
Accept All: If the user clicks "Accept All" it sets as
acceptedand stores user details.Reject All: If the user clicks "Reject All" it sets as
rejectedand user information will not stored.Once consent preferences have been accepted or rejected, all user consent records will be available for review. The platform's Admin/Owner can navigate to the Users->User Consent section, where a comprehensive list of all consent decisions are displayed.
-
User Consent: Go to Users then select User Consent
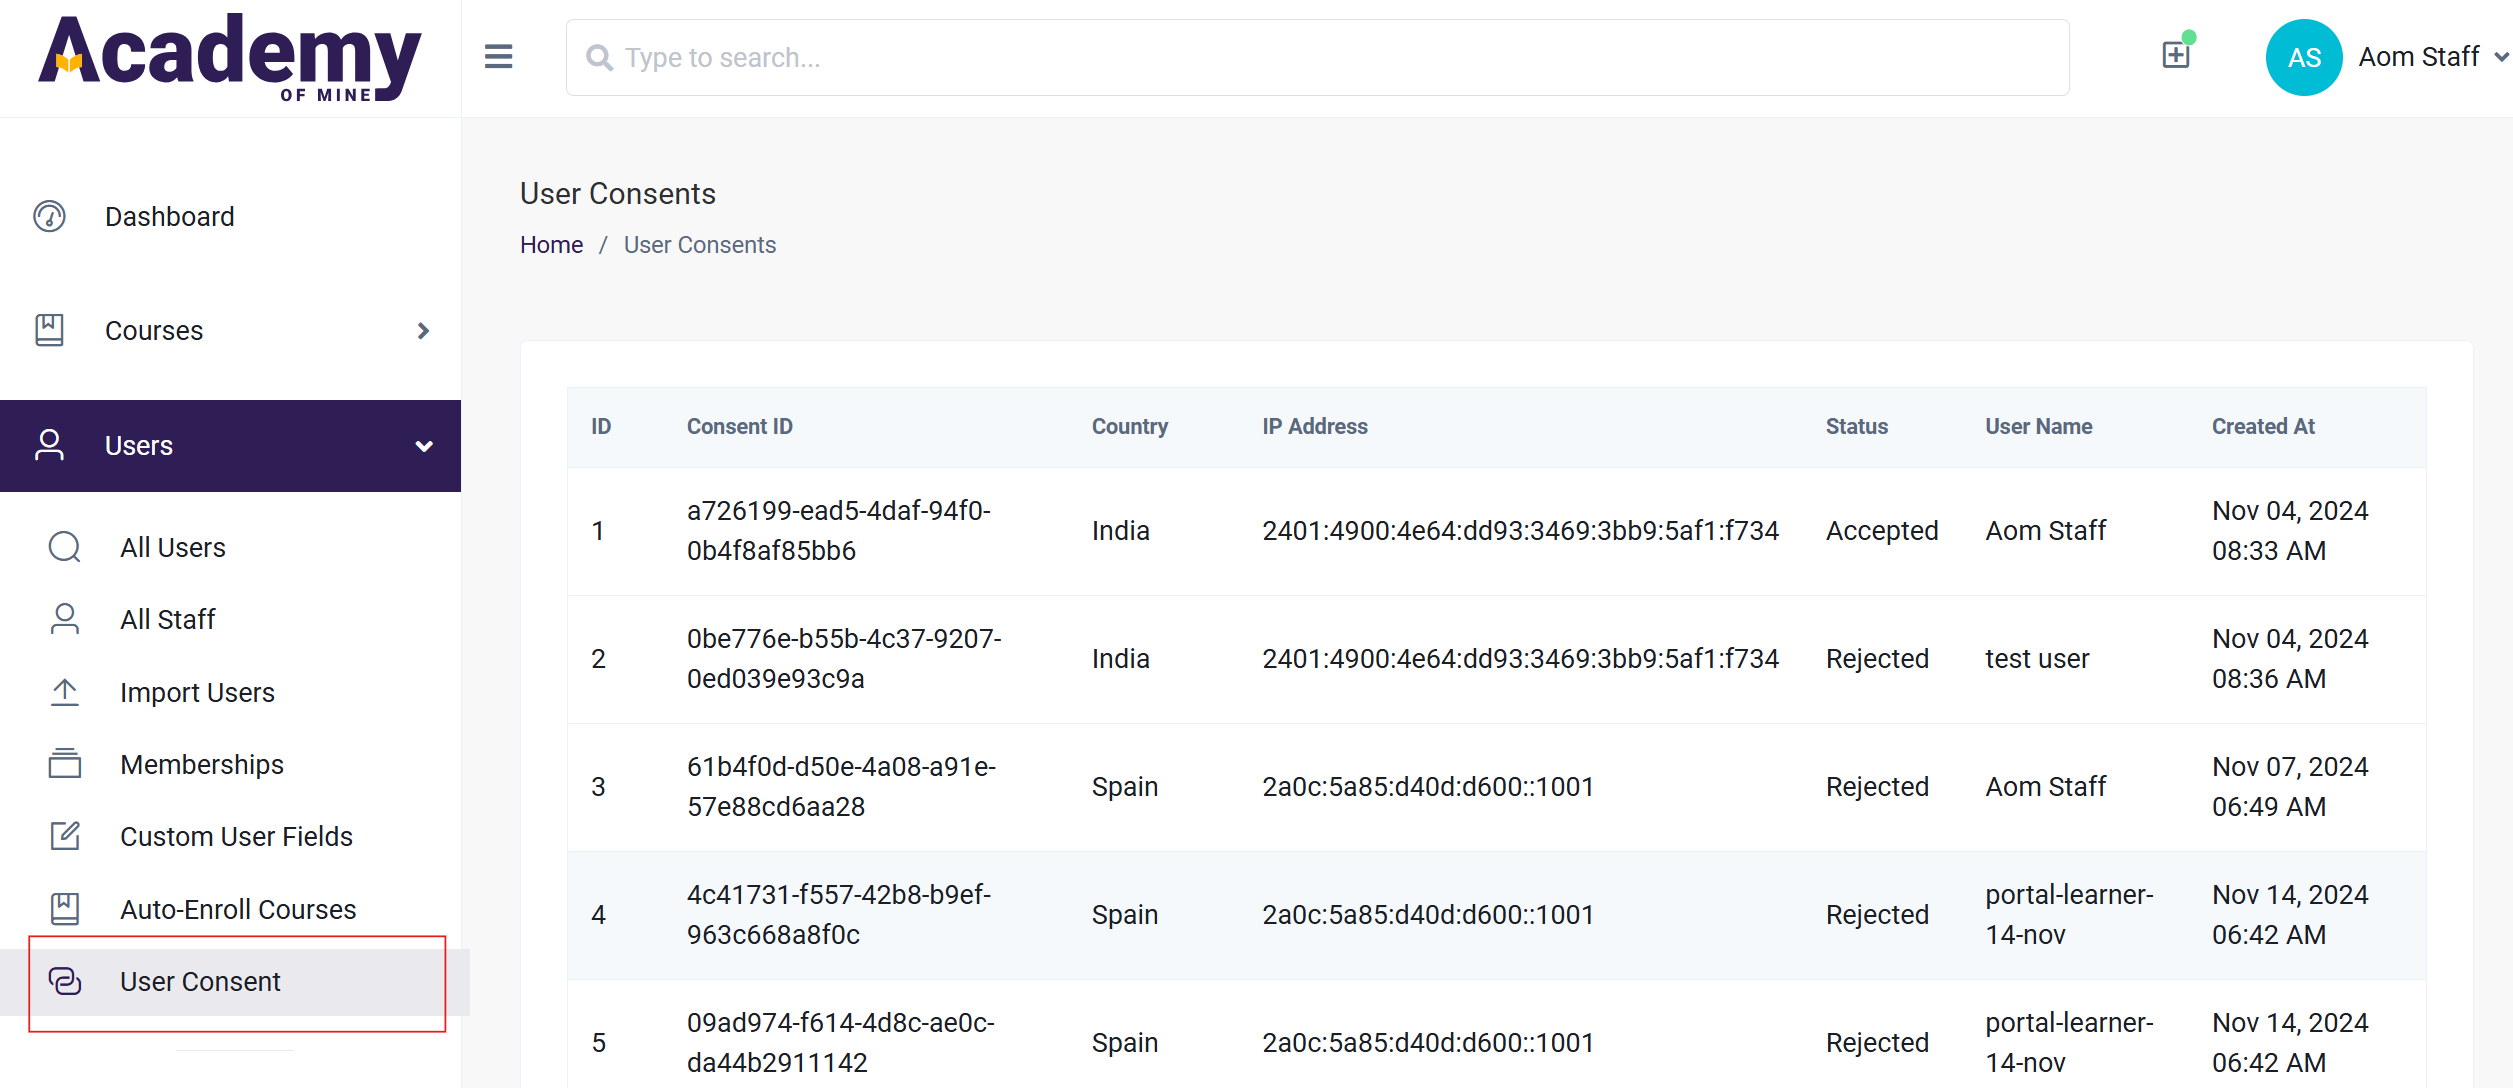
This section provides transparency regarding cookie preferences and tracks the status of consent. Each entry includes important details such as the Consent ID, Country, IP Address, Status, and User Name, and information related to user interactions with the website. This feature ensures that users can easily manage their privacy preferences and maintain control over the data shared while browsing.
Google reCAPTCHA
Google reCAPTCHA is a security service designed to protect websites from spam and abuse by distinguishing between human users and bots. It uses advanced risk analysis techniques to detect automated activities while providing a seamless user experience. reCAPTCHA offers several versions, including the invisible version, which works in the background without requiring user interaction, and the checkbox version, where users confirm with a checkbox labeled "I am not a robot." It's widely used to secure forms, logins, registration pages, and other online interactions from bot attacks.
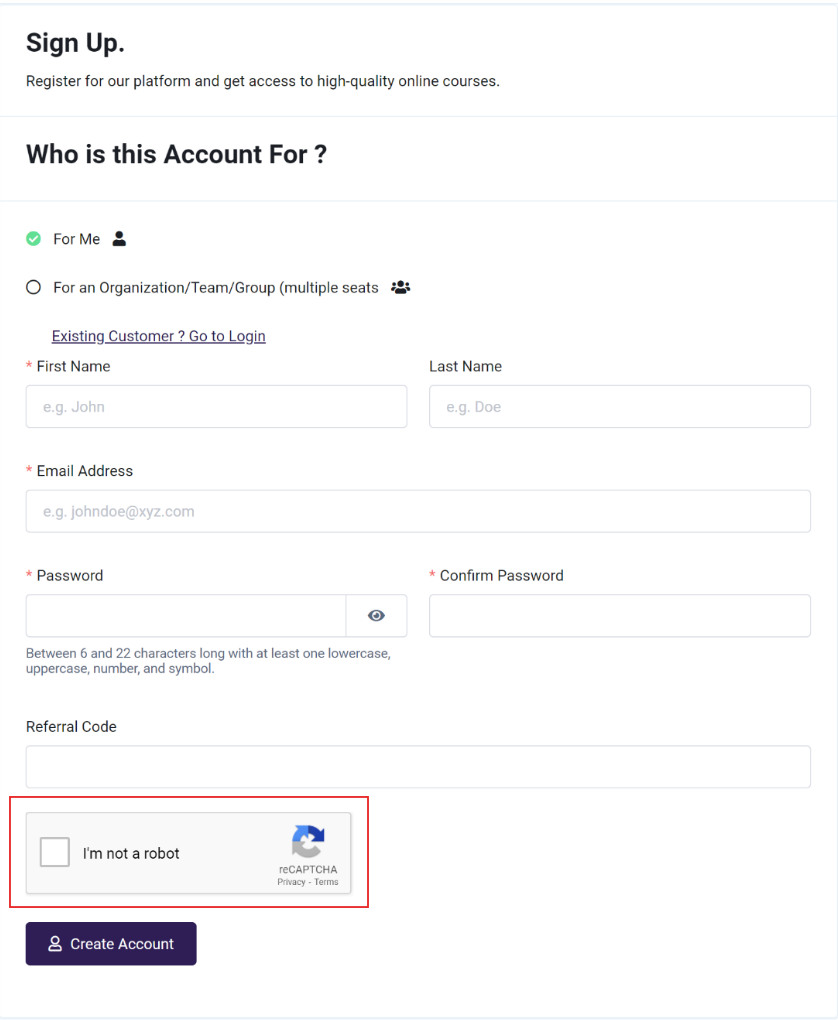
Google reCAPTCHA is integrated into the registration page to ensure that only genuine users can create accounts, adding an additional layer of security to the registration process and preventing automated or malicious account creation.
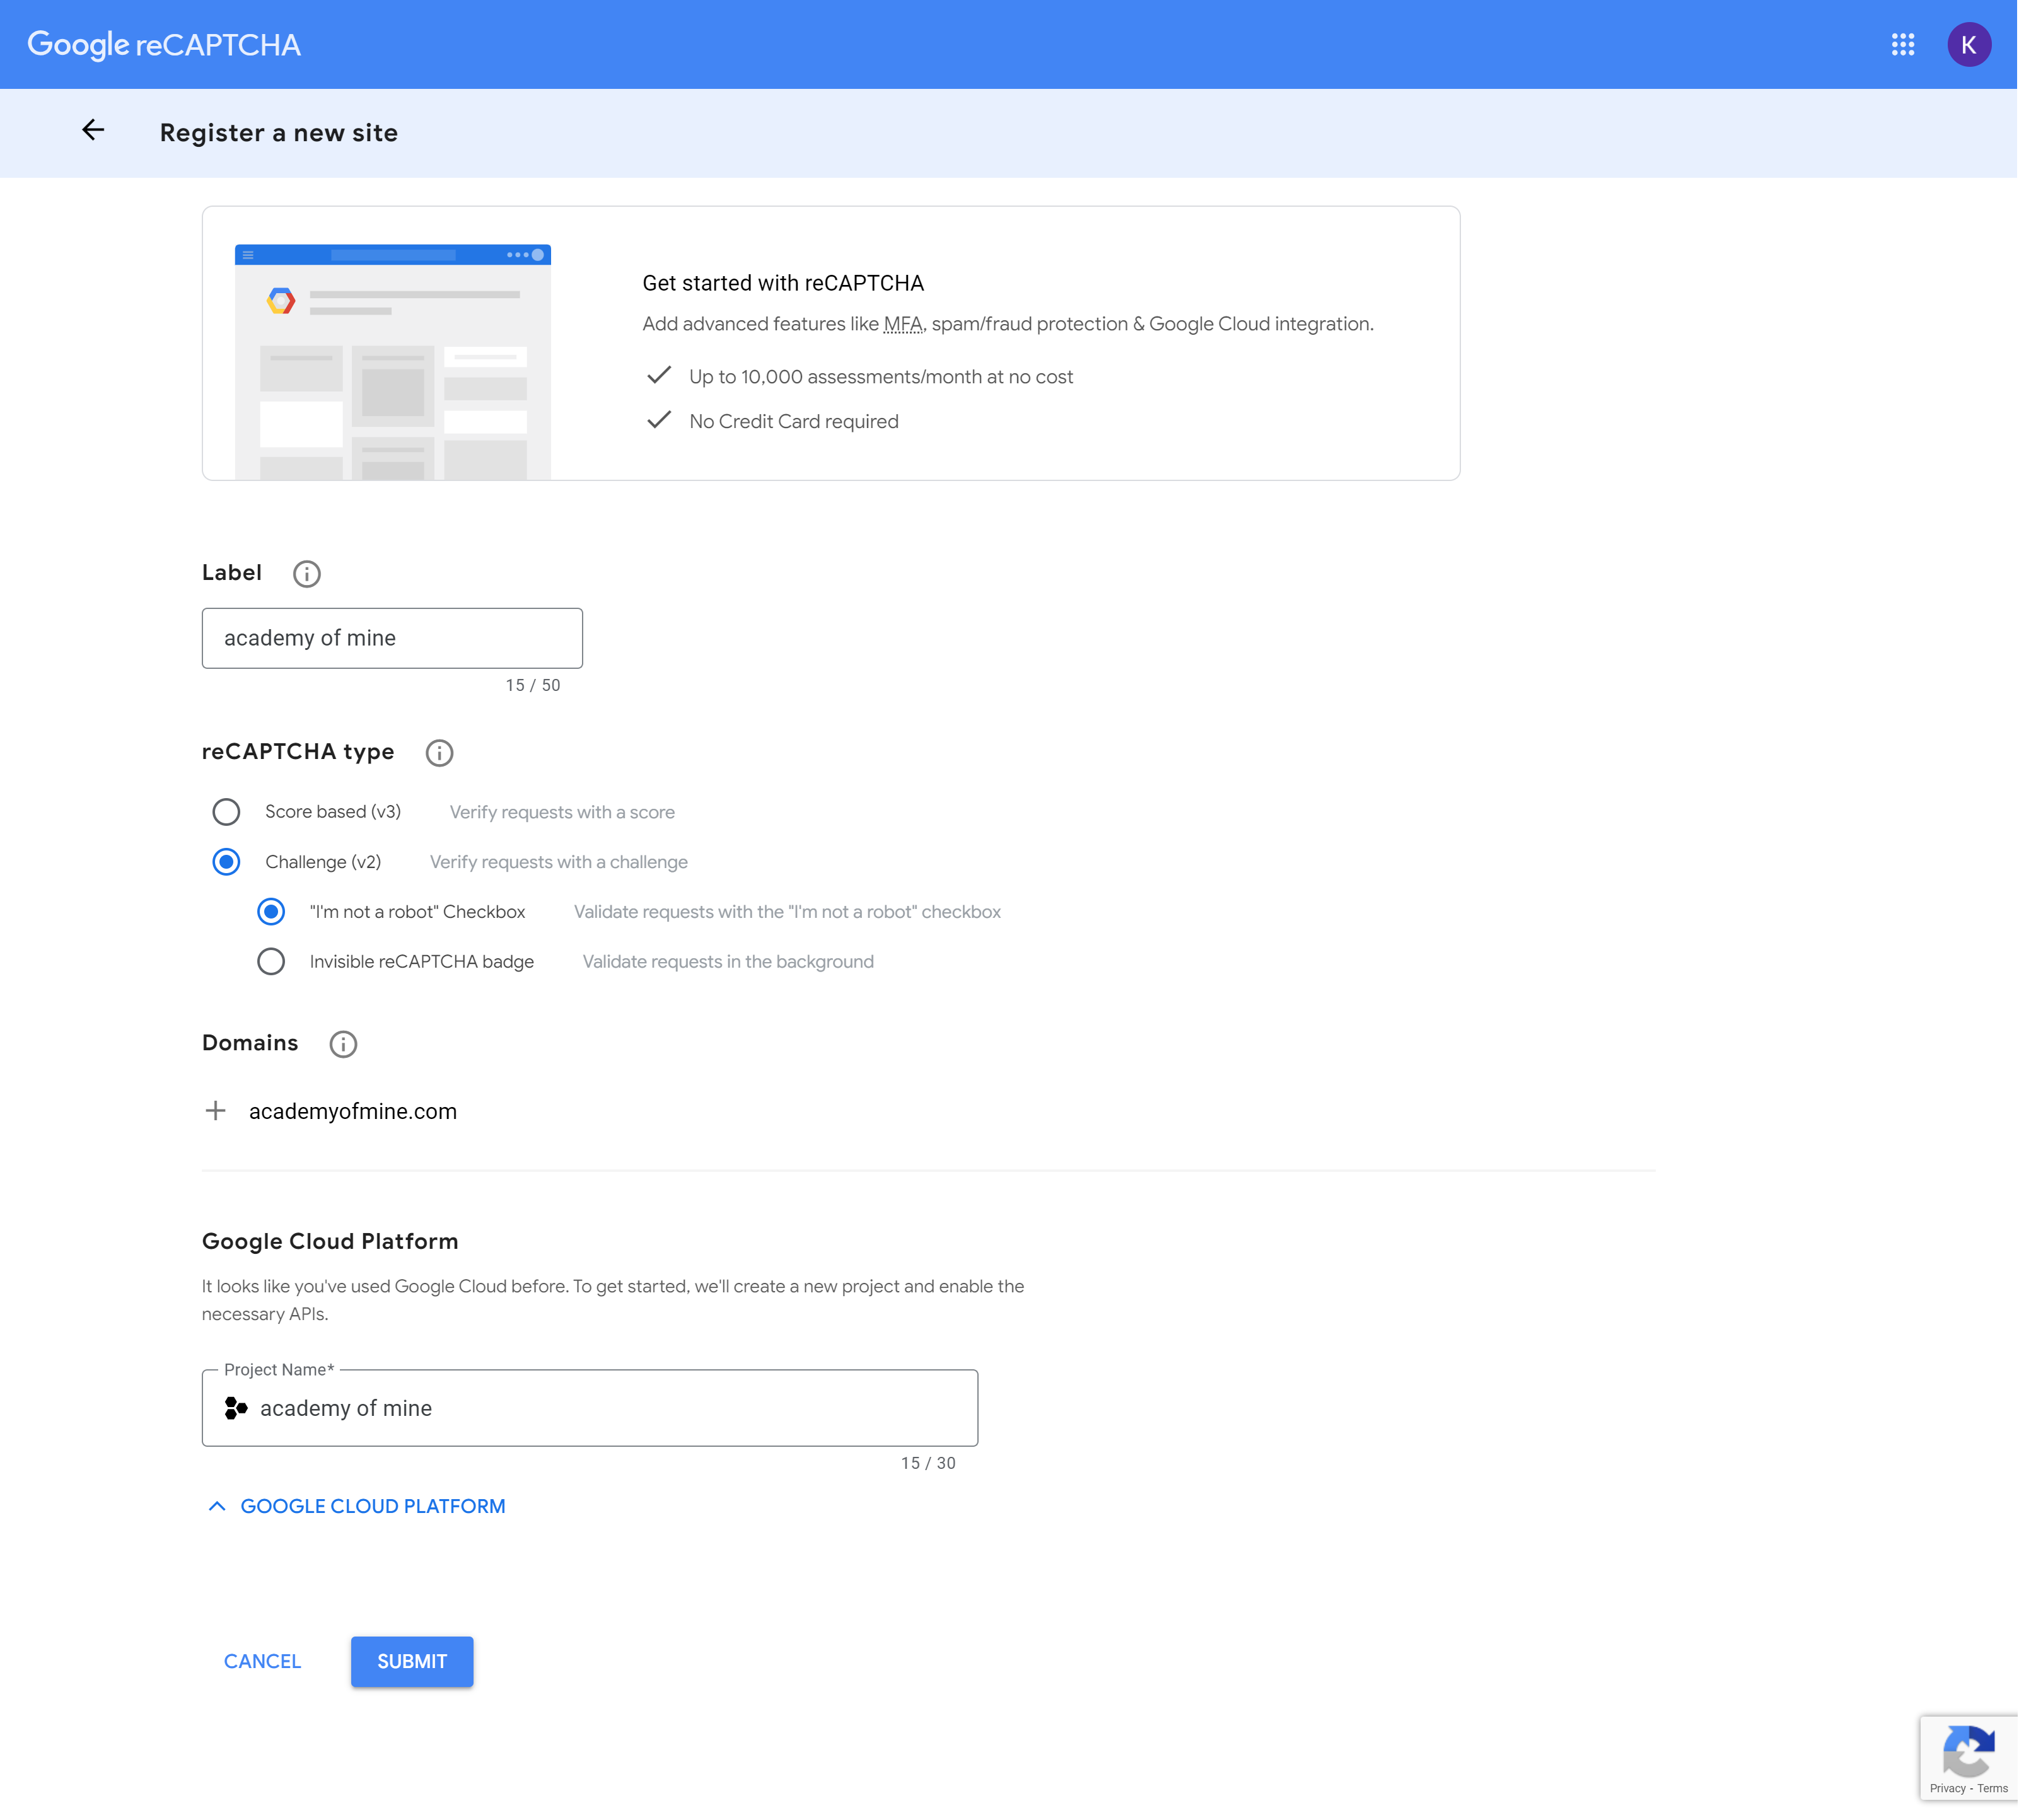
To add Google reCAPTCHA to the registration page, follow these steps:
- Go to the reCAPTCHA Admin Console: https://www.google.com/recaptcha/admin/create.
- Enter the Label: Provide a label to easily identify the site later.
- Select reCAPTCHA Type: Choose Challenge (v2) and select the "I'm not a robot" checkbox option.
- Add Domain: Enter the domain name of the website (e.g., "example.com").
- Set a Project Name: Create a unique project name for better organization and tracking.
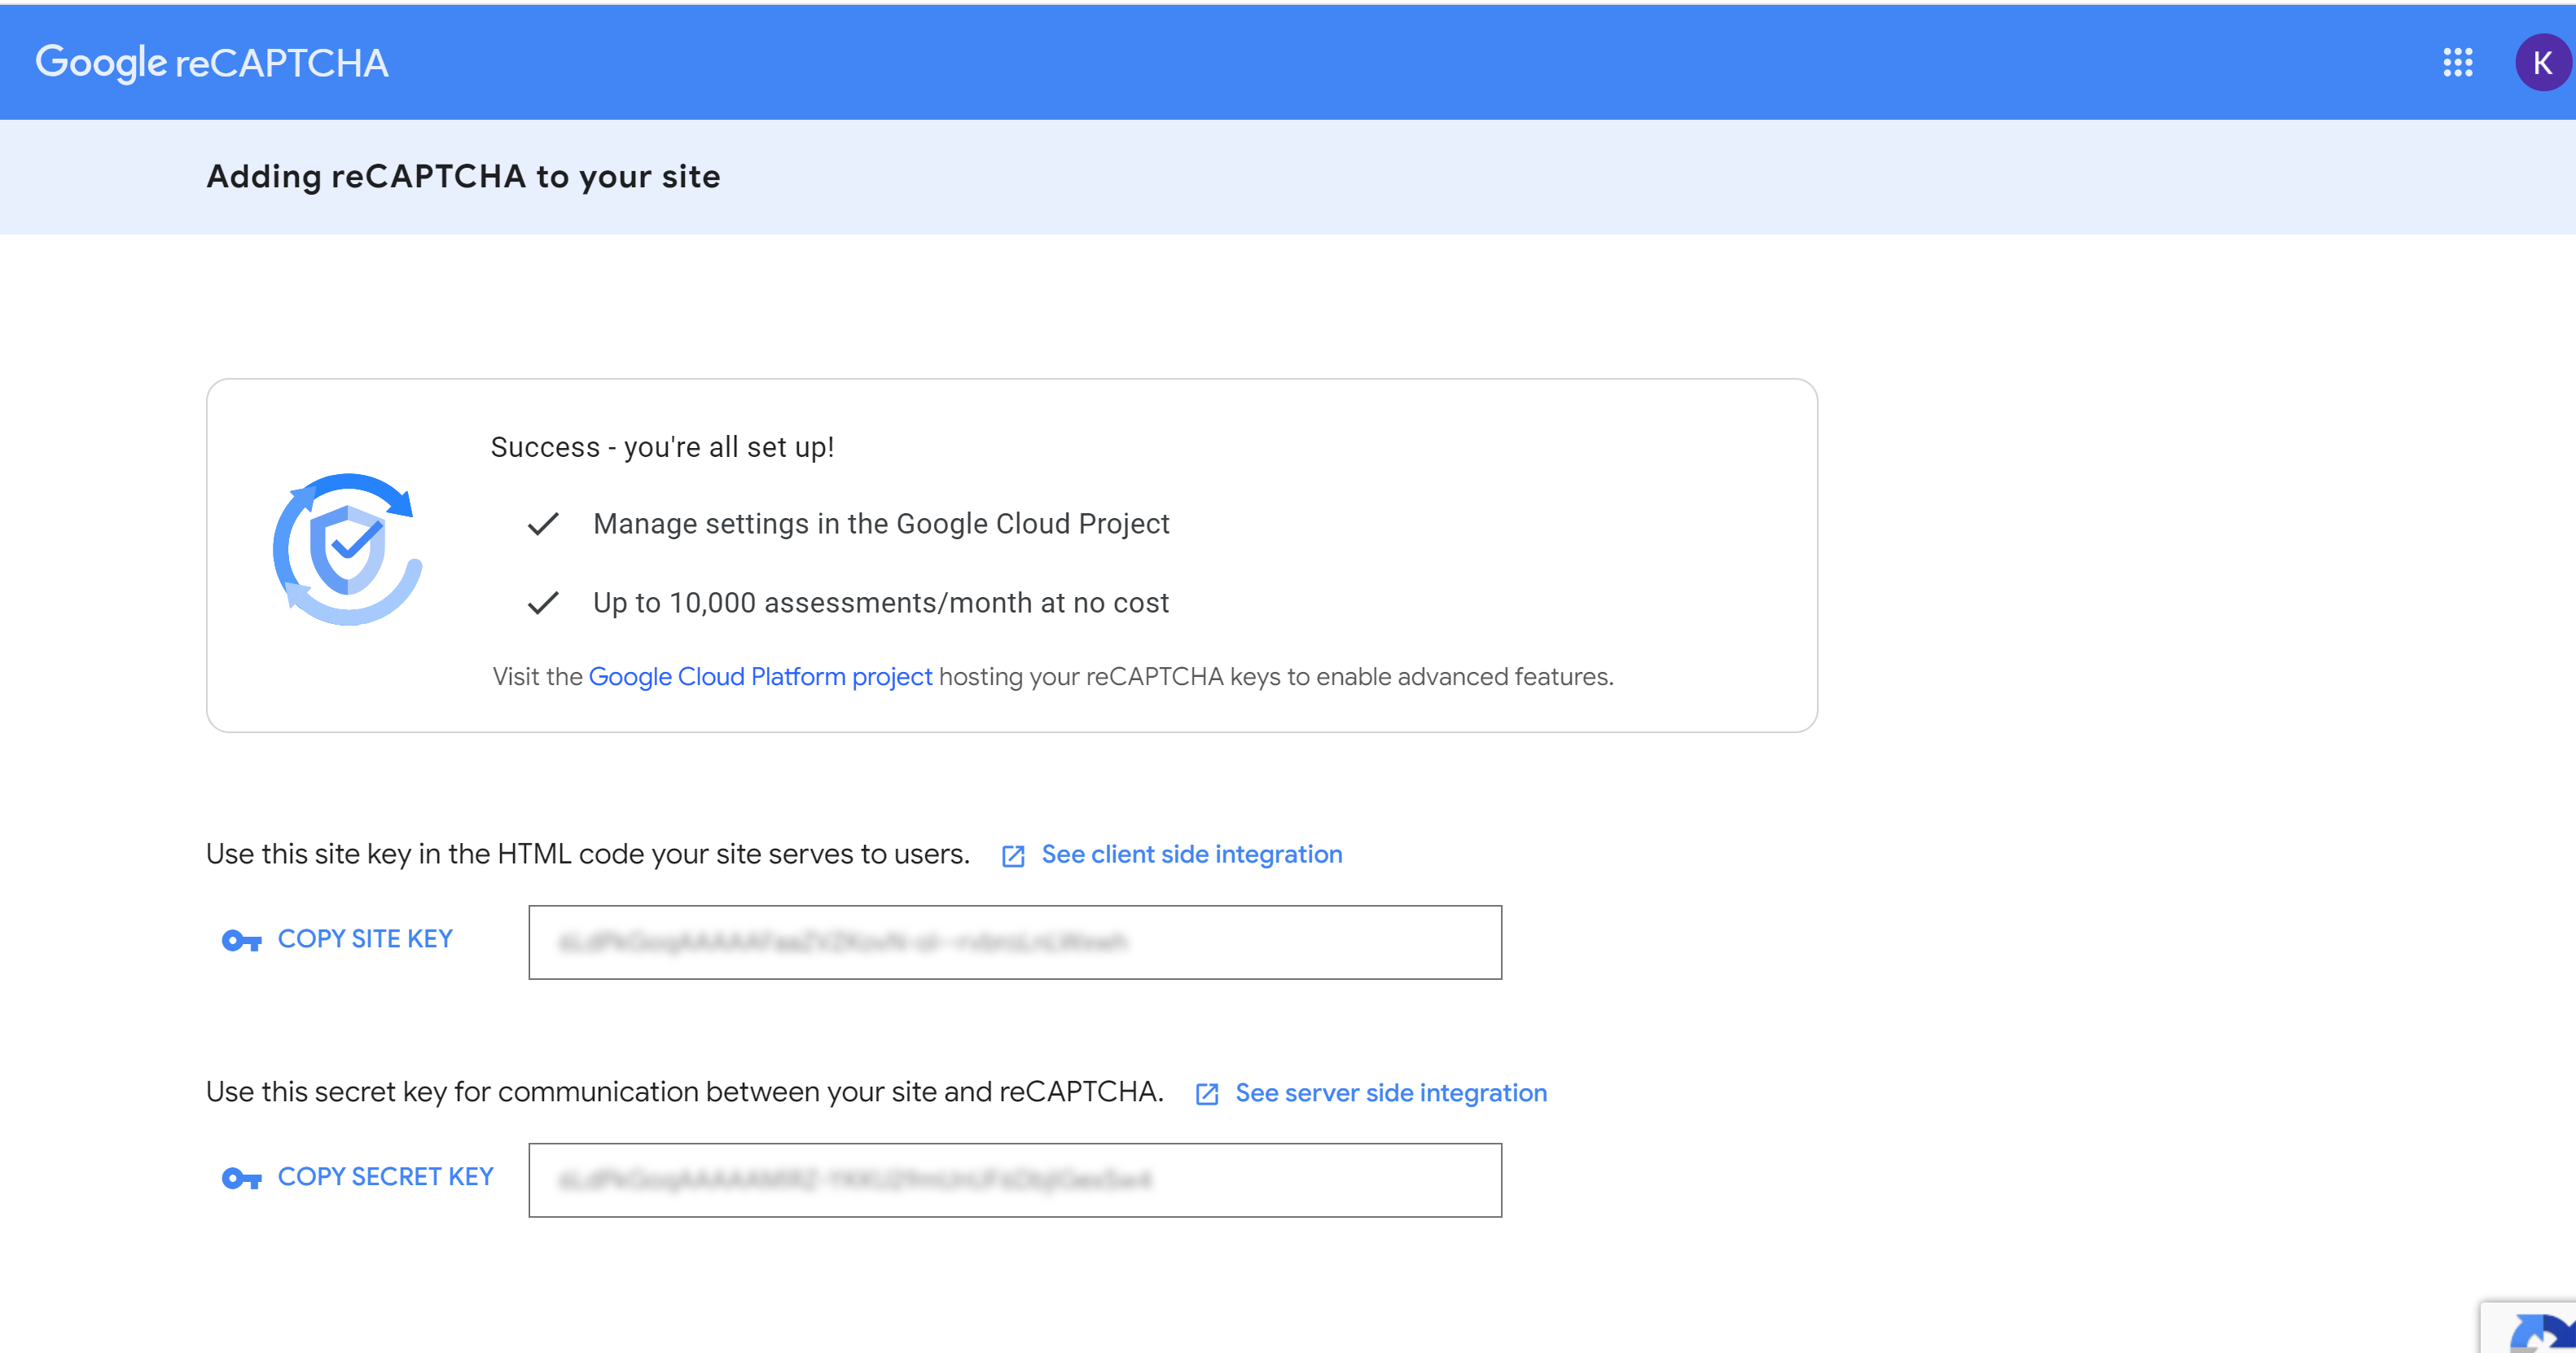
- Submit: After entering all the required details, click Submit to generate the Site Key and Secret Key needed for integration.
These keys will be used to integrate reCAPTCHA into your platform for spam protection.
Copy the Site Key and Secret Key generated during the Google reCAPTCHA setup and store them in a secure location. These keys will be required to integrate reCAPTCHA into the website's settings to activate the security feature. Ensure that they remain confidential and protected for future use.
Once the keys are obtained, follow these steps to enable Google reCAPTCHA:
- Navigate to Settings: Go to the website's admin panel and click on Settings.
- Select General Settings: Under the settings menu, locate and select General.
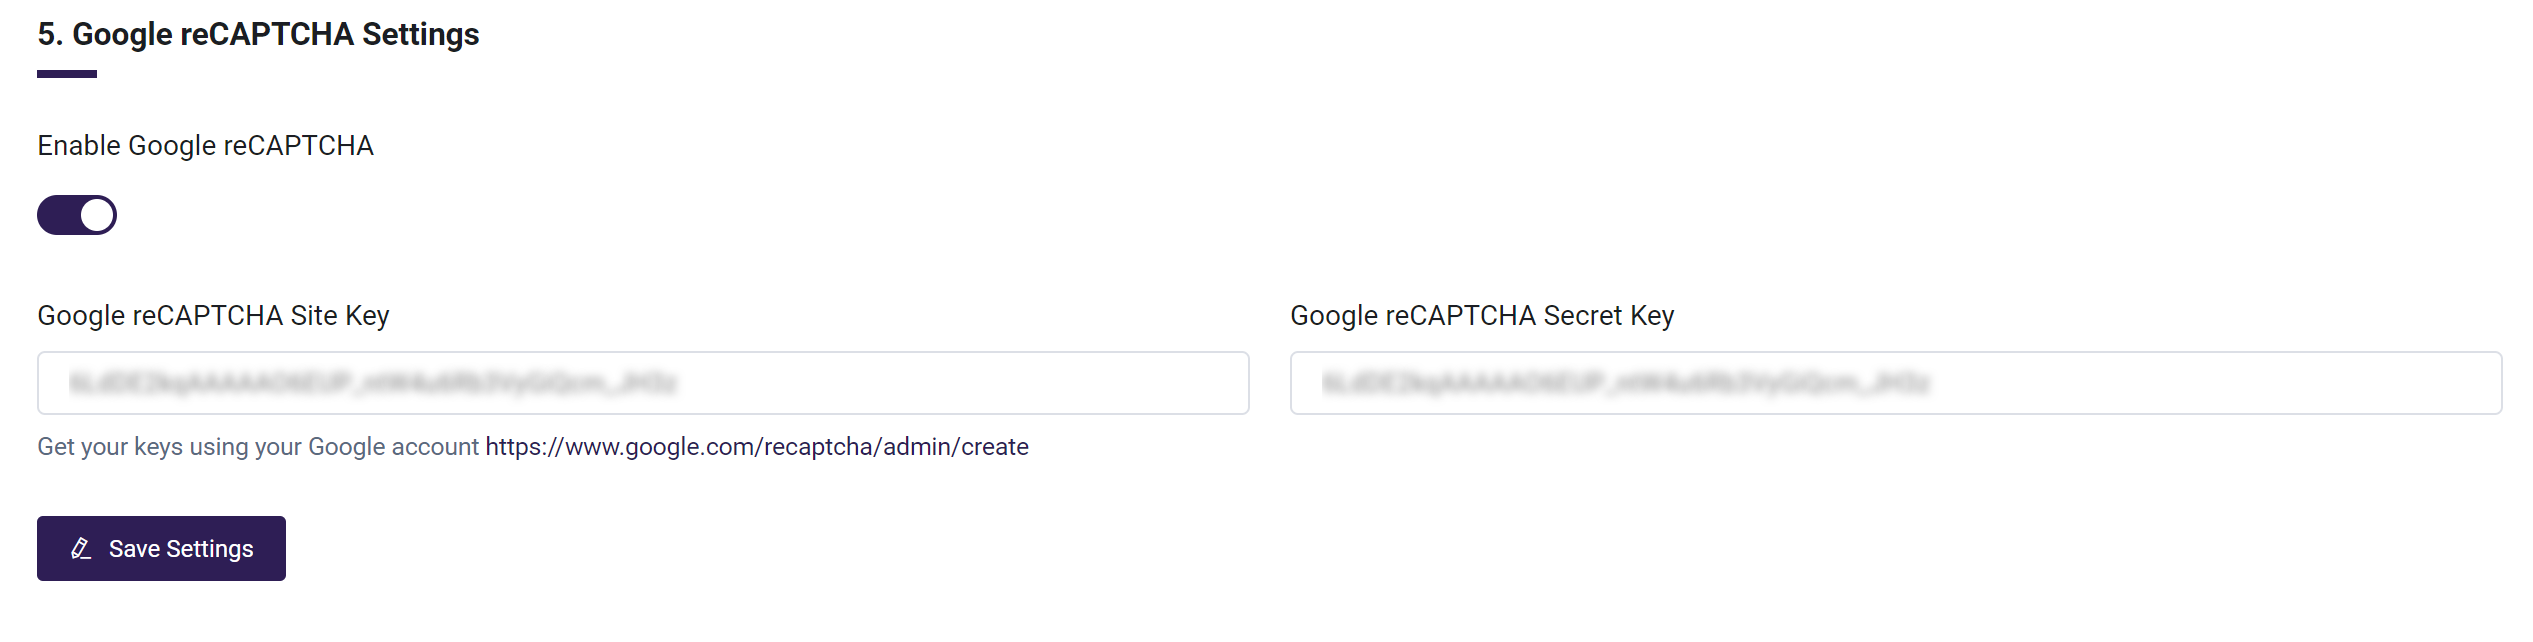
- Google reCAPTCHA Settings: Find the section labeled Google reCAPTCHA Settings.
- Enable reCAPTCHA: Toggle the option to enable Google reCAPTCHA on the registration page.
- Add Keys: Enter the Site Key and Secret Key that is generated from the reCAPTCHA Admin Console.
- Save Settings: Save to apply the changes.
That's it! Google reCAPTCHA is now successfully set up and active on the website, helping to protect your site from spam and bots.
FAQs
-
How can I change the language displayed on my platform?
You can adjust the Site Language in the General Settings. This language will be reflected throughout the platform, ensuring consistency for both internal users and learners.
-
How can I prevent certain emails or domains from registering on my platform?
In the Enter Emails/Domains to be Blocked field, you can specify email addresses or domains to restrict users from registering. This feature helps maintain control over who can access your LMS.
-
How can I change the time zone of my platform?
You can adjust the Time Zone in the General Settings to ensure accurate timestamps for learner progress, activities, certificates, and reports.
-
How can I make my platform content accessible only to specific users?
Enable the Private Site option in General Settings to restrict access to your platform, requiring login for viewing content.
-
How can I change Learner Dashboard view?
You can change it from Site Page Identifications setting under General Settings. You can designate any of the default or custom pages to be the Learner Dashboard.