Creating and Managing Membership Plans
Memberships are a handy way to allow learners access to certain content automatically instead of purchasing many products or being enrolled in multiple courses or learning paths. You can set up different Memberships, and select what content access is assigned to each one.
Let's go through an overview of Memberships, how to create them, and the various ways that users can be added to a Membership.
Membership Overview
If you want to allow learners access to many courses or learning paths all at once, without them needing to purchase or be enrolled in multiple courses or learning paths, Memberships will be a great fit. You can create different Memberships that offer access to certain course or learning path categories, and also have the option to allow access to all course or learning path categories. For example, you may offer an "Elite Membership" that gives access to all your course categories, as well as a "Basic Membership" that has access to select course/learning path categories instead. Memberships are available for learners to purchase as a product via eCommerce, and they can also be added to a membership by you.
There are a few options of course and learning path content access in a membership to consider:
- All categories of courses and/or all categories of learning paths
- Specific course categories and/or specific learning path categories
When creating your membership, keep this in mind and think about what courses or learning paths you want the membership to include. You'll want to make sure that the courses and/or learning paths are part of the category or categories that will be included in the membership. Also note that courses and learning paths do need to be assigned to a category to show up in a membership.
If you need a hand adding courses or learning paths to a category before you create the membership, take a look at the Using Course Categories article or Creating Learning Path Categories articles
Now that you have the background, let's now dive into how to create the memberships!
Creating a Membership
Once you have decided what content access you want a Membership to have, and have the categories set up if needed (as mentioned above), you can get started creating the Membership using these steps:
-
From the Admin Dashboard, click the Users tab and select Memberships
-
Click + Add Membership
-
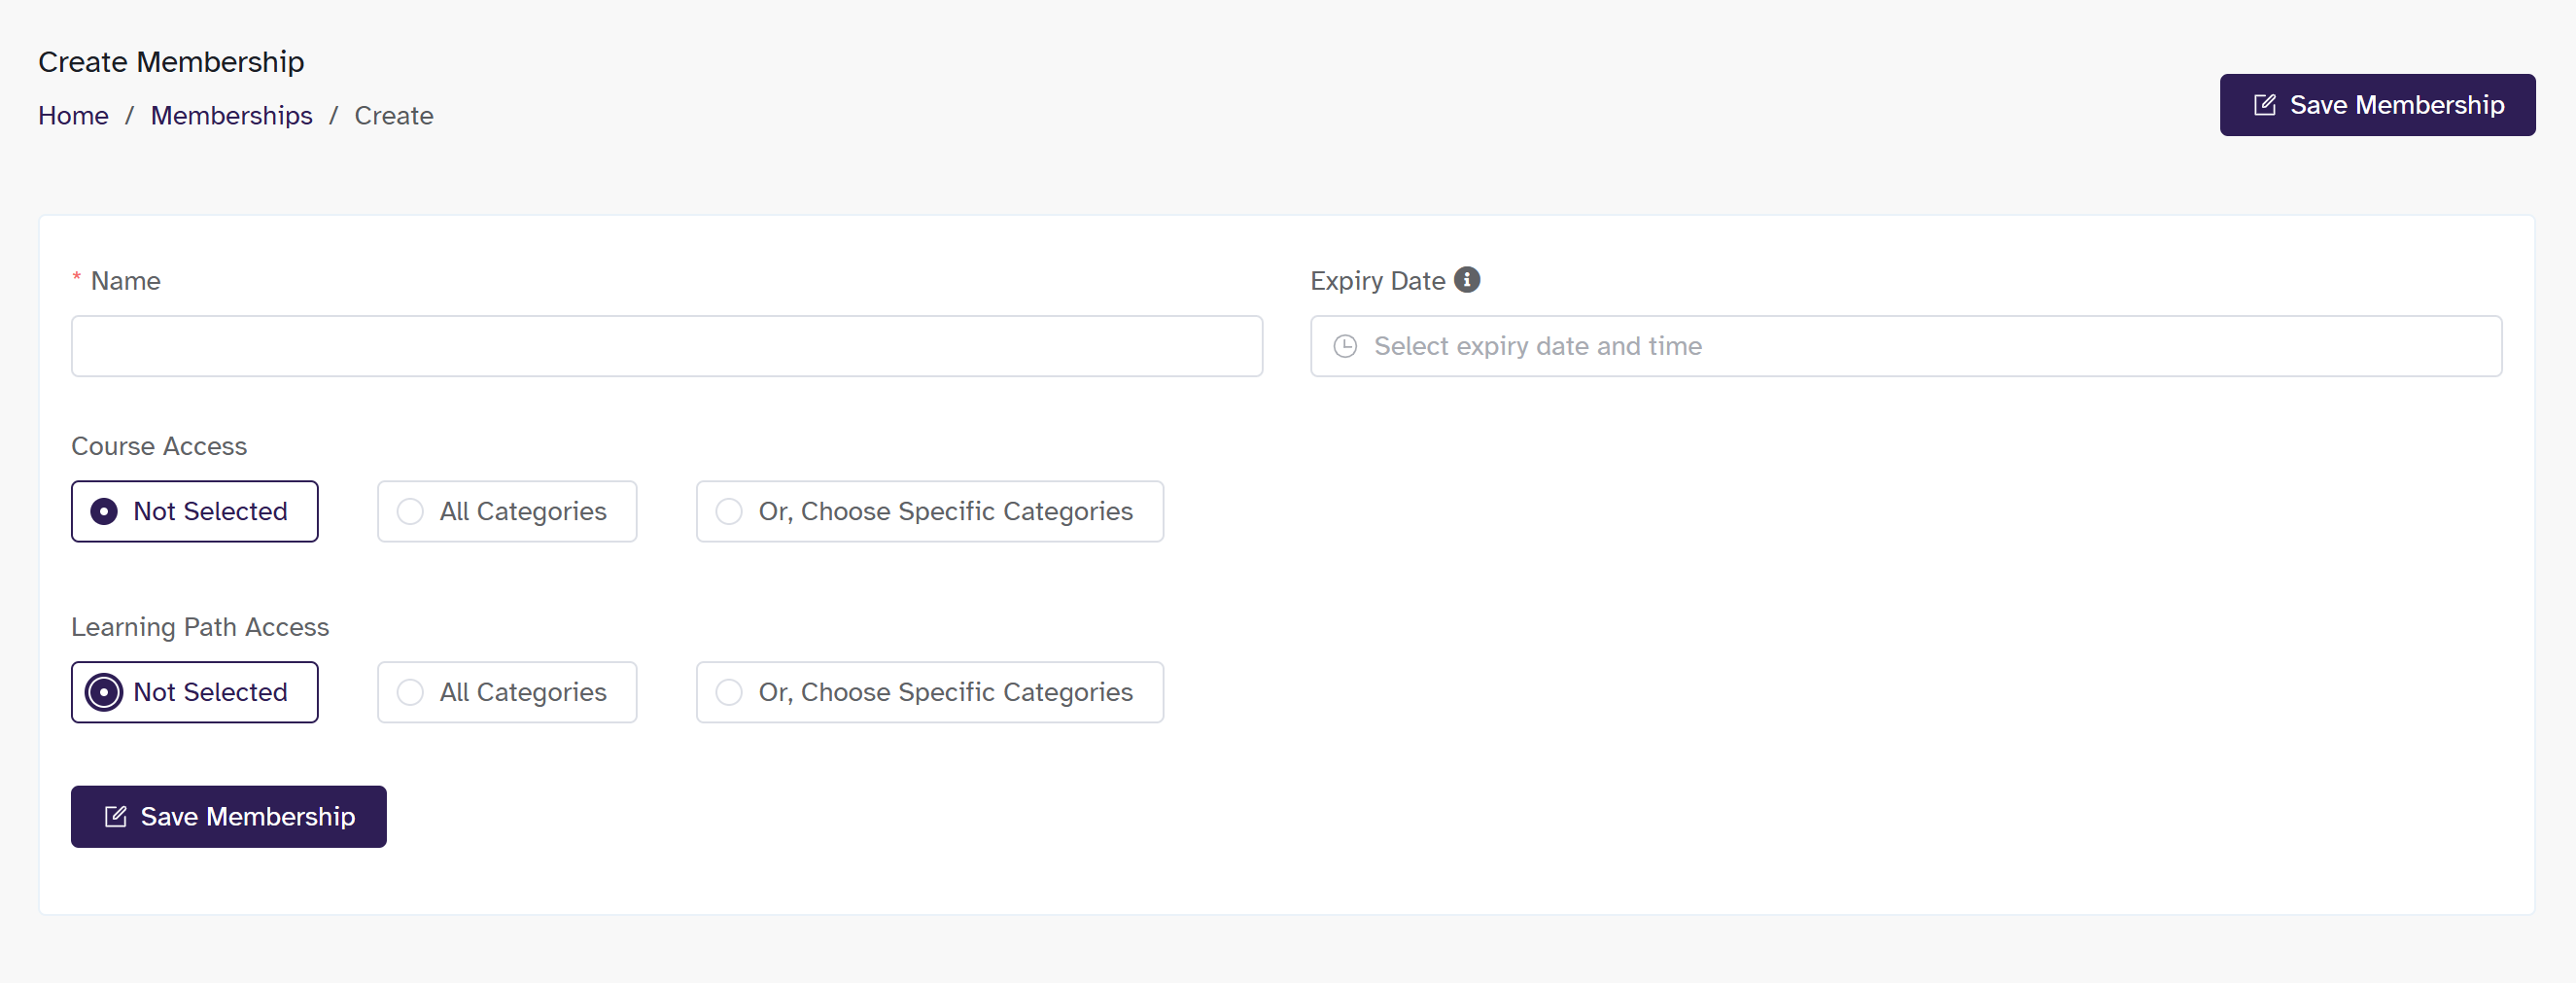
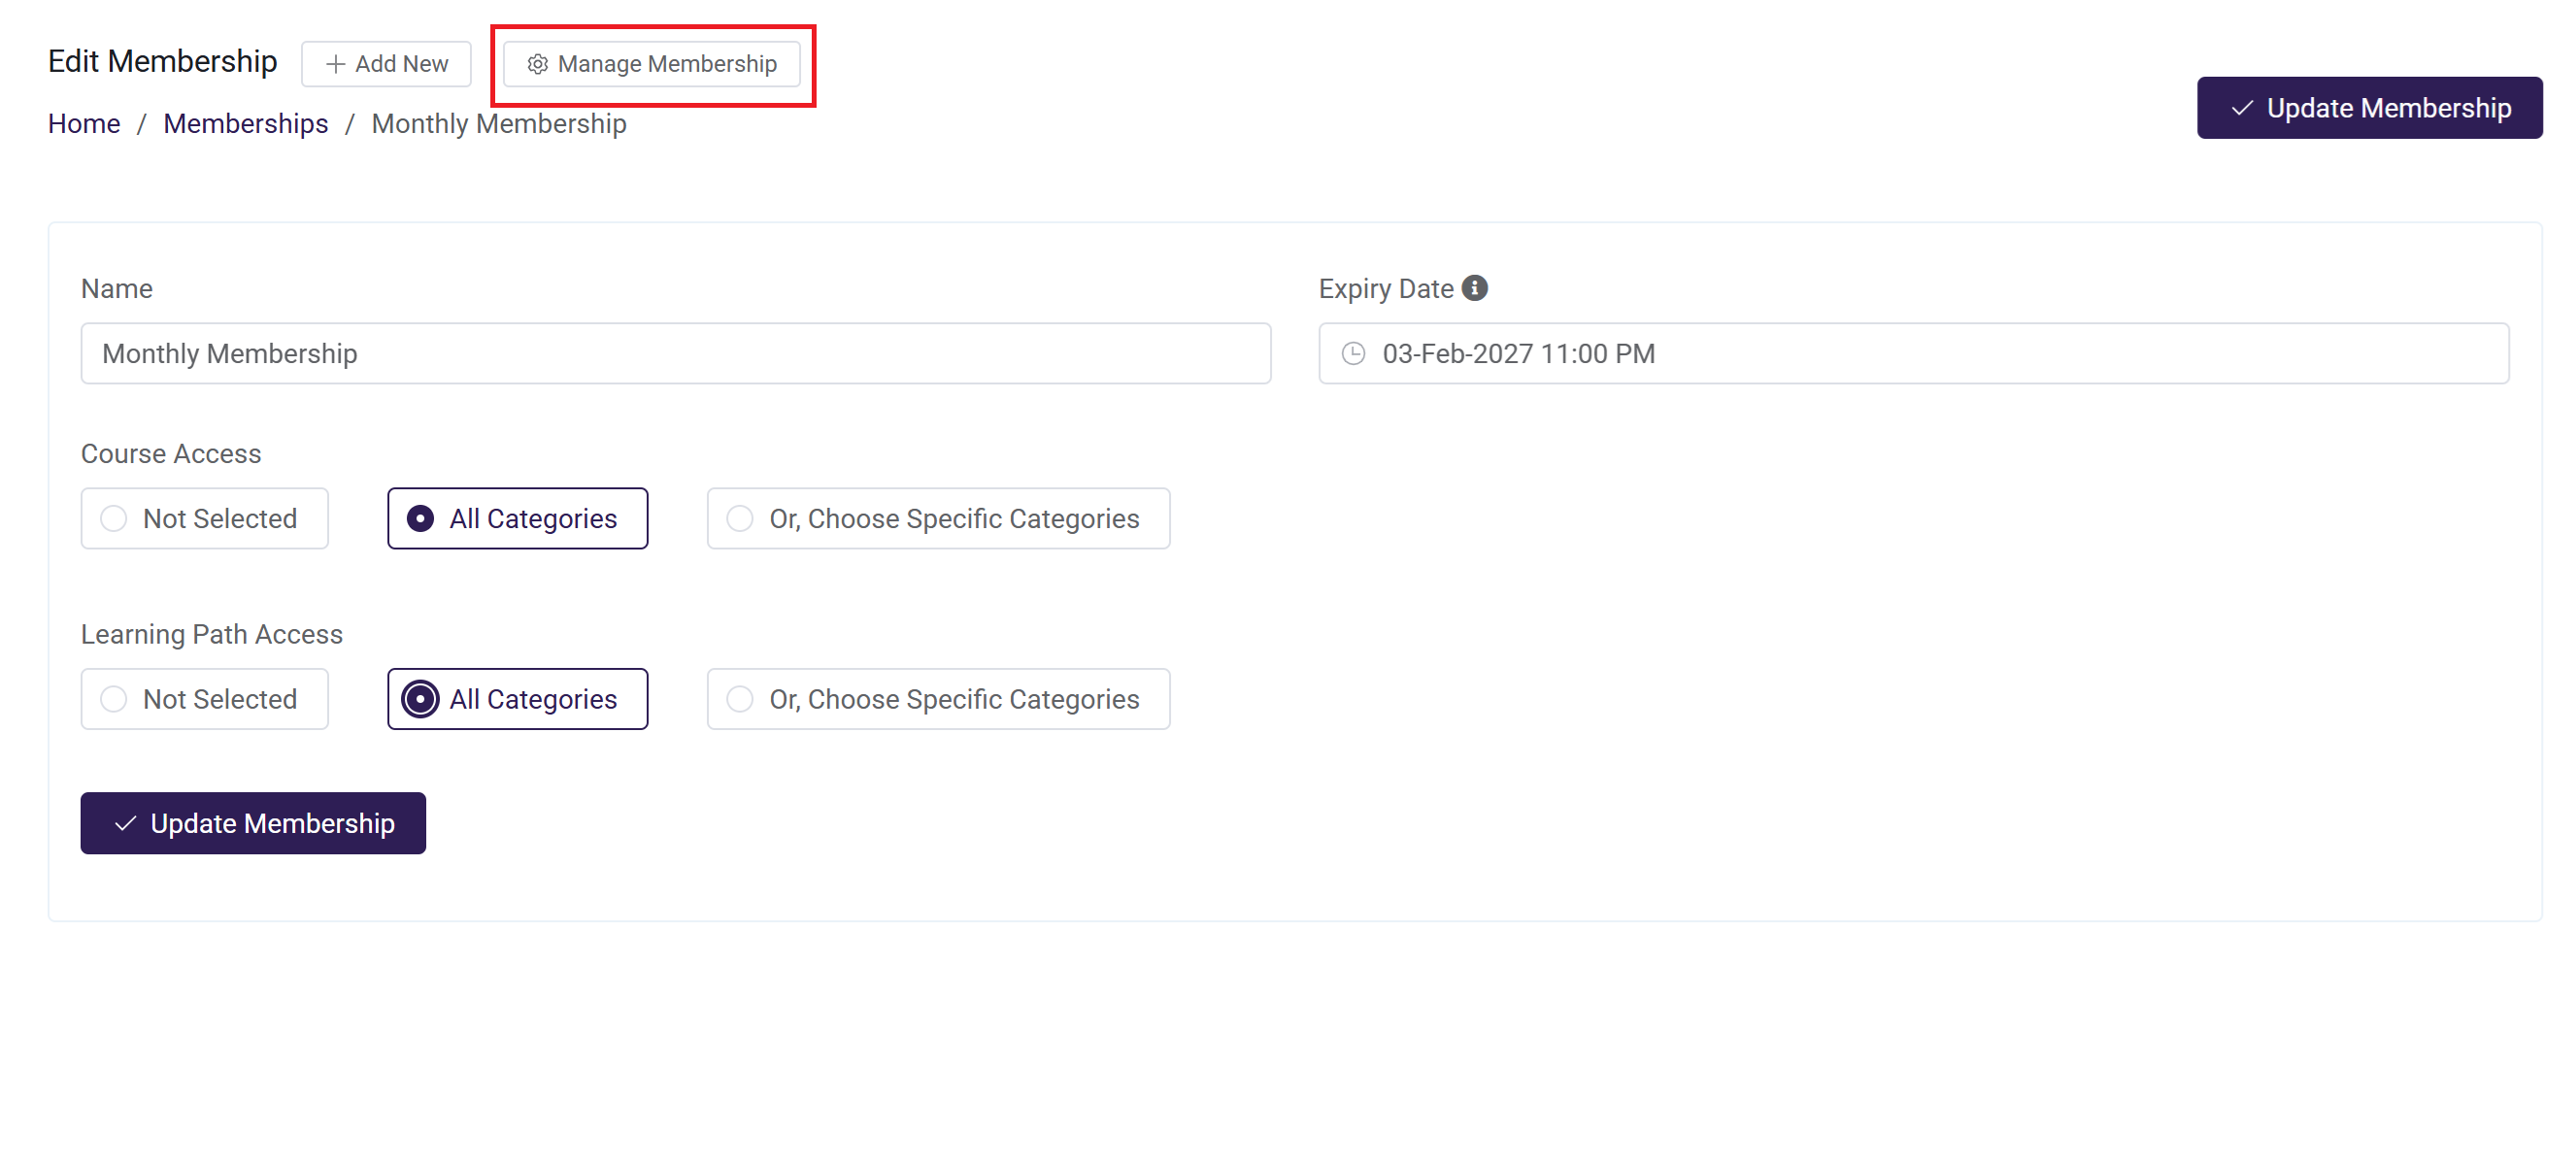
Enter the name of the Membership and if you would like it to expire at any point (leave it blank if the membership won't expire)
-
Now, select what content access this Membership will have
- Check "All Categories" in the Course Access and/or Learning Path Access for access to all your course or learning path categories--remember, courses/learning paths will still need to be tagged with a category to be included in this
- Or, you can choose specific categories of courses and/or learning paths by selecting "Choose Specific Categories" and then selecting the desired categories from the dropdown menu. You may select more than one category
- Choose "Not Selected" if you don't wish to include courses or learning paths in the Membership
-
Select Save Membership when you're done
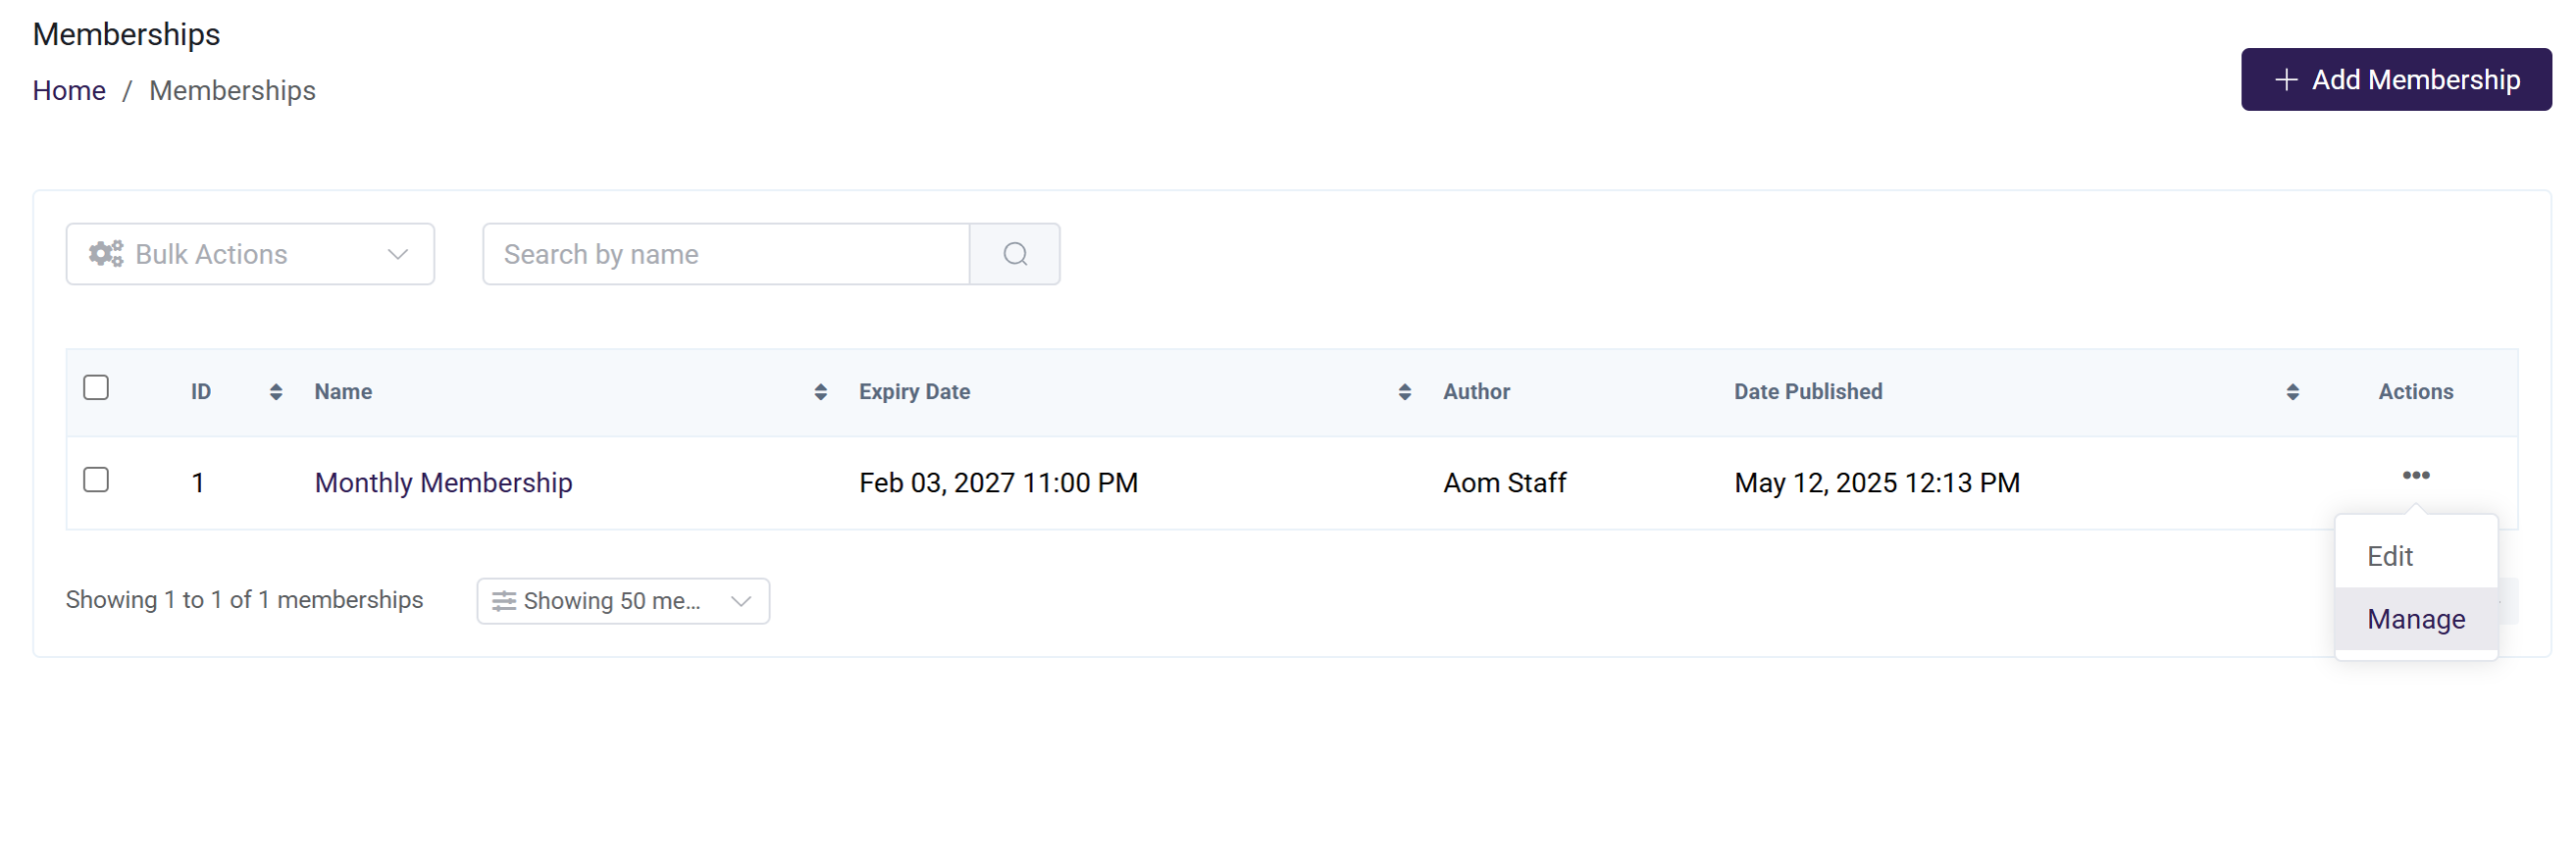
Manage Membership
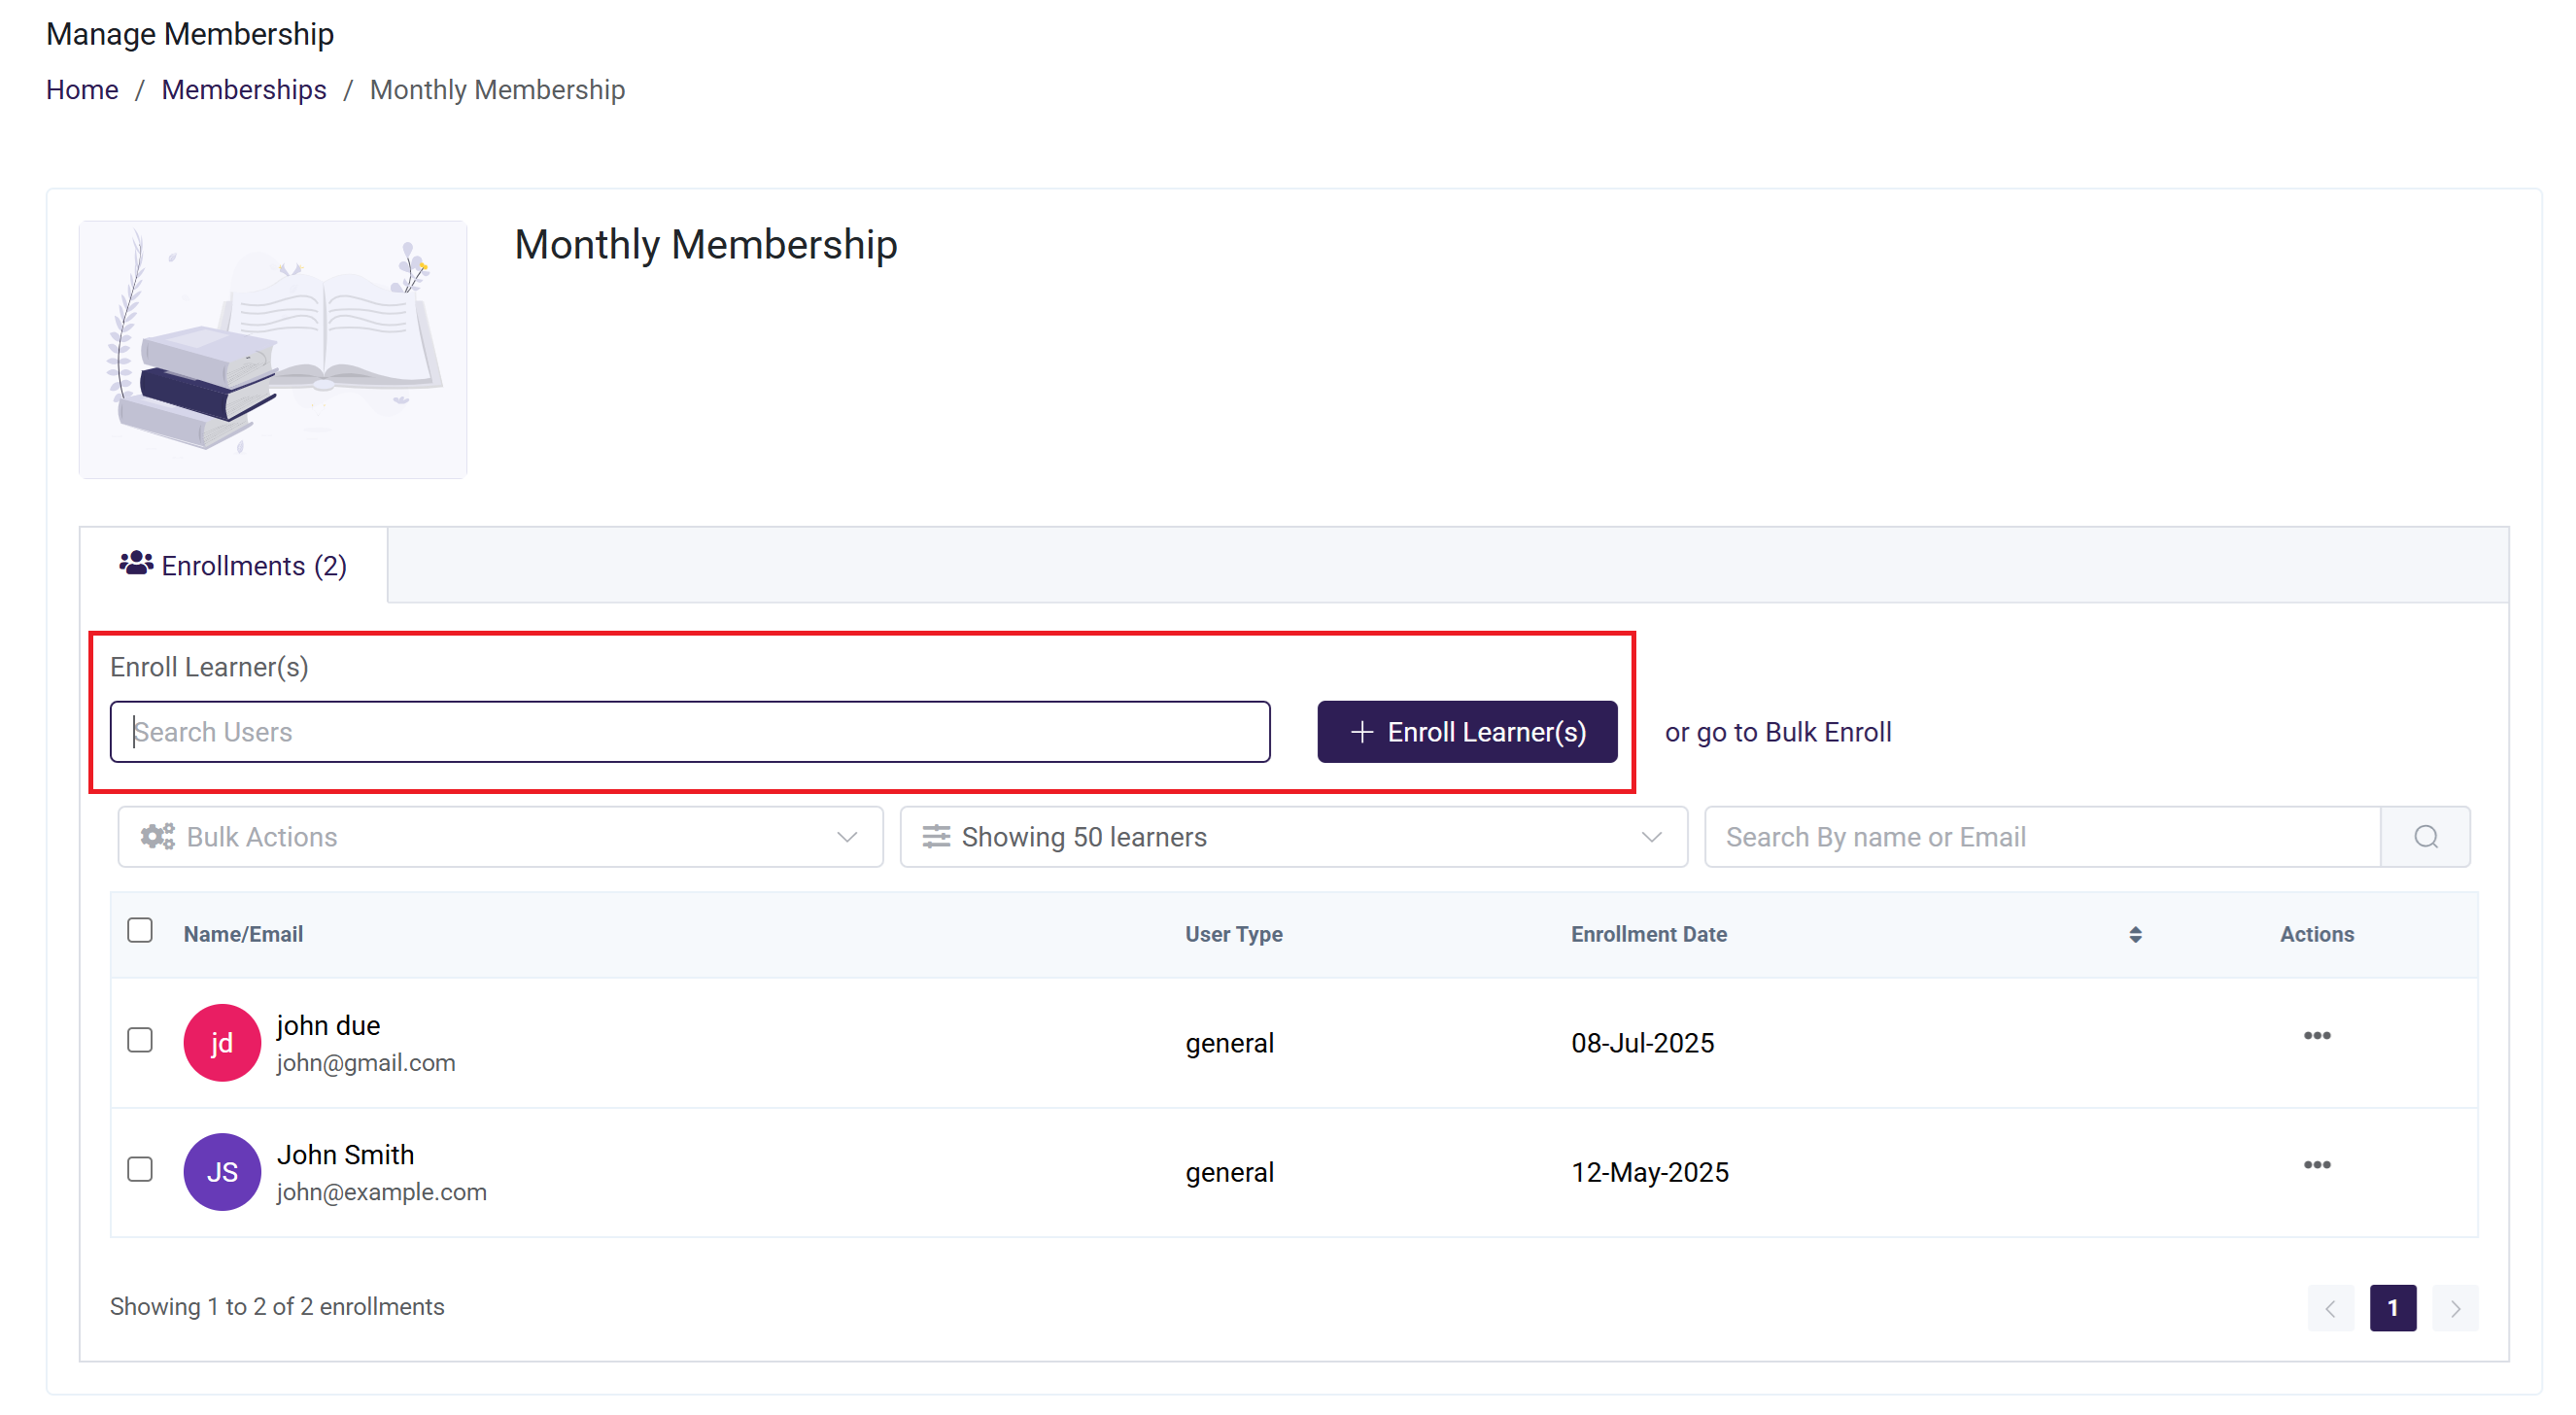
The Manage Membership enables owners(or authorized staff) to enroll learners, remove learners, and modify learners’ membership expiration dates.
-
Enroll Learner(s):
- In the learner search field, enter the name or email address of the learner you wish to enroll.
- Select the learner from the search results. You may select multiple learners.
- Click the Enroll Learner button to confirm and complete the enrollment. The selected learners will be successfully enrolled in the membership.
-
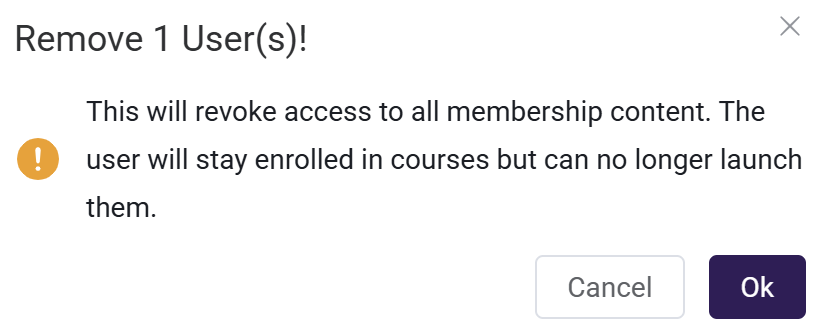
Remove Learner(s): When a learner is removed from a membership, all content that user was enrolled through that membership will be automatically revoked.
This means:
- The learner will lose access to all courses and learning paths assigned via that membership.
- Any in-progress content will no longer be accessible.
- The learner will not be able to view, continue, or complete the revoked courses.
To Remove a Learner, Follow the Steps Below:
- Click the three dots (...) next to the learner’s name and select Remove. The learner will be removed from the membership.
- A pop will appear that confirm whether you want to remove , click ok otherwise you can cancel your action.
-
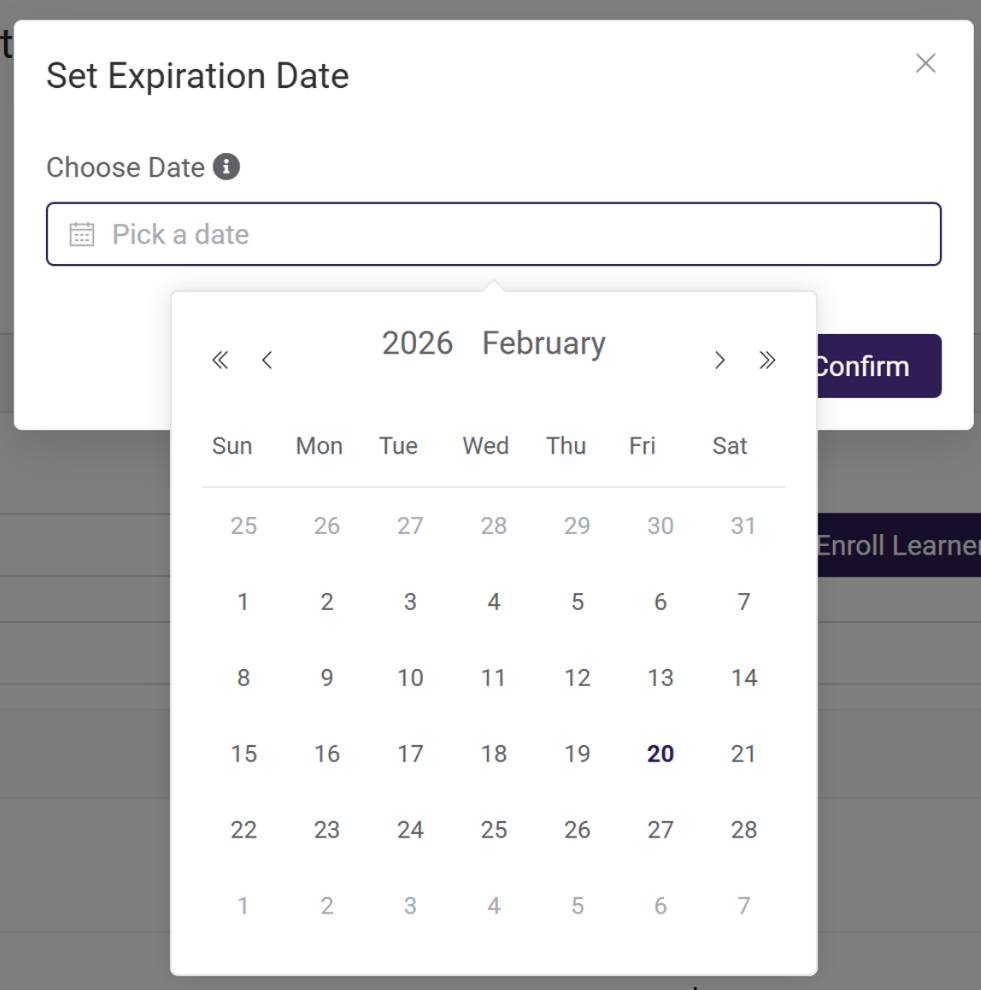
Update Expiration Date:
- Click the three dots (...) next to the learner’s name and select Update Expiration Date. Click on Bulk Actions, then select Update Expiration Date from the dropdown options.
- A confirmation pop-up will appear allowing you to select the new expiration date. Click Confirm to apply the changes, or click Cancel to discard the action.
4. Bulk Actions: The Bulk Actions feature allows owner or staff to perform actions on multiple learners at once. This helps save time and ensures efficient membership management. Available bulk options include Remove and Update Expiration Date.
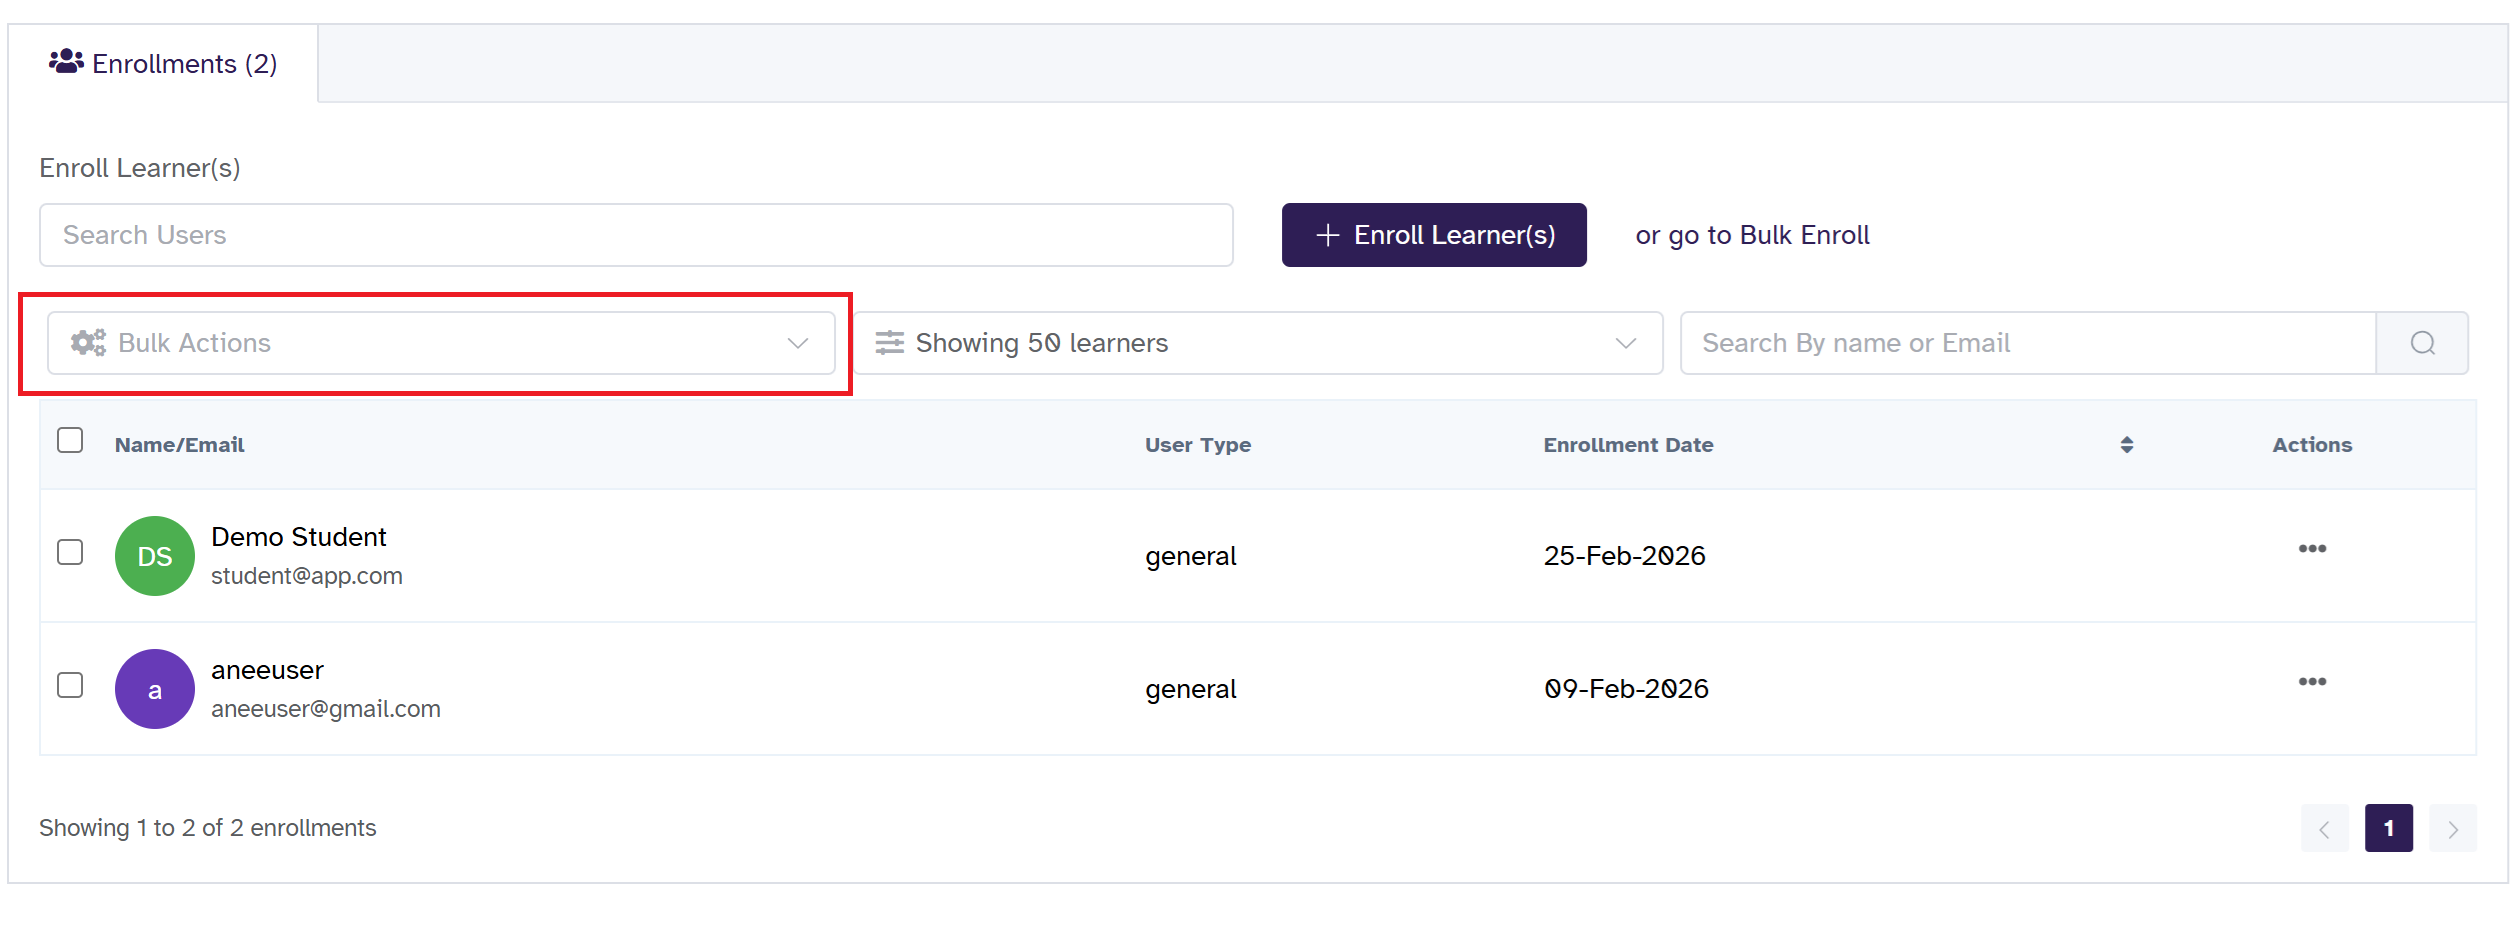
How to Use Bulk Actions:
-
Use the checkbox next to each learner’s name to select one or more learners.
-
Click on the Bulk Actions dropdown located above the learners list.
-
A dropdown will appear displaying the available actions.
-
Choose an Action
- Remove: Select Remove to remove the selected learners from the membership. A pop will appear that confirm whether you want to remove , click ok otherwise you can cancel your action.
- Update Expiration Date: Select Update Expiration Date to modify the membership expiration date for the selected learners. A confirmation pop-up will appear allowing you to select the new expiration date. Click Confirm to apply the changes, or click Cancel to discard the action.
Adding Users to Membership Plans
Once the Membership has been created, there are a few ways that a learners or user can be added to a membership plan. They can be added individually, via the bulk upload function, or they can purchase a product that includes that Membership via our eCommerce tool. Note that a user can only have one Membership at a time. Let's take a look at each of these options.
Adding a Single User to a Membership Plan Manually
If you would like to manually add an individual user to a membership plan, there are two ways to enroll a user into a membership:
-
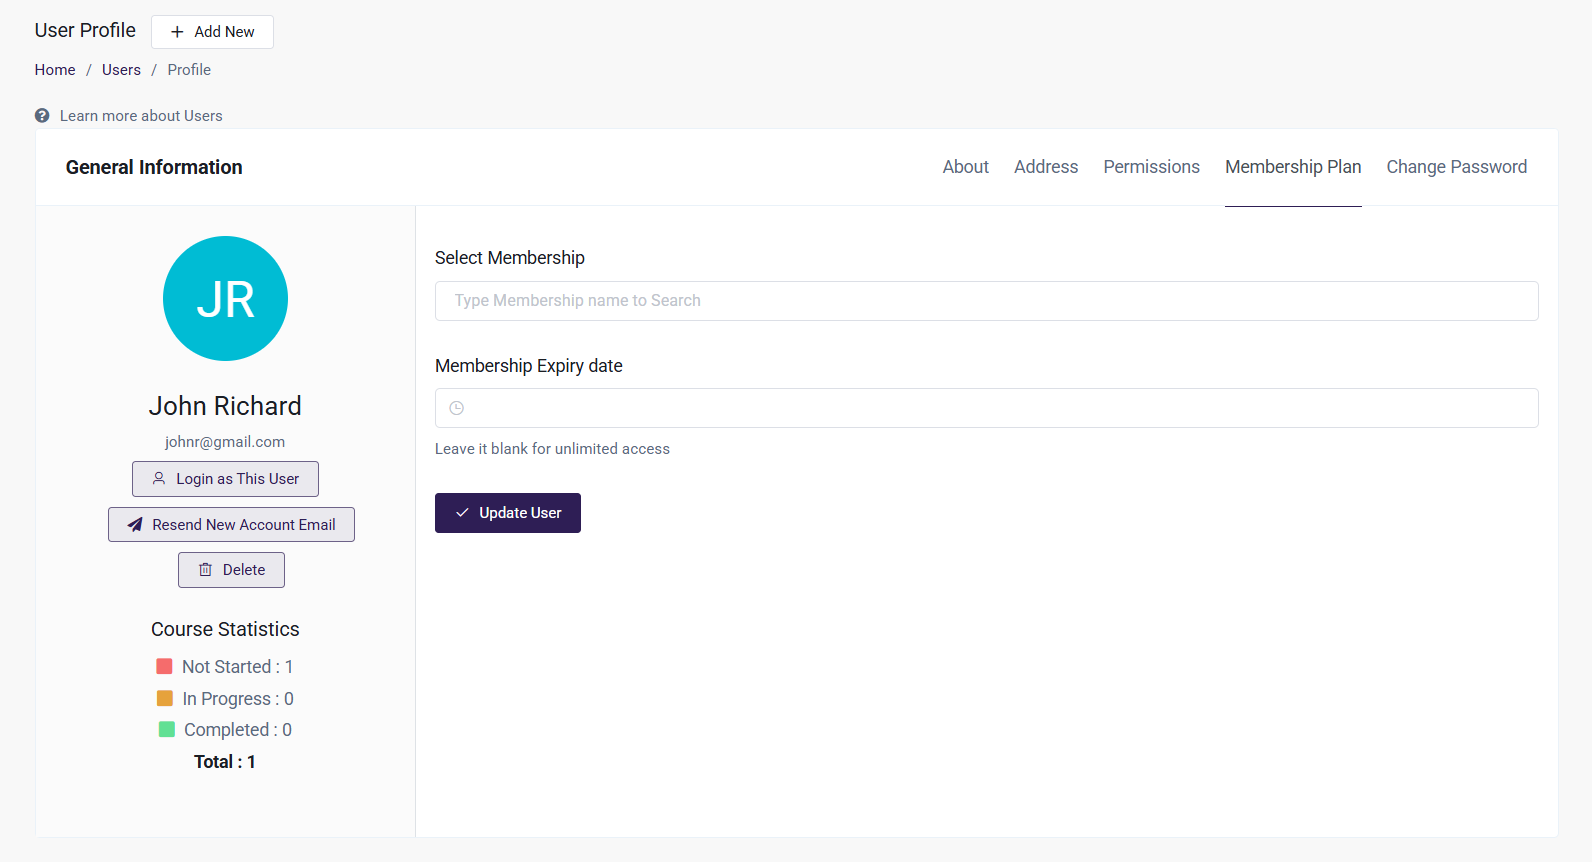
From the Users Menu
- From the Admin Dashboard, select the Users tab and choose the user from the list
- Select Membership Plan
- Enter the Membership you would like to add them to, and add an expiry date if you'd like
- Click Update User to save this plan to their user profile, and give them access to what the Membership entails
-
From the Membership Menu
- From the Admin Dashboard, navigate to the Memberships tab and open Manage Membership from the list.
- In the learner search field, enter the name or email address of the learner you wish to enroll.
- Select the learner from the search results. You may select multiple learners if required.
- Click the Enroll Learner button to confirm and complete the enrollment.The selected learners will be successfully enrolled in the membership.
Bulk Uploading Users to a Membership Plan
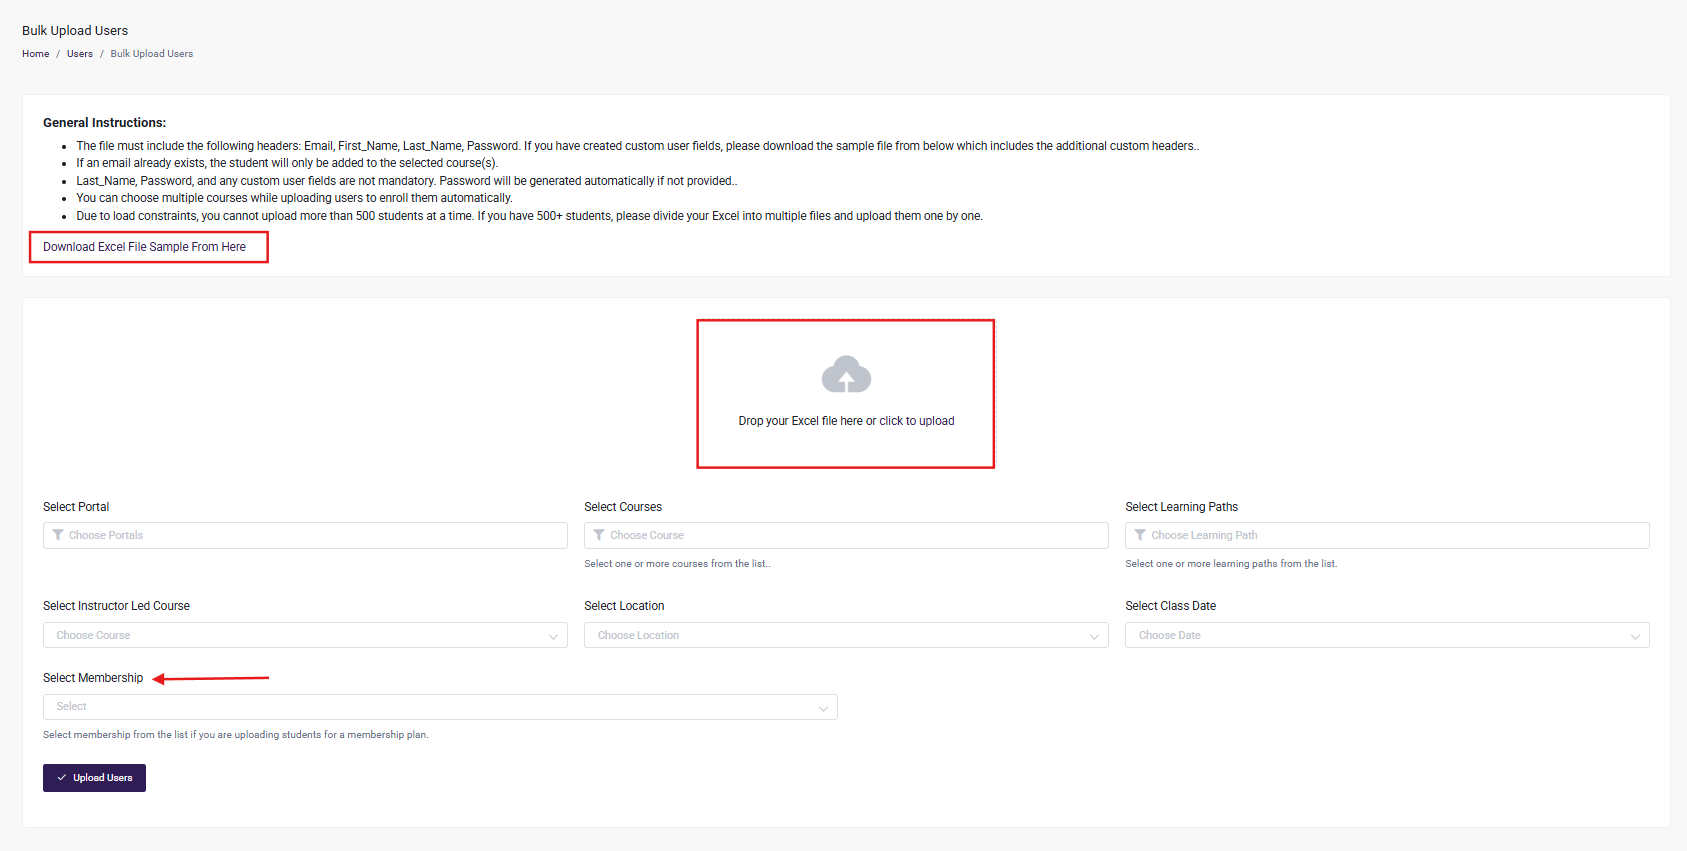
If you have many users to add that will be a part of a Membership Plan, you can use the bulk upload and automatically add them to a Membership in one fell swoop by following these steps:
- From the Admin Dashboard, choose the Users tab and Import user and then select Bulk Upload
- Drop your Excel file with the users in the upload box, or click to upload
- Select "Select Membership" dropdown
- Choose what Membership Plan you would like the users to be added to from the dropdown menu
- Click Upload Users
Setting up a Membership for Purchase by a User
You can also set up a product that allows content access based on a Membership. With this, users will be able to purchase this product, and will have access to the content based on the membership tied to the product. Here's how to get that set up:
-
From the Admin Dashboard, select the eCommerce tab and choose Products
-
Click + Add Product
-
Choose if it will be a Simple Product Type or a Subscription Product Type
-
Enter in the Product details, such as the Title, Description, Category, Featured Image.
-
From the Price menu, enter the price
-
Add a Sale if desired, and a Free Trial if if's a Subscription Product Type. From the Availability tab, select the status and add an expiry date for the Product if required
-
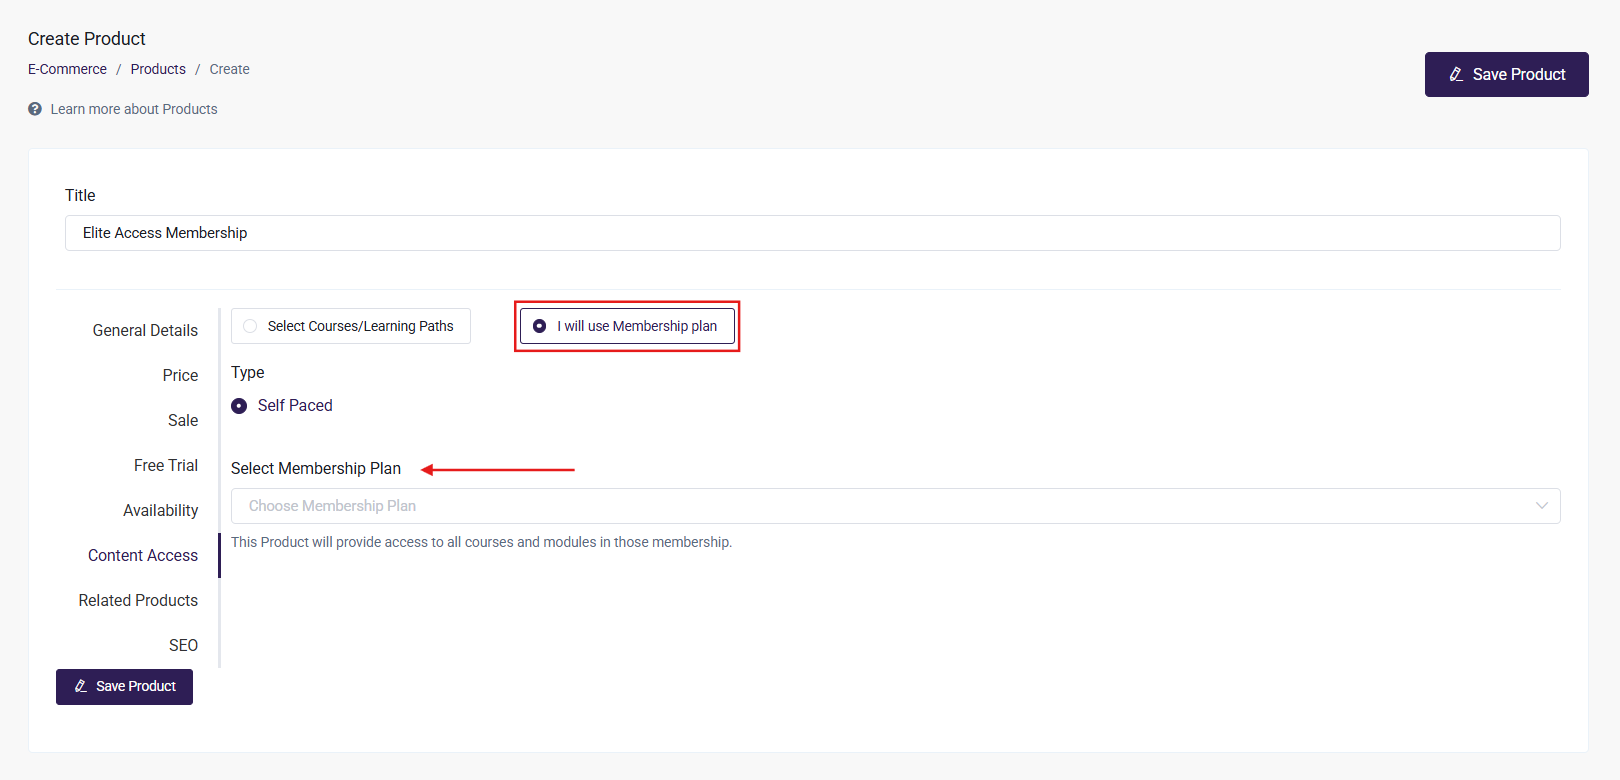
Select the Content Access tab--this is where we will add the Membership for this Product
- Click "I will use Membership plan"
- Select the Membership plan from the dropdown menu. This will give learners access to the courses and learning paths included in the Membership
-
Add an SEO description if needed
-
Click Save Product
Now, learners will be able to purchase this Membership as a product by walking through Checkout, as laid out in this article: Navigating the Checkout Process. Once they purchase that Membership, as we have discussed, they will have access to all the content assigned to that particular Membership.
For example, here is an example Course Catalog that a learner would see that includes a Product called Basic Membership:
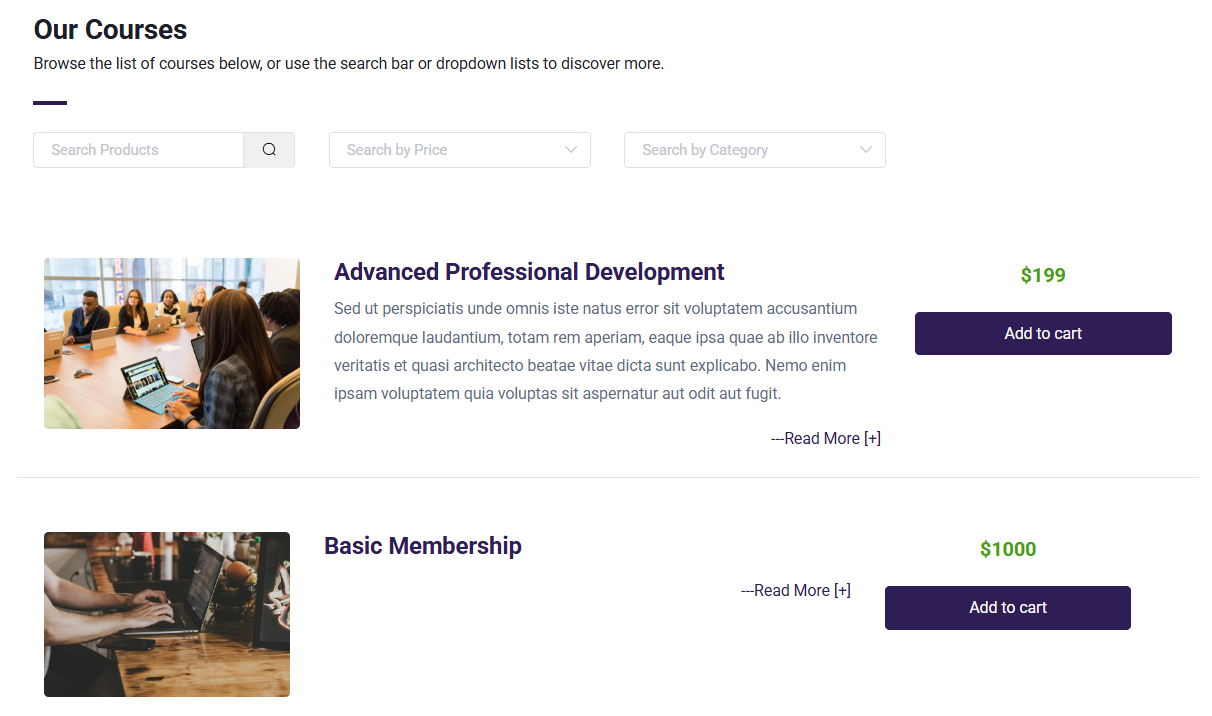
The learner would then add that Product to their cart, and complete Checkout to gain access to the Membership.
Portals and Membership Plans
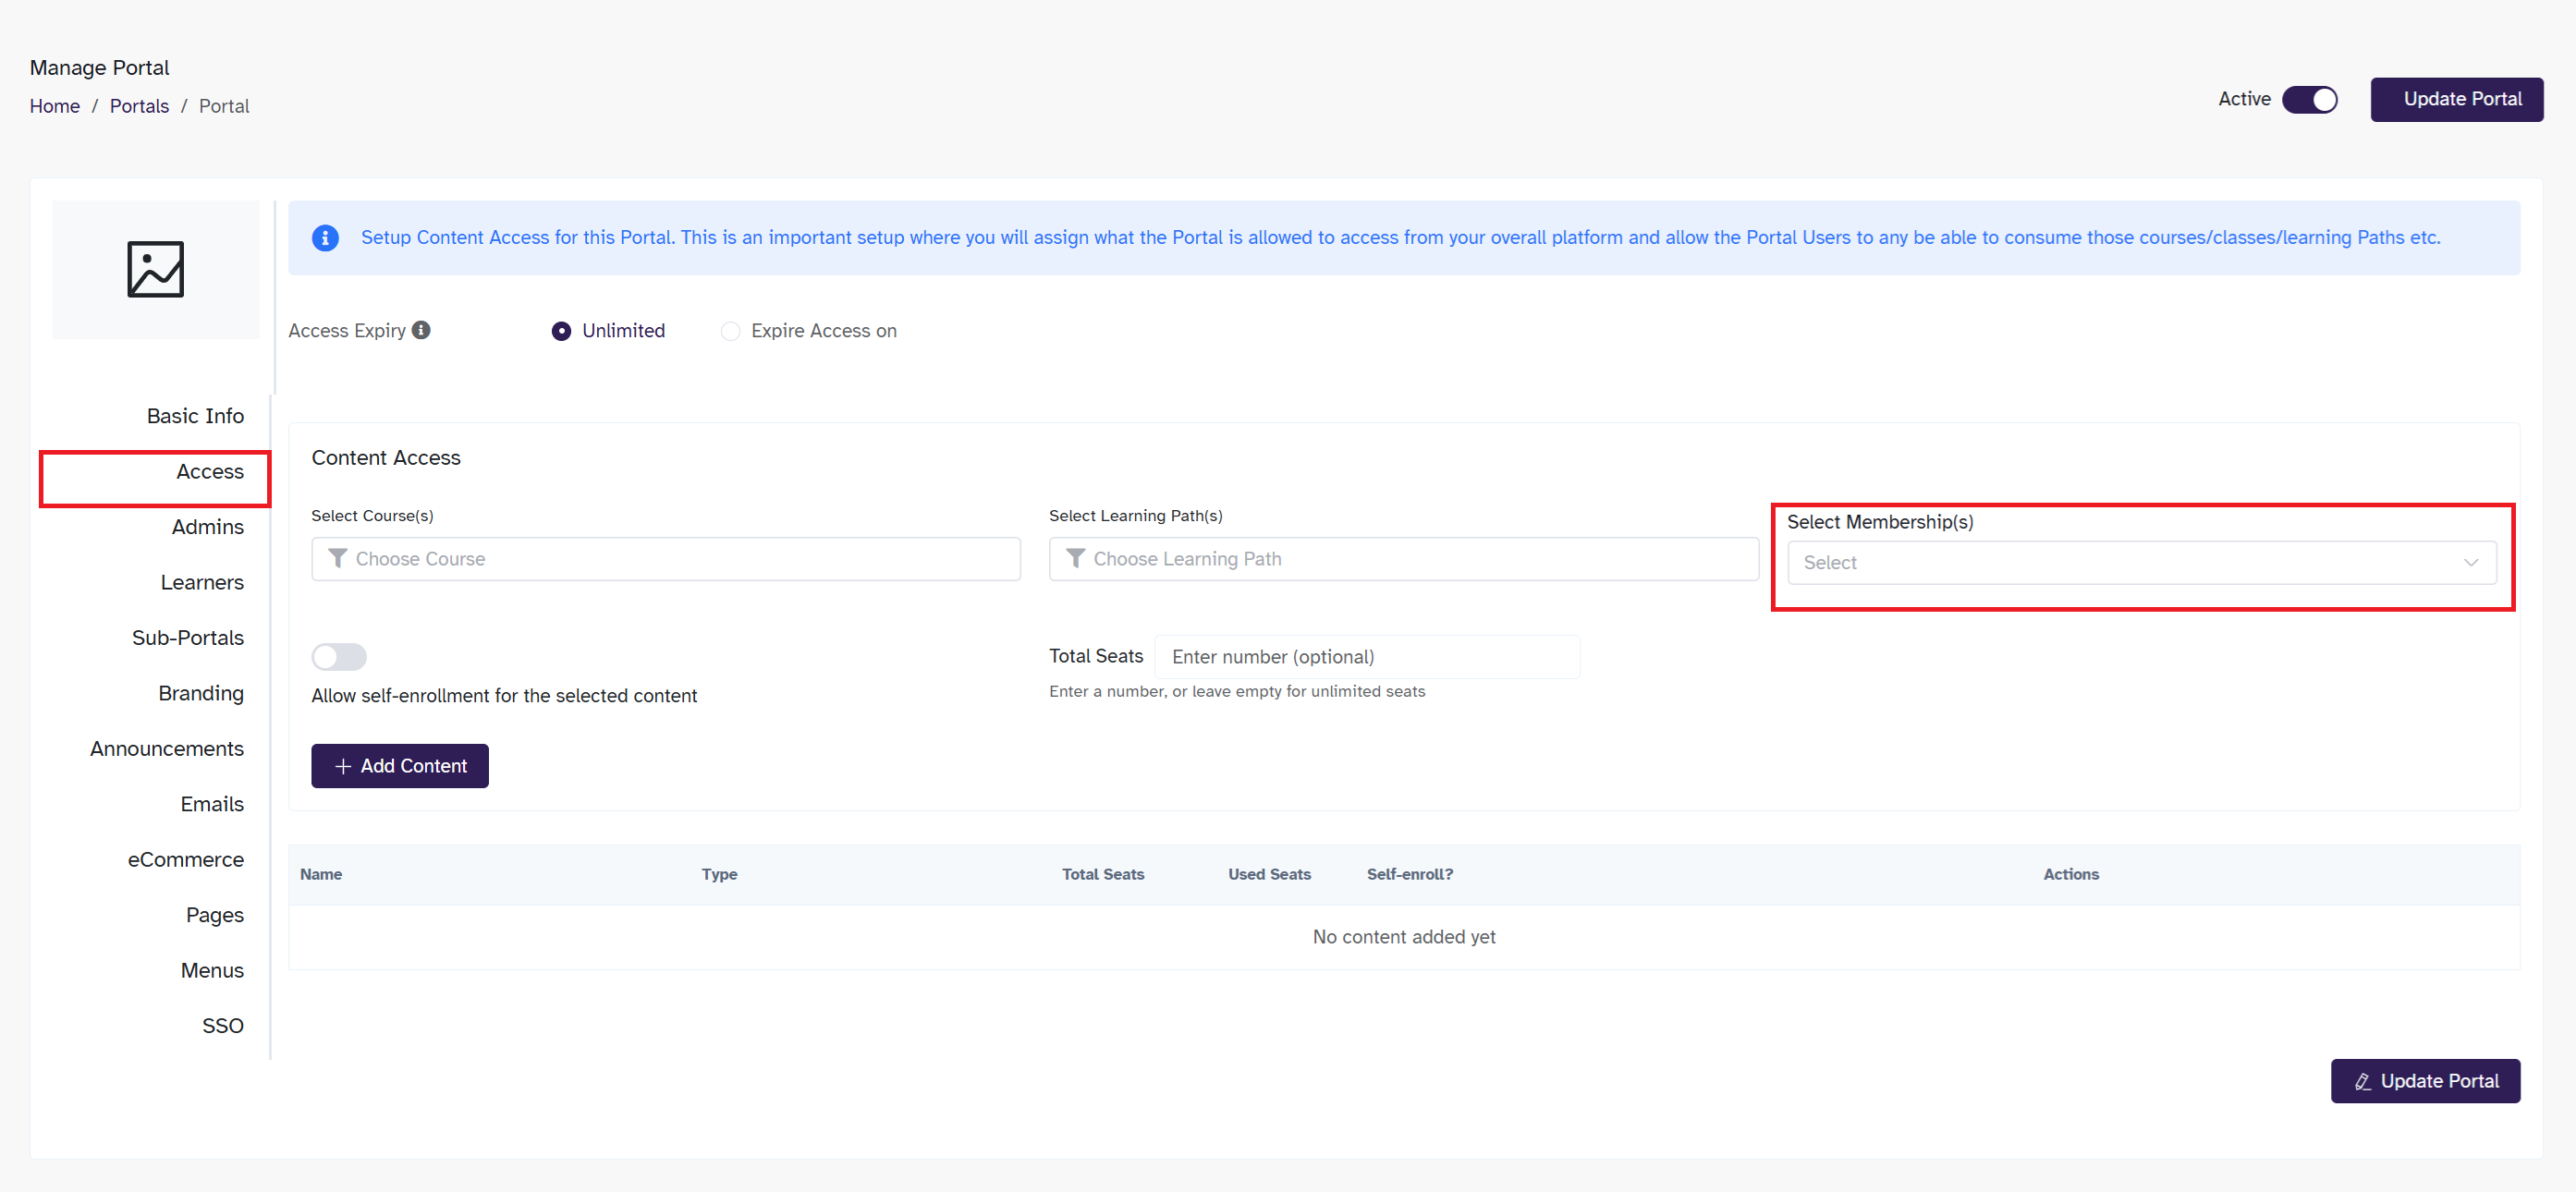
You can assign Membership to a Portal through the Portal Content Access tab. All Admins and Learners of the Portal will have access to the assigned Membership. To enroll a specific Learner in a Membership, go to the Learner tab, select the Learner, and choose 'Enroll in Content' to complete the enrollment process.
To select a Membership Plan when creating a Portals:
- From the Admin Dashboard, select the Portals tab and choose All Portals
- Click + Create Portal
- Add the Portal Name, Referral Code and add a Portal Admin
- In access tab Membership can select. Memberships are always restricted and can only be granted through admin approval.
- Click Create Portal
Get a more in-depth look about creating and managing portals here.
Learner Experience of Memberships
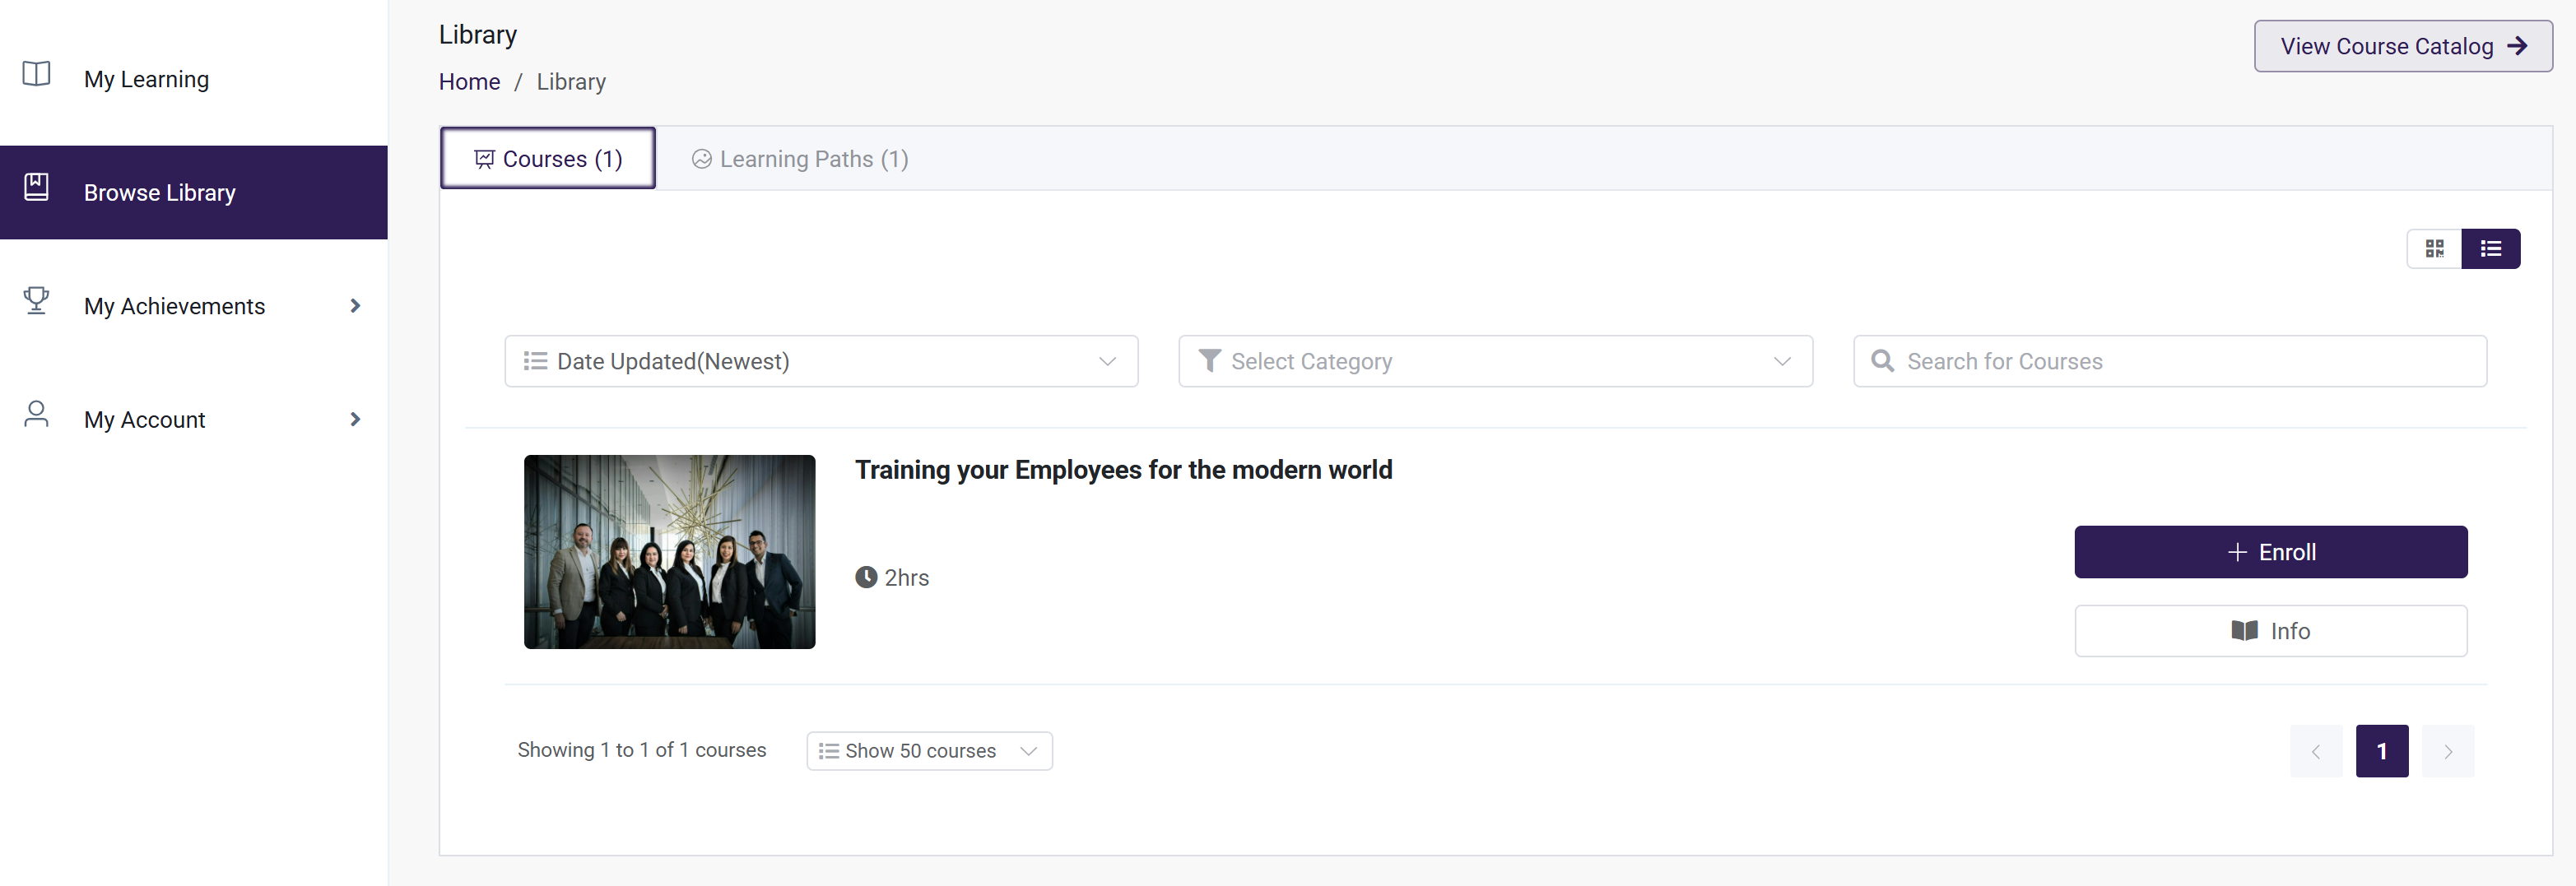
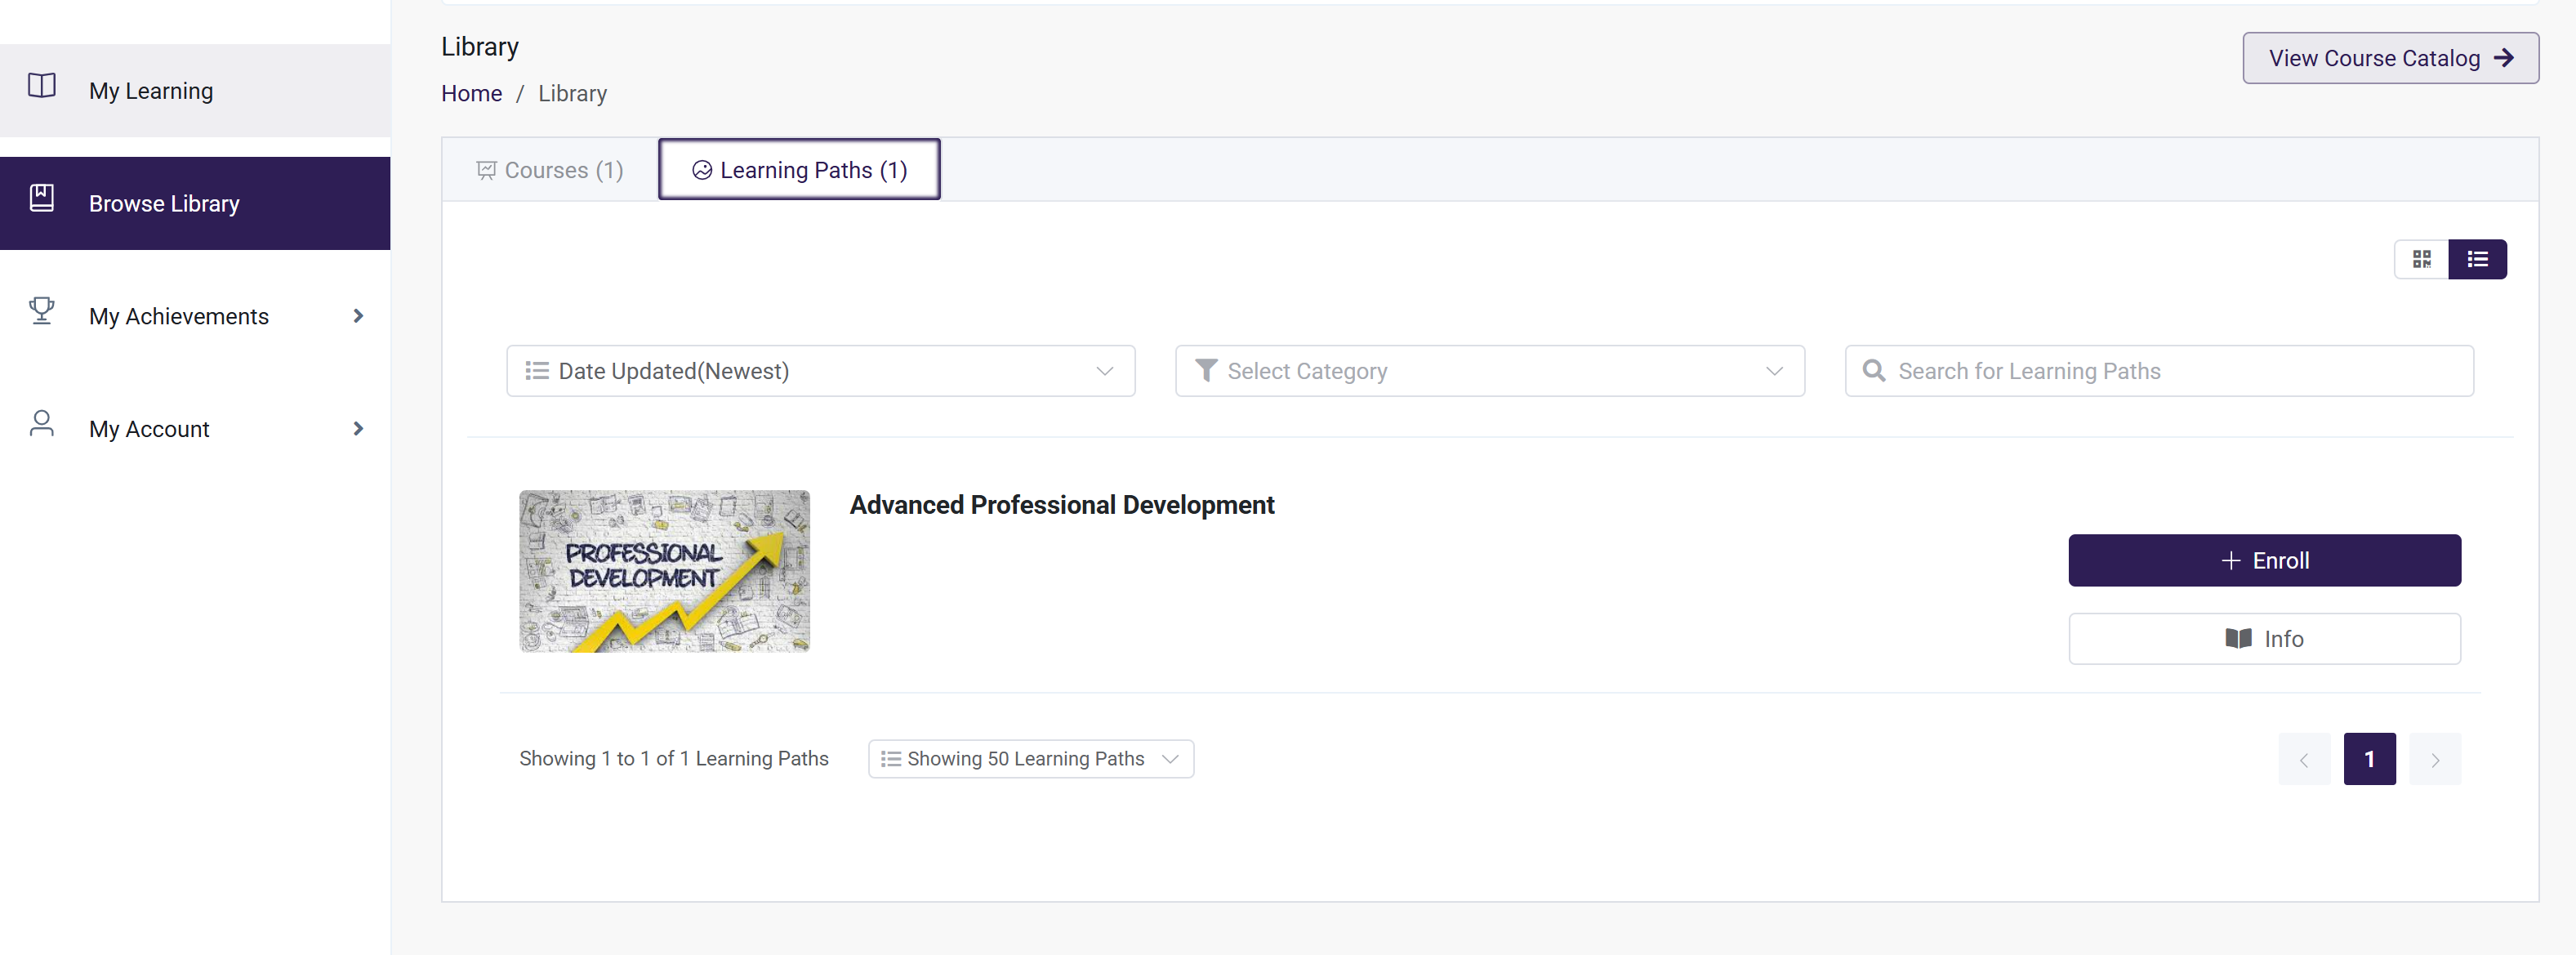
When a learner has been added to a Membership Plan, they will be able to view that content via their Browse Library. They will be able to enroll in learning paths they have access to, or enroll themselves in courses tied to the Membership.
- Select Browse Library